Autumn

Autumn Leaf Textured Patchwork Quilt Decorated Cookie Collection

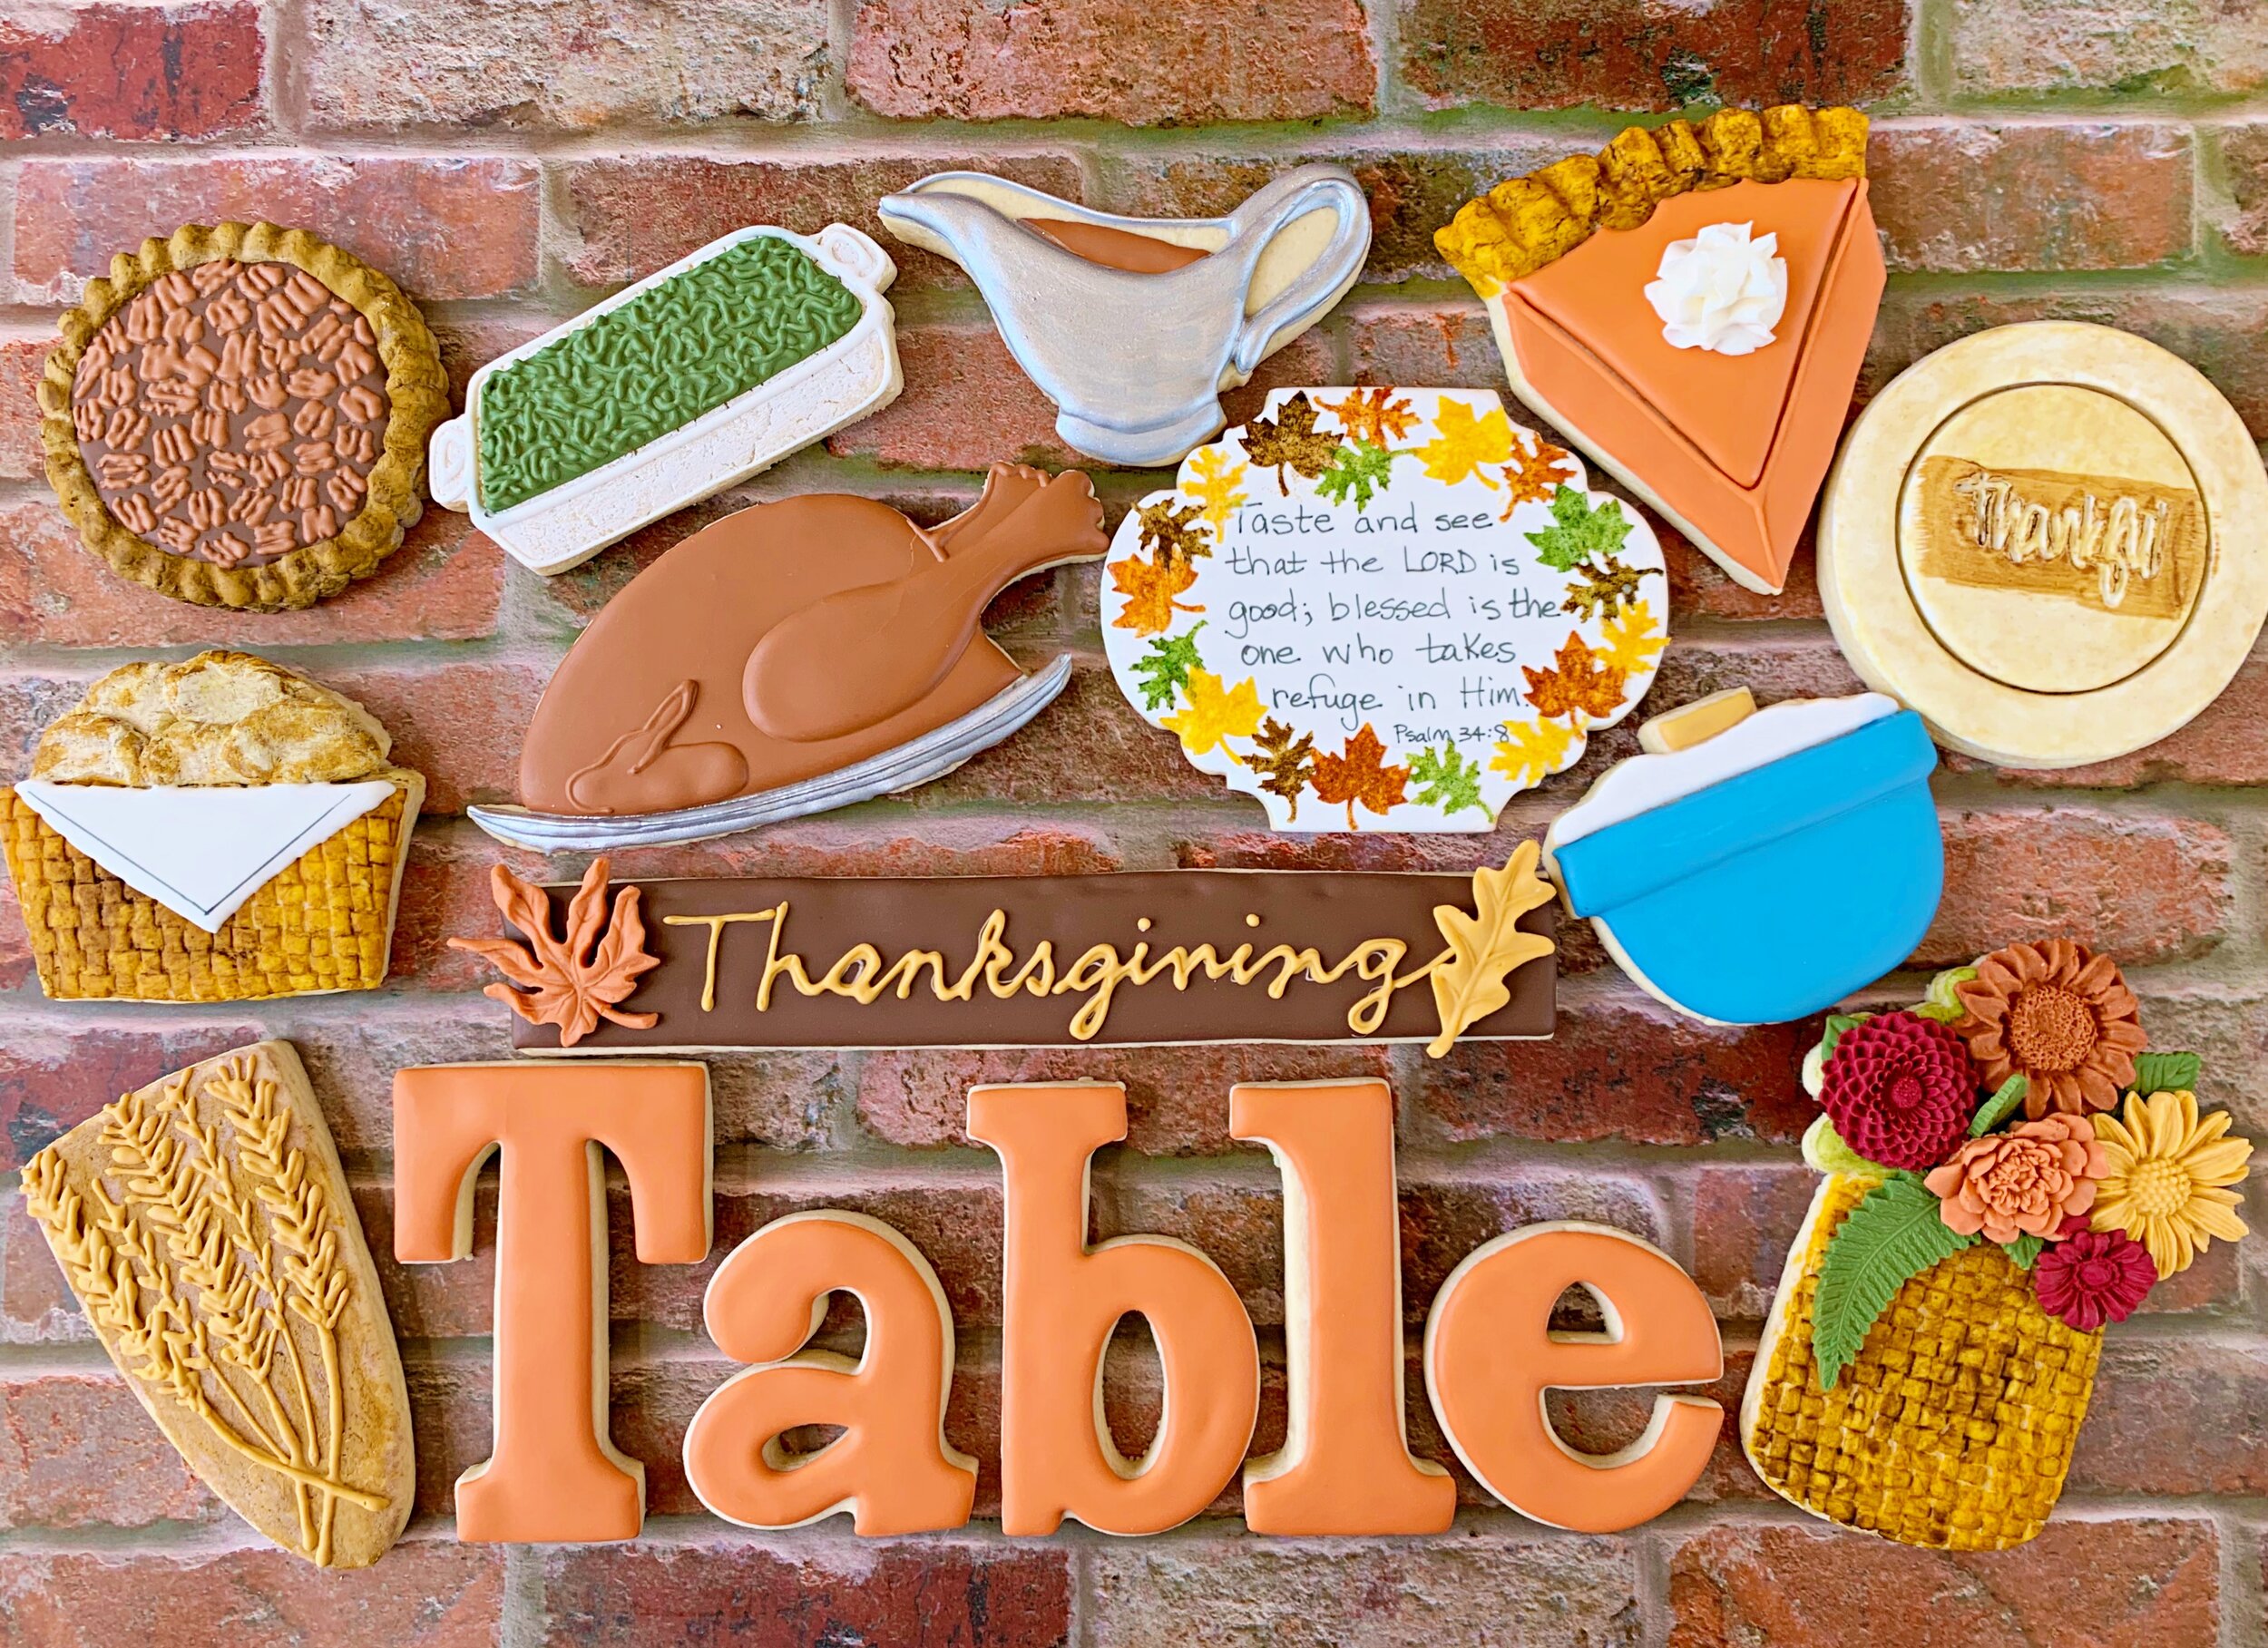
I love this little leaf tesselation cutter that Creative Cookier made for me a few years ago. Between loving quilts and loving autumn.......it makes the best of both worlds on COOKIES!

Here's a little tutorial I did using this cutter a couple of years ago:
Autumn Leaf Cookie Quilt (Tutorial)

For this particular "quilt", I utilized texture mats on cookie dough to make the tan lacy pieces and the orange burlap pieces. Then once they were baked, I covered them in dry dust. The watercolor pieces were done just like the watercolor cookies I did in this WaterColor Decorated Cookies post. 


Exposed Brick Wall Decorated Cookies (Tutorial)

While I was in L'viv Ukraine this summer, I marveled at how beautiful all the old buildings were. They have such a charm about them. Oh the stories they could tell if they could speak. Every time I saw exposed brick, I reminded myself to try making a cookie with that look once I returned home.


So here I am.....fulfilling that dream I had back in June. :)

Using a brick embosser, push it face down into the sugar cookie dough and roll over it with the rolling pin to make a deep impression in the dough. Then use a cutter-shape-of-your-choice, cut out the dough to capture that beautiful brick impression.
(see photo & video below)

Once the cookie is baked and cooled, brush over the entire surface with dry red dust.

Next brush over random areas of it with pearl dust to give it an aged sheen.

Mix up some pale gray glaze and add enough powdered sugar to make it so thick it won't stick to your fingers. Spread it over portions of the brick without uniformity.
(Take a look at exposed brick.....it is totally random how the top layer has worn and broken off.)

And there you have it.......beautiful exposed brick.
I can hardly wait to try this on my winter scenes this year.....adding wintry precipitation too. :)


Happy Harvest Decorated Cookie Collection

Autumn has to be top on my list of seasons!
And all the rustic-ness comes together in this favorite harvest cookie collection.

I hope this finds you enjoying the beauty and yumminess of the season!

Happy Harvest!!!

Pumpkin Patch Sign Decorated Cookies (Tutorial)   Pumpkin Decorated Cookie YouTube Video HERE


Pumpkin Latte Decorated Cookies (Tutorial)

Pumpkin lattes.......they are all the rage during this harvest season.
I have family members that are crazy about them. 

Here's a YouTube video to show the entire process to make pumpkin latte cookies.

Using a cookie cutter with a mug shape that includes whipped cream piled on top (see links below), it's fairly easy to decorate a cookie up for the pumpkin latte season.

The video shares all the details.....first the mug body, then the handle, then the layers of "whipped cream" with a sprinkle of actual cinnamon on top. :)
And be sure to include either a cute pumpkin cookie on the front of the mug, or cut a mini pumpkin shape into partially dried glaze and then decorate the shape with piped glaze.

Here's some potential mug cutters to use:
Hot Cocoa Mug #1 by BobbisCookiesCutters
Hot Cocoa Mug #2 by BobbisCookiesCutters
Hot Cocoa Mug #3 by BobbisCookiesCutters
Tall Mug by TheCookieBoxCCS
Short Mug by TheCookieBoxCCS


Pumpkin Patch Sign Decorated Cookies (Tutorial)

Oh how I love all the rustic styling that is so appropriate for the harvest season!
Just the thought of all the wood and "antiqued"-looking decor makes me giddy. :)

The pumpkin patch is a favorite go-to place for folks to celebrate the season.
What better location to point out on an adorable sign cookie....

I wanted to incorporate the wood grain effect into this cute sign-shaped cutter from BobbisCookiesCutters on Etsy.


As you'll see on the video, I used two different impression mats to create the wood effect.
I pushed the mat face down into the dough and rolled the rolling pin over it to make a marked impression.
For the main post I used this woodgrain mat.
For the actual rectangular sign, I used this wood panel texture mat.
You'll need to cut out the sign within each pattern, but you'll trim the second one to include only the rectangular sign, and lay it on top of the first one.
(This explanation will only make sense once you've watched the video.)

After assembling the impressed dough to make the sign, bake it and cool it.
And then it's time to brush the entire surface with dry dust. First cover it with Golden Leaf dust, and then with Caramel dust. That combination gives an authentic wood color.
(This is also shown on the video.)

You can write anything on the sign you'd like.
Adding an embellishment like the mini pumpkin cookie (or piping a small one on with glaze icing), adds some rustic charm to the sign.

 
Member Login
Welcome, (First Name)!

Forgot? Show
Log In
Enter Member Area
My Profile Not a member? Sign up. Log Out