twine

Raindrop Cookie (Tutorial)


To make raindrop cookies you'll need:

 I do not have a tear drop cutter.....
so I improvised. :)

I cut an oval shaped cookie
and then took a mini tear drop cutter
and cut out a tear out of the top of the oval
added a full teardrop in the space
and pressed it together to look
like a raindrop.
The easy way would be to use the teardrop cutter. haha

Using a straw, make a hole in the top of the dough
if you'd like to hang your raindrop cookies.

Outline & Flood the baked cookies with blue glaze.
Be sure to outline the hole if you make one.
Immediately add a white highlight on either
side of the teardrop. (wet on wet)

Allow cookies to dry for 24 hours.

Add loops of Twine to hang them. 


Other April Showers Posts:

Balloon Cookies (Tutorial)

When I set out to make cookies for the CookieCrazie 4th Birthday Party
I wanted to make some basic birthday shapes
to share here.

Every party needs balloons, right?!

What if you don't have a balloon cookie cutter?
No problem...


You can use a hot air balloon, an upside down Christmas ornament,
an Easter egg, or even a plain 'ole circle.

You'll need to squish the last three to make them look more balloon-shaped.

For these cookies you'll need 
Outline cookies with #2 round and let dry for 10-20 minutes.

Fill in each balloon with #4 round 
and add white reflection lines while still wet, if desired.

You can add various accents
like opening rims and strings if, if you like.

And you can have even more fun by adding
some real twine to the balloons for
added cute factor. ;) 
I love my twine from The Twinery


And to think that none of these balloons
were cut with a balloon cookie cutter.
Love it!

String-A-Long Valentine Cookies Using Nonpareils (Tutorial)

One more tutorial in time for Valentines cookie baking......


 You'll need:
  • cookies in varying shapes with a string hold cut out (I used a wide straw)
  • icing in your choice of colors
  • nonpareils (I'm using Valentine-sy colors of red, pink, & white)
  • a wide surface bowl, dish, or pan with sides (to keep the lovely nonpareils from escaping all over your kitchen...hee hee)
  • twine, ribbon or string to match our icing colors


Outline your cookies with a #2 round tip including an extra line close to the outline to make your outside border be thicker to hold nonpareils. Be sure to outline the string hole if you'd like.

Fill in between the outline and the extra line to make your thick border. While it is wet, place it in your container with sides and sprinkle the nonpareils over all the icing areas.

Shake off the excess and let dry for 20-30 mnutes.

Flood the rest of the cookie with a #4 round tip and dry 30 minutes or more.
(Dry it more if it is red icing.....to prevent bleeding.)

Once the base is dry, add your text with a #1 round tip and dry overnight.

Tie cute twine or ribbon through your cookies and have fun displaying them anyway you like.


Enjoy your holiday baking and decorating......make lots of memories.

So many possibilities....so little time. :)

Sweet Valentine Text Cookies (Tutorial)

More cookies on a string......but THIS time......
you get to personalize them for that special someone. :)

A few weeks ago, I saw this adorable poster on Pinterest.
I loved the sayings so much.....and knew I just HAD to put a few on some Valentine cookies. heehee


I picked out a bunch of varying shapes to go together for these text cookies.
It was fun to even change up some shapes by putting the string hole in a different spot.

Ok....so you know the drill for cookies with strings after my last post of the
hanging stitched valentine hearts, right?
Cut out your shapes with a small hole for the string.
I used a wide straw.....but any small cylinder will work.

You can pick any colors you'd like.
I chose more electric colors for this one......rather than the traditional red & pink.

Outline each cookie with a #2 round....and "inline" the string hole too.


Let them dry for 10-15 minutes......then flood the insides with a #4 round.


You can add text right away (with a very small tip like #1 or #0) for wet on wet. 
Or you can let them dry for 20-30 minutes and then add your text.
OR......the easiest way is to let them dry overnight and then add your text with markers.
(This might be a fun project to do with the kids.....
have them write their own texts on cookies.)

I use FooDoodlers.....but any food coloring markers will do.

Once the cookies are dry....add your twine or string.
I used twine from The Twinery.
What fun colors!

I had a few stray cookies that I forgot to put holes in.....
so they are just hanging out with the rest. lol


So many possibilities for these cookies. Enjoy!

Hanging Stitched Valentine Heart Cookies (Tutorial)

Only 9 more days until Valentines Day.....
I gotta get movin' on all the things I want to show you before the big day.

I've got several Valentine cookie tutorials I want to share with you in the next week....so let's get started!


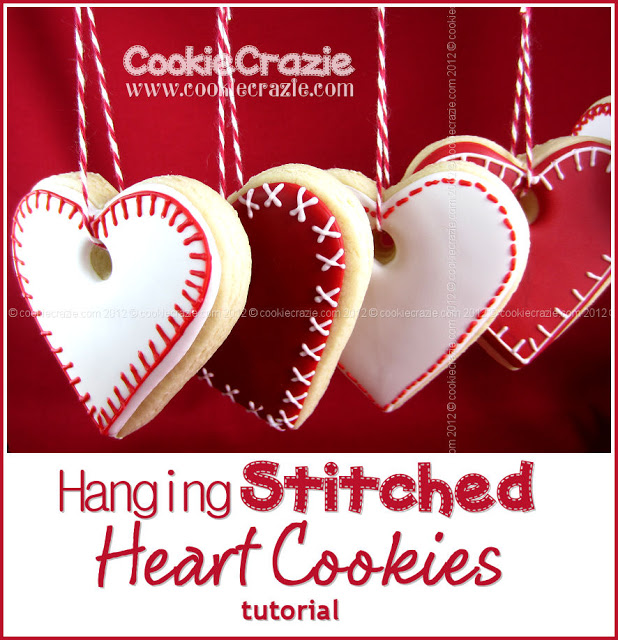
I know, I know......you are shocked that I'd do STITCHED hearts AGAIN. I hope you don't tire of them.....because I just love stitched things. :) 

These are fairly similar to the Christmas ornaments I did in December.
They are nice and simple......and yet really cute.
Simple and cute.....great combo. ;)

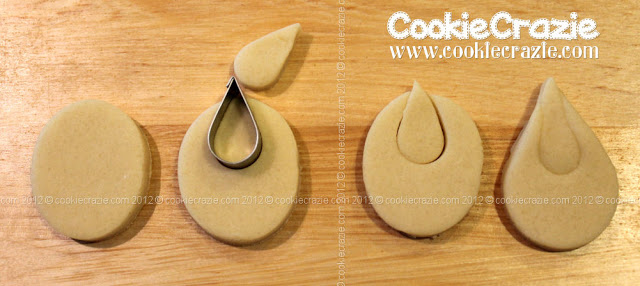
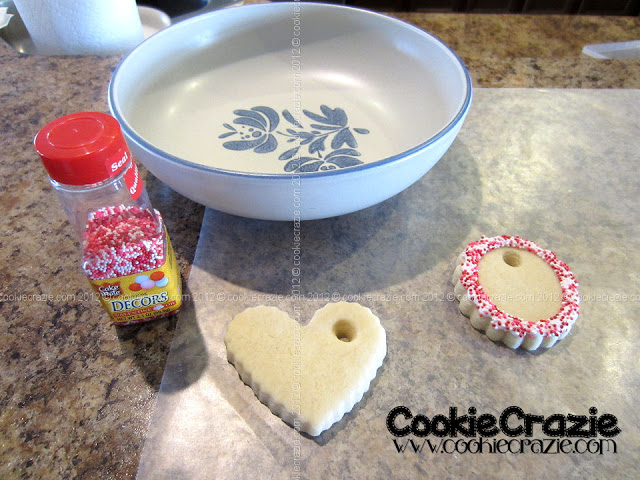
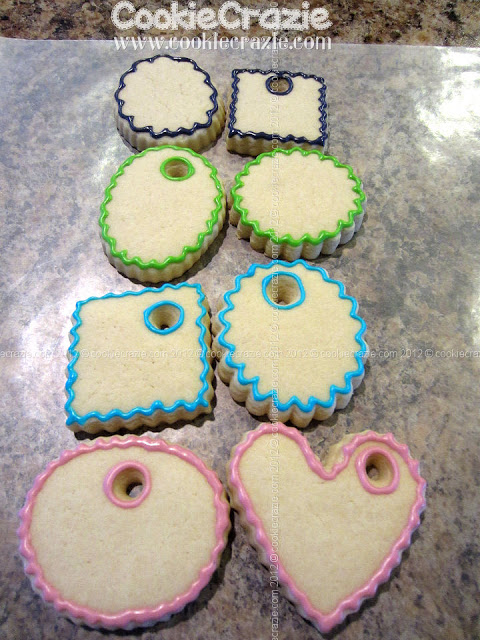
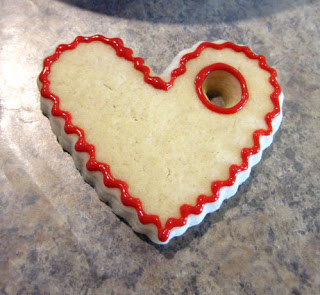
Bake up some heart cookies and use a straw or other small cylinder to punch a hole through them.

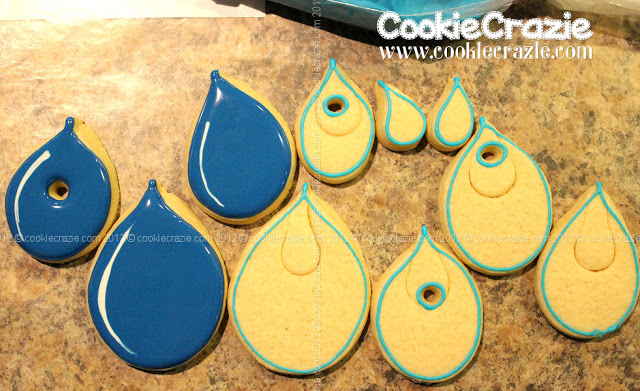
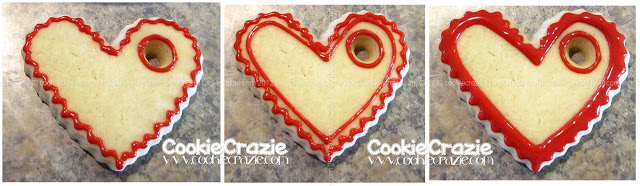
Outline your hearts.
(You're gonna see these next photos several times in the near future.)
I know some people are very visual.....
so I wanted to make sure that you saw the outlined hearts that you'll let dry for 10-15 minutes.


Be sure you outline (or is that "inline"!) the hole too. I have a pic from a different project to show you the outline around the hole.

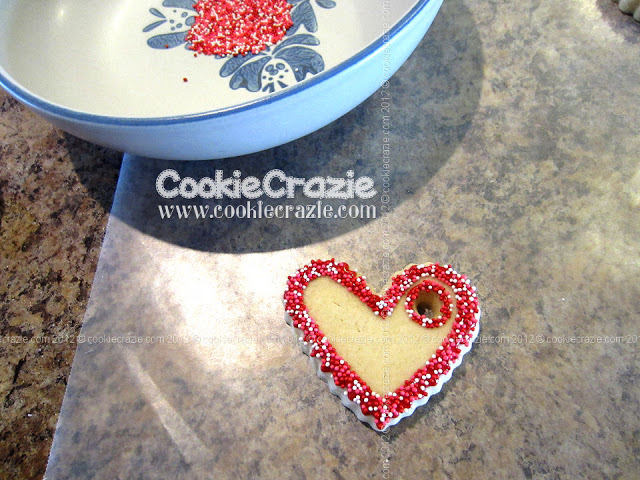
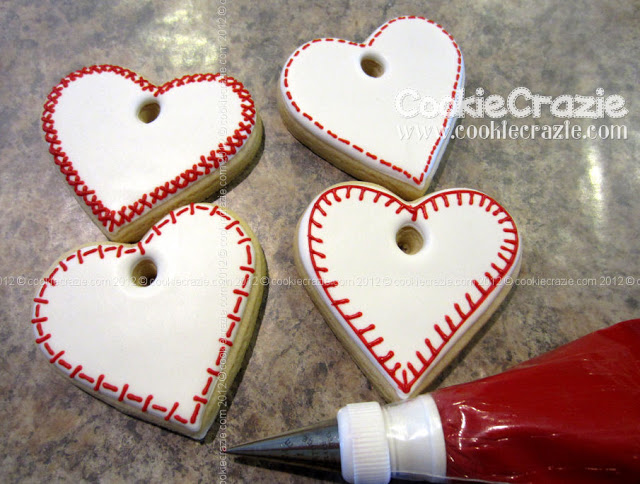
Once the outlines have dried....you flood the insides of the hearts.


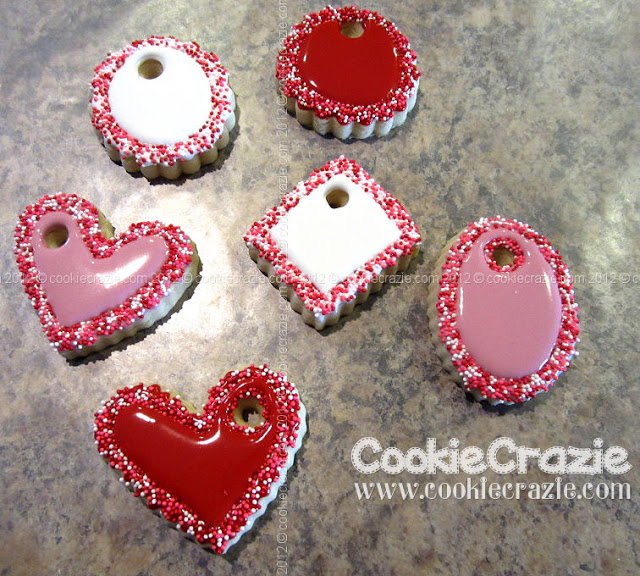
Now you have to let the flooded hearts dry overnight.
I changed my mind in the middle of doing these cookies.....
so I thought I'd show you two ways you can add stitches.

You can draw the stitches on the hearts with a food color marker. 
I use FooDoodlers.

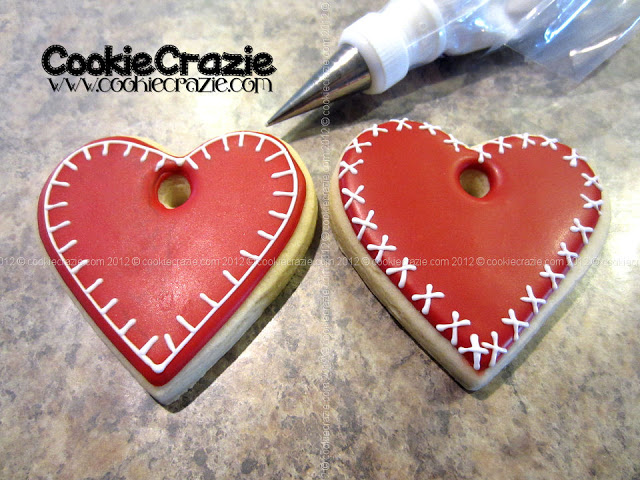
OR.....you can pipe on the stitches on with a #1 round tip.
I used a PME tip......works really well for this type of detail work.
(Notice how much more vivid the red shows up when you pipe it on compared to the marker above.)


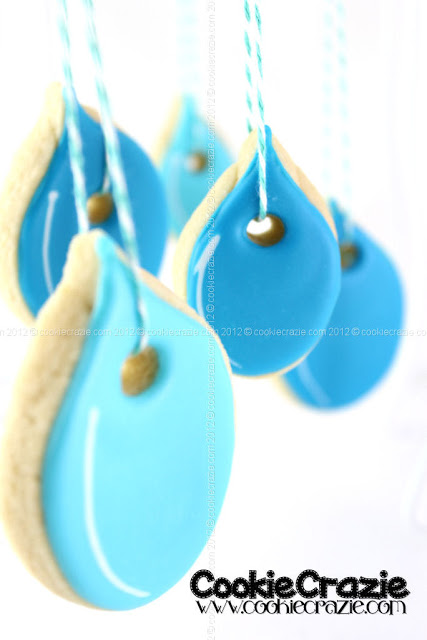
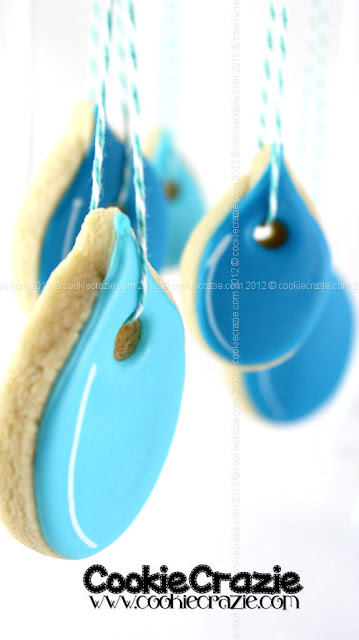
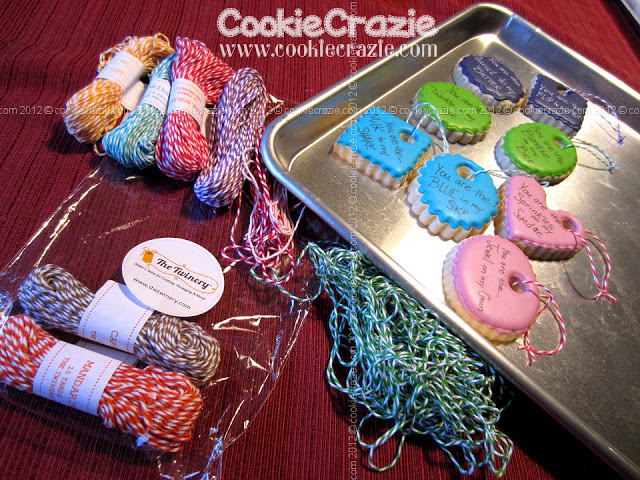
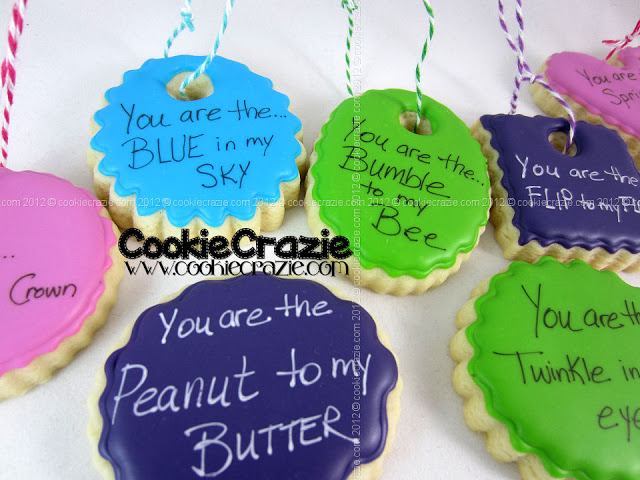
After a few hours (or overnight) of drying......you can tie some cute twine or string on each heart.
I used the wonderful twine I got from The Twinery. Love their selection!

And then the fun begins........hang them on a string and bring smiles all around. :)


Don't go too far away......I'm still editing all the photos I took of last week's projects.
Lots more coming your way soon.
Member Login
Welcome, (First Name)!

Forgot? Show
Log In
Enter Member Area
My Profile Not a member? Sign up. Log Out