Nonpareils

String-A-Long Valentine Cookies Using Nonpareils (Tutorial)

One more tutorial in time for Valentines cookie baking......
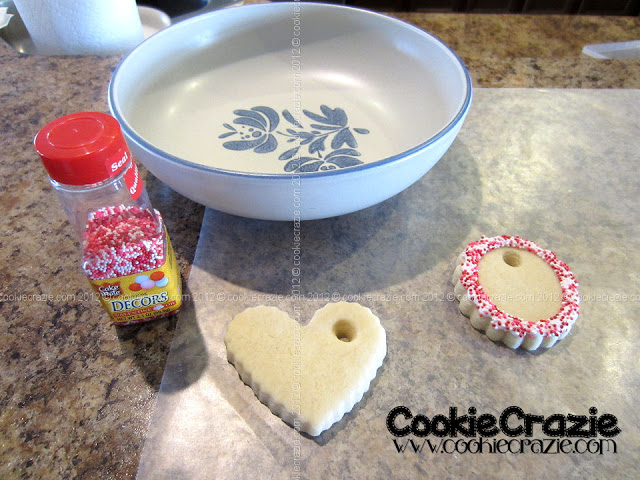


 You'll need:
  • cookies in varying shapes with a string hold cut out (I used a wide straw)
  • icing in your choice of colors
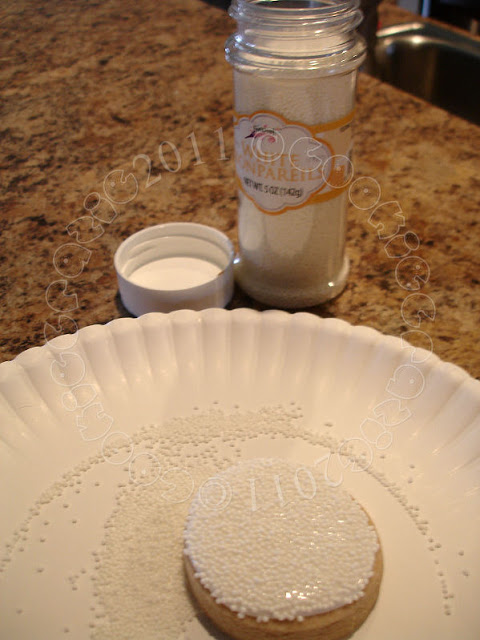
  • nonpareils (I'm using Valentine-sy colors of red, pink, & white)
  • a wide surface bowl, dish, or pan with sides (to keep the lovely nonpareils from escaping all over your kitchen...hee hee)
  • twine, ribbon or string to match our icing colors


Outline your cookies with a #2 round tip including an extra line close to the outline to make your outside border be thicker to hold nonpareils. Be sure to outline the string hole if you'd like.

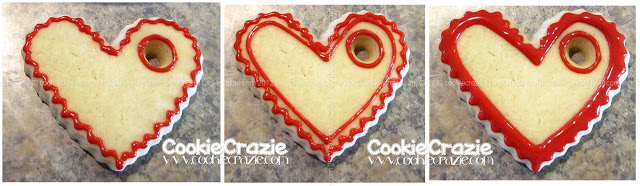
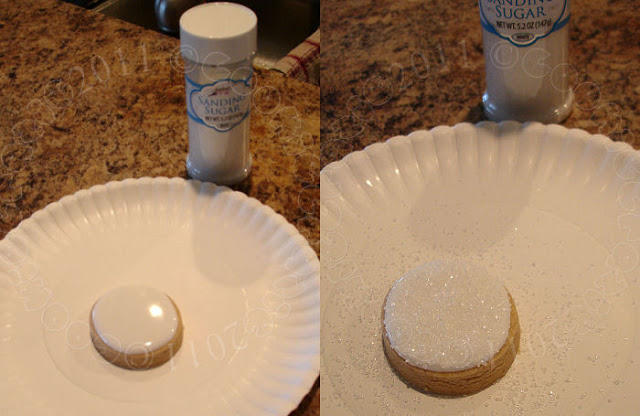
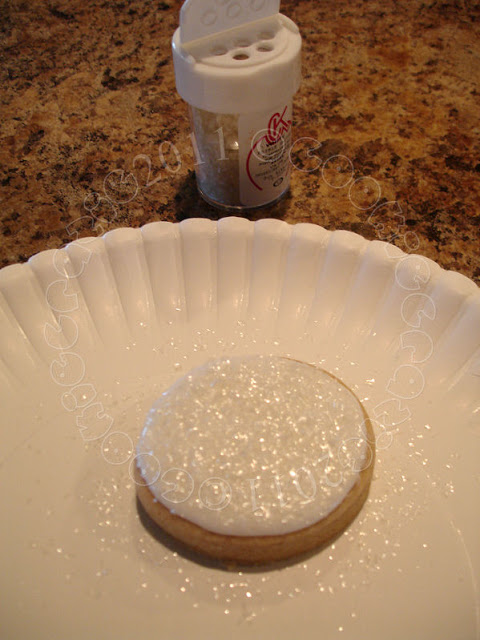
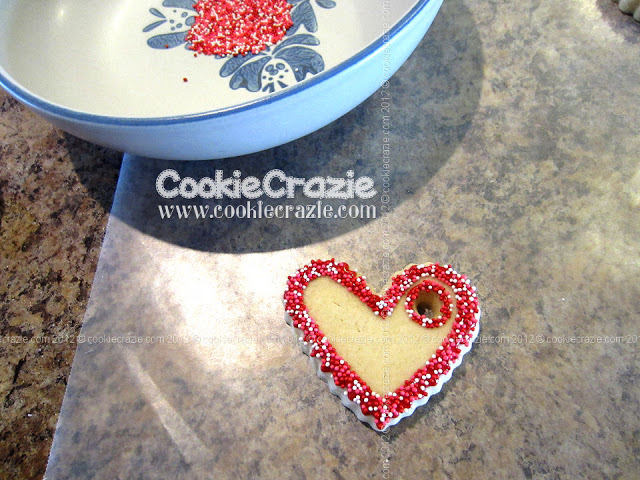
Fill in between the outline and the extra line to make your thick border. While it is wet, place it in your container with sides and sprinkle the nonpareils over all the icing areas.

Shake off the excess and let dry for 20-30 mnutes.

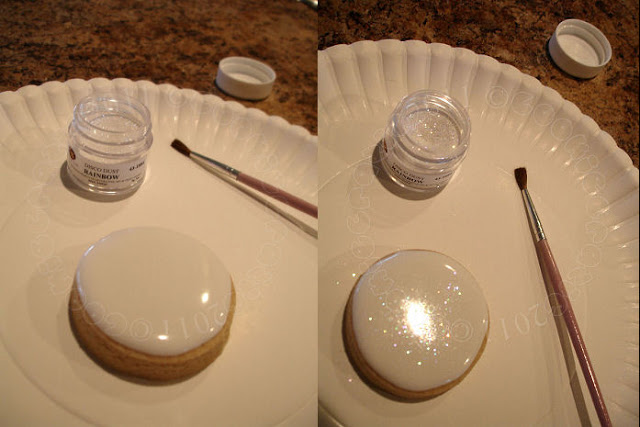
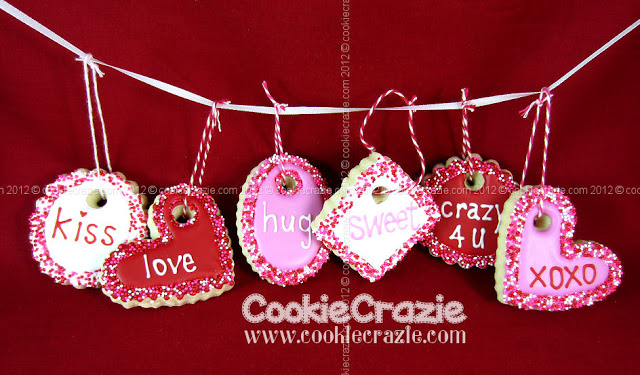
Flood the rest of the cookie with a #4 round tip and dry 30 minutes or more.
(Dry it more if it is red icing.....to prevent bleeding.)

Once the base is dry, add your text with a #1 round tip and dry overnight.

Tie cute twine or ribbon through your cookies and have fun displaying them anyway you like.


Enjoy your holiday baking and decorating......make lots of memories.

So many possibilities....so little time. :)

Disco Dust, Sanding Sugar, Edible Glitter, Nonpareils.....oh my!!

A few weeks ago, someone asked about all the different "pretties" that can be added to the top of a cookie. While I was making snowball cookies in January, I decided to experiment. Plus, I wanted to put all the effects together so you could compare them for yourself.

Sanding sugar.......it's seen everywhere in the cookie world these days. I think they make it in just about every color. It brings a nice shiny crystal-y look to the cookie. Sprinkle it on.....let it sit for a few minutes and then pour off the excess.


Nonpareils.....most everyone has seen them. Actually.....most people HAVE them in their kitchen. :) We all grew up with them.....using them on the Christmas cookies, ice cream, etc. They come in every color and color combo imaginable! They are great for certain effects, but I have two problems with them. First, once you open the cap.....the likelihood of having them EVERYWHERE is great (lol). Also, I don't like biting into a whole bunch of them on a cookie. But sometimes their effect is just perfect for whatever cookie you are doing. Just sprinkle them on.....carefully! ;)


Edible glitter gives a lot of dimension to the cookie because it is kind of like flakes. I found that it was the best match for making a "snowball effect". I've also used it for making snow cone cookies in the summer time. You can find edible glitter in many colors too. Just sprinkle it on.


Disco Dust provides the ultimate in a shiny, glitter-y effect. However, it is considered "non-toxic" (like crayons) and thus not intended as something edible. I've been told it is ground plastic, although I haven't confirmed that. If you're wanting to add a beautiful effect to a display cookie that will not be eaten.....disco dust would be a perfect choice.
However, I would not recommend adding it to cookies that will be consumed.


And here's all the "snowballs" and their "pretties" together. 


I've included a link to each decor item to give you an idea of price and show you the place I go to purchase them.

_________________________________________________

So RED is the color for today's valentine cookies. Fun!


Happy Sunday to you. :)
Member Login
Welcome, (First Name)!

Forgot? Show
Log In
Enter Member Area
My Profile Not a member? Sign up. Log Out