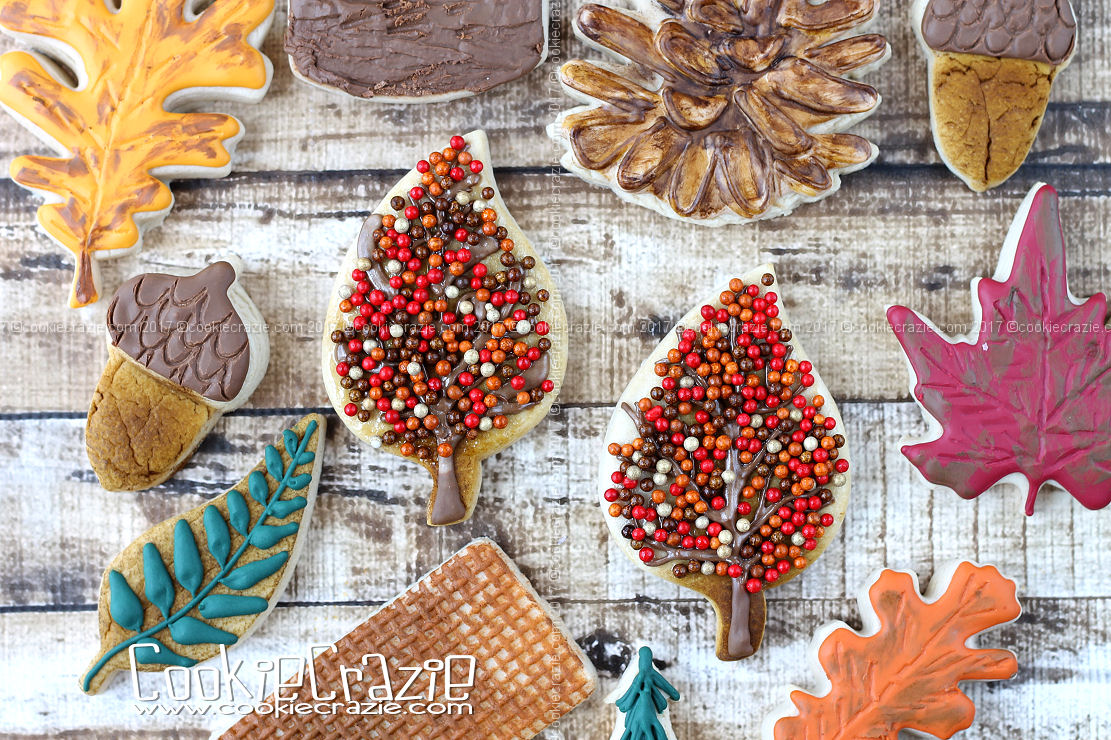
Harvest time brings the opportunity for jars of yummy-ness......honey, jelly, jam, and more!
And the cute containers make the delicious treat even more special.
Start with a container or jar-shaped cookie. There's tons of choices of mason jar cutters and the like out there. The site where I purchased the honey jar is not available right now to share a link. :(
You'll also need a mini plaque cutter to create a cute tag cookie that you can tie onto your jar. Be sure to cut out a hole in the top using a straw.
(see photos and video below)
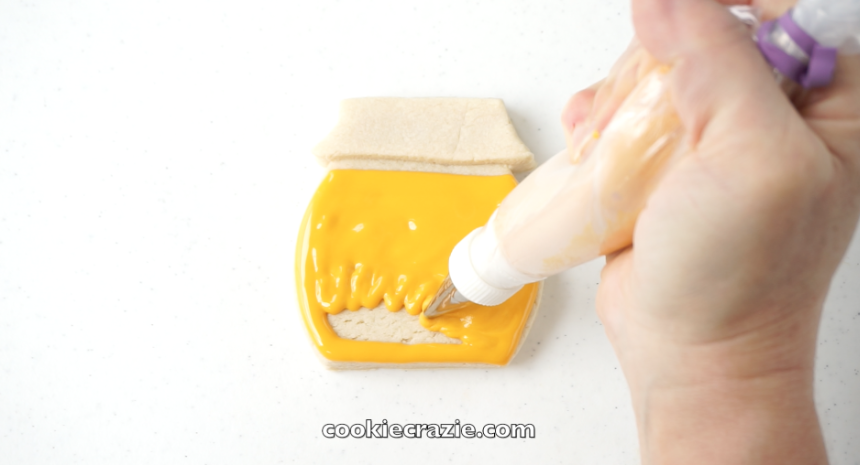
Outline and flood the bottom portion of the jar with glaze.
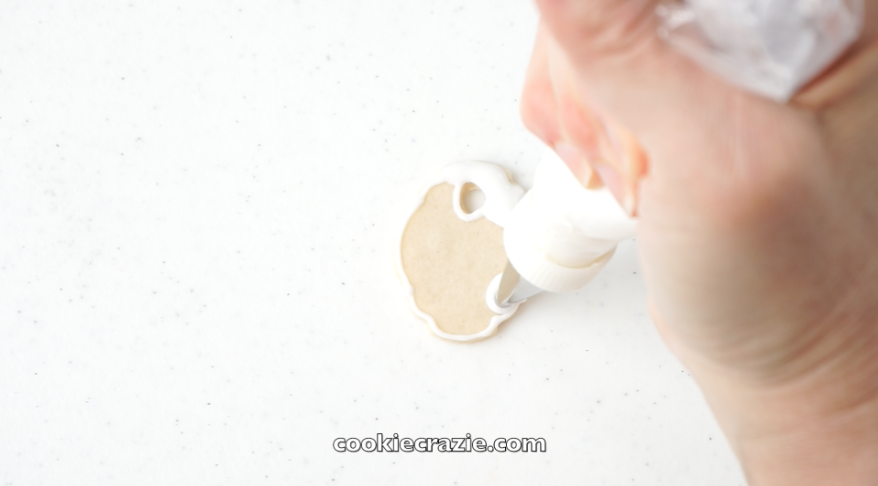
Outline and flood the tag with white glaze.
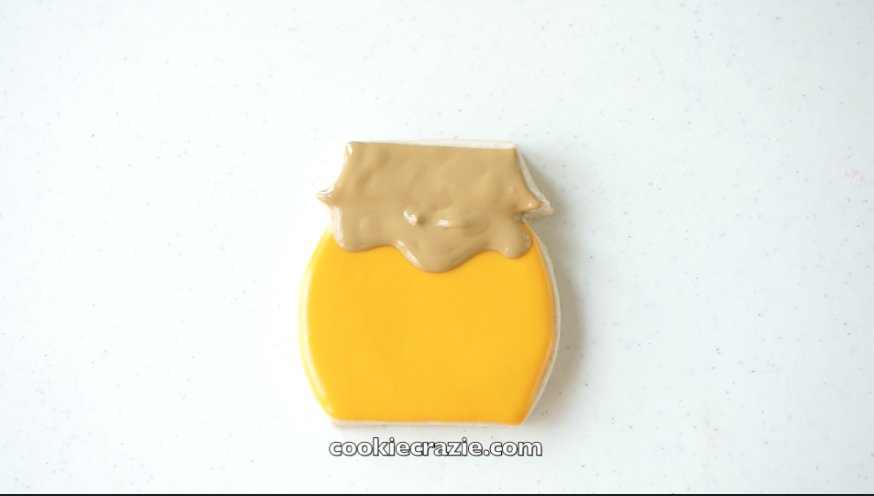
After allowing the initial glaze to dry for at least 30 minutes, add an outline and flood of tan glaze to the lid and top rim of the jar to resemble a burlap cover.
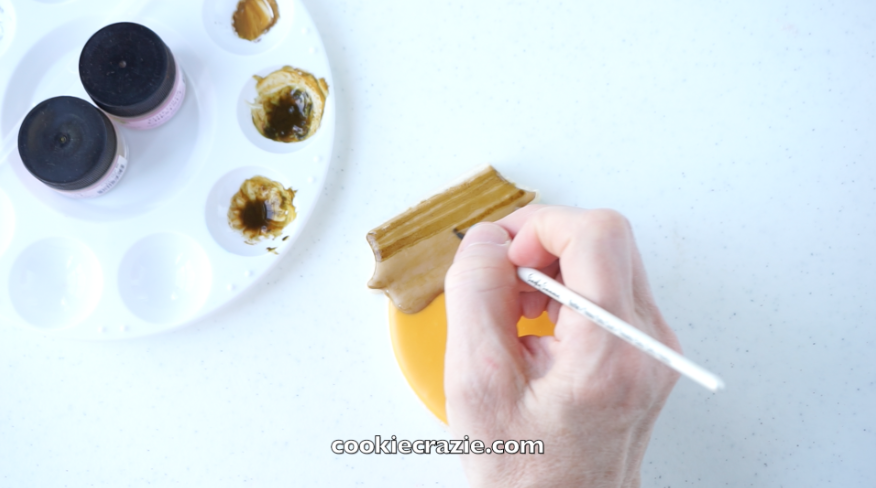
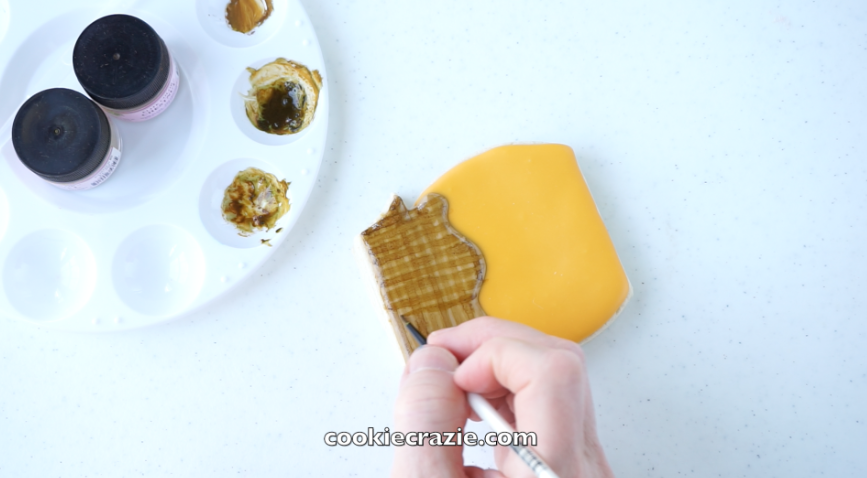
Once the tan glaze has dried overnight, use a mixture of caramel dust and alcohol (or clear flavoring like almond) to paint on lines to the "burlap" cover of the jar.
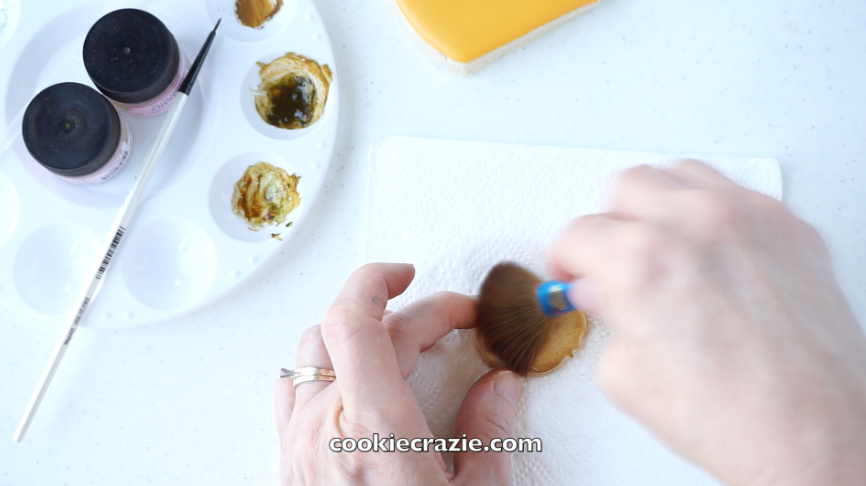
Brush the tag with caramel dust to give it a rustic- antiqued look.
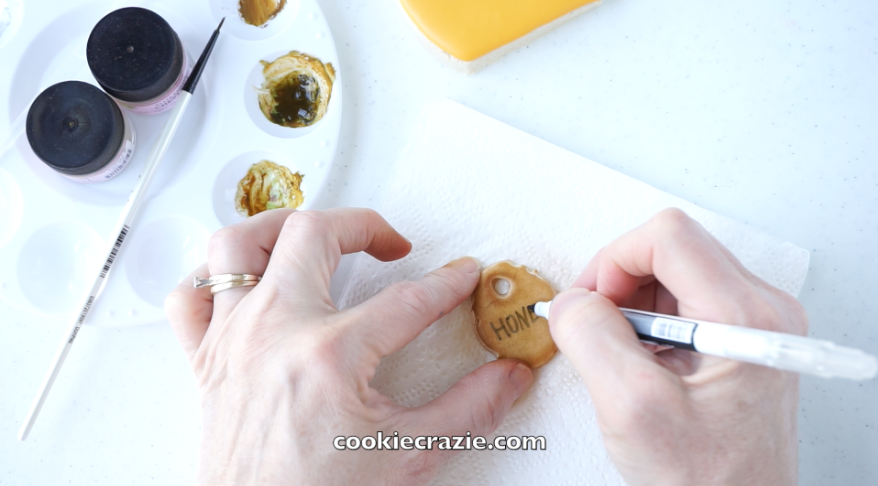
Using a black food color marker, add words, dots, lines, and/or embellishments to the tag.
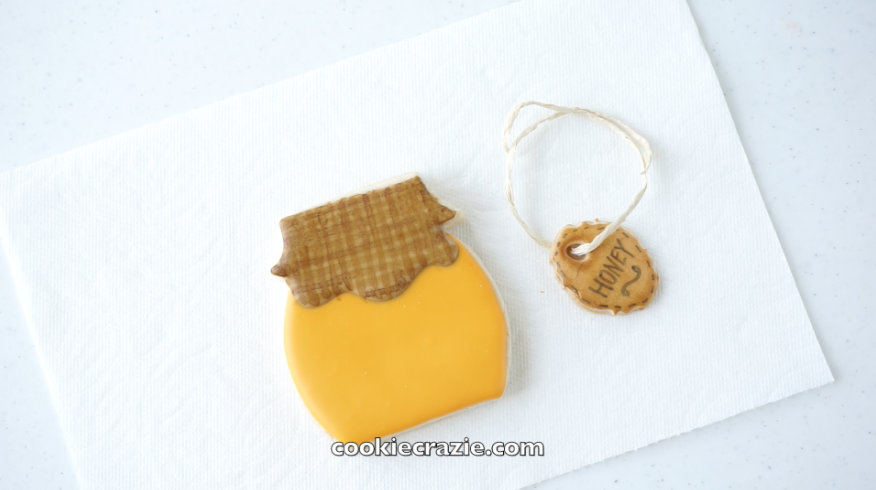
Thread food-safe twine or string through the hole of the tag and tie it to the jar.
Harvest time cuteness....coming right up!