Tutorial

Patriotic Medallion Bunting Decorated Cookies (Tutorial)

I found some really cute patriotic medallions in my search for Independence Day decorations.
It immediately got me to wondering if I could replicate them in cookie form. (That seems to be very common in my CRAZIE brain!)
 

Simple simple simple.......
 

Outline and flood a round cookie with red, white and blue glaze. These can all be done at the same time. You'll be creating a bull's eye effect by piping the outer edge with blue glaze, the middle with white glaze, and the inside circle with red glaze. (see photo below)

Once the flooded cookie has dried for about 1 - 1-1/2 hours, use a cake tester to make diameter lines all the way around it.

In the cookies shown above, I ended up marking them with additional diameter lines to create a more complete look.


Bumper Car Decorated Sugar Cookies (Tutorial)

In keeping with the summer amusement park theme, I just HAD to make a bumper car. 
I'd say this is probably one of my favorite rides as I was growing up.
The wait line was always long and the actual time in the cars was always too short. ;)
Great memories.....

Cut off the bottom 1/5 of a long fat oval cookie to make a nice flat surface for the bottom of the bumper car. I used these oval cutters. 
Insert a sturdy straw into the back top of the car to leave a hole that you can later fill with a decorative straw. (see photos below)

Once the cookie is baked and cooled, outline and flood the bottom "bumper" with grey glaze as shown below. Next outline and flood the actual car in whatever color glaze you'd like.
After the car has dried for approximately 30 minutes, add details like a headlight, steering wheel, and seat back.

Dry overnight.

If desired, make a mixture of silver dust & alcohol (or clear extract, i.e. almond) and paint the grey portions of the car to give a shiny finish. (I'm sorry I forgot to get a photo of this step.)

Poke a decorative straw into the created hole at the back of the car and bend the top of the straw, as seen below.

Let the bumpy ride begin!


Cotton Candy Decorated Cookies (Tutorial)

Cotton Candy......it's one of those things that doesn't feel real. You can see it and you can taste it, but it is like eating air....sweet air, that is. 😊

And yet, the memories it brings back are delightful.

I handcut these cookies, but I found a similar shaped cutter to recreate the cookies in this post.

Outline and flood the "cone" of the cookie with white glaze.
Outline and flood the remainder of the cookies with pink glaze. (see photo below)

Allow the icing to dry for about 15-30 minutes and then add detail lines. (see photo below)

After the cookie has dried overnight, combine super pearl dust with some alcohol (or clear extract; i.e. almond) and paint the pink part of the cookie to give it a "feather-y" look.

Now that is cotton candy with some substance. haha


Stenciling with Glaze

Stenciling with glaze has always been thought of as impossible. The composition of glaze and it's quality to flow into a level surface has disqualified it from being a contributor to stenciling on cookies. Or so I thought......

Recently I've been trying to use some of my stencils on cookies without using an airbrush. I tried many techniques and none of them were working consistently. I decided to try glaze once again, but thickened it more than I had in the past to see what I could do.

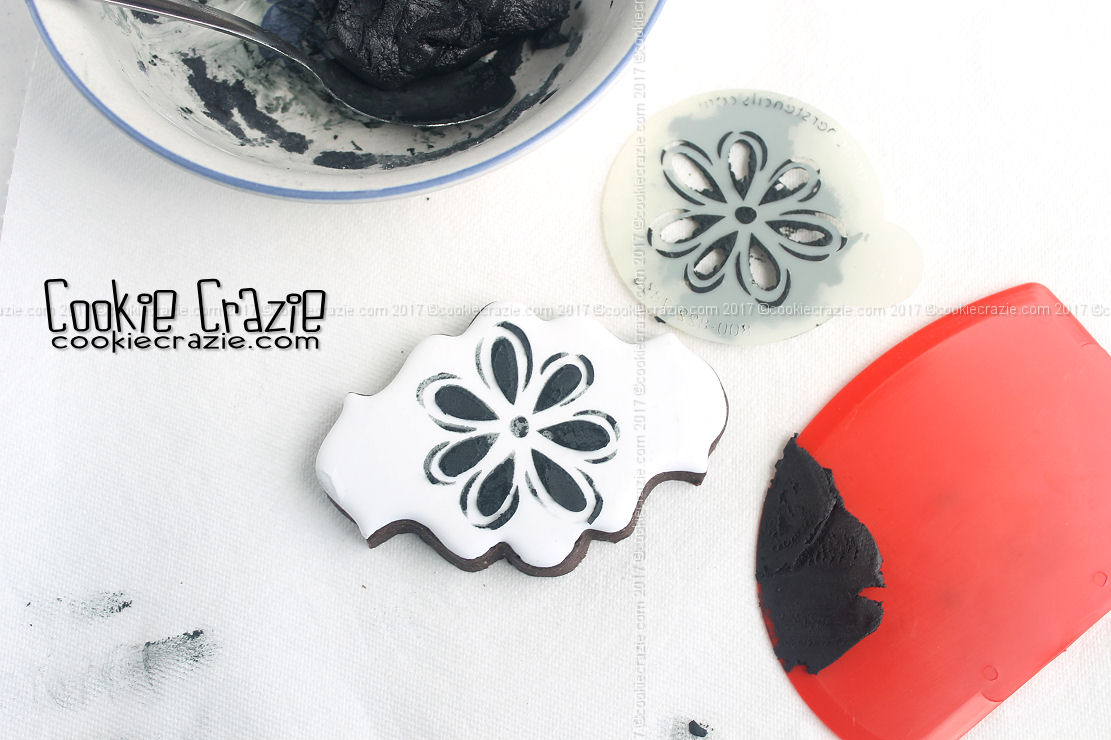
And here are my results. :) It surprised me. It's totally possible to stencil with glaze!

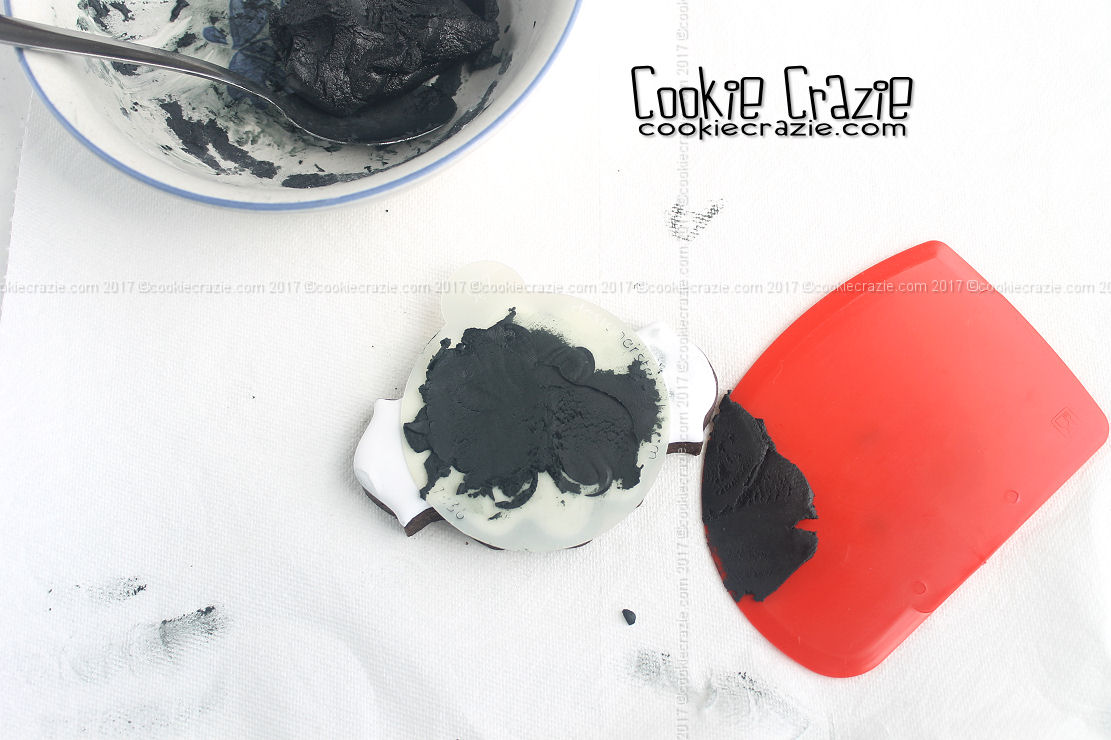
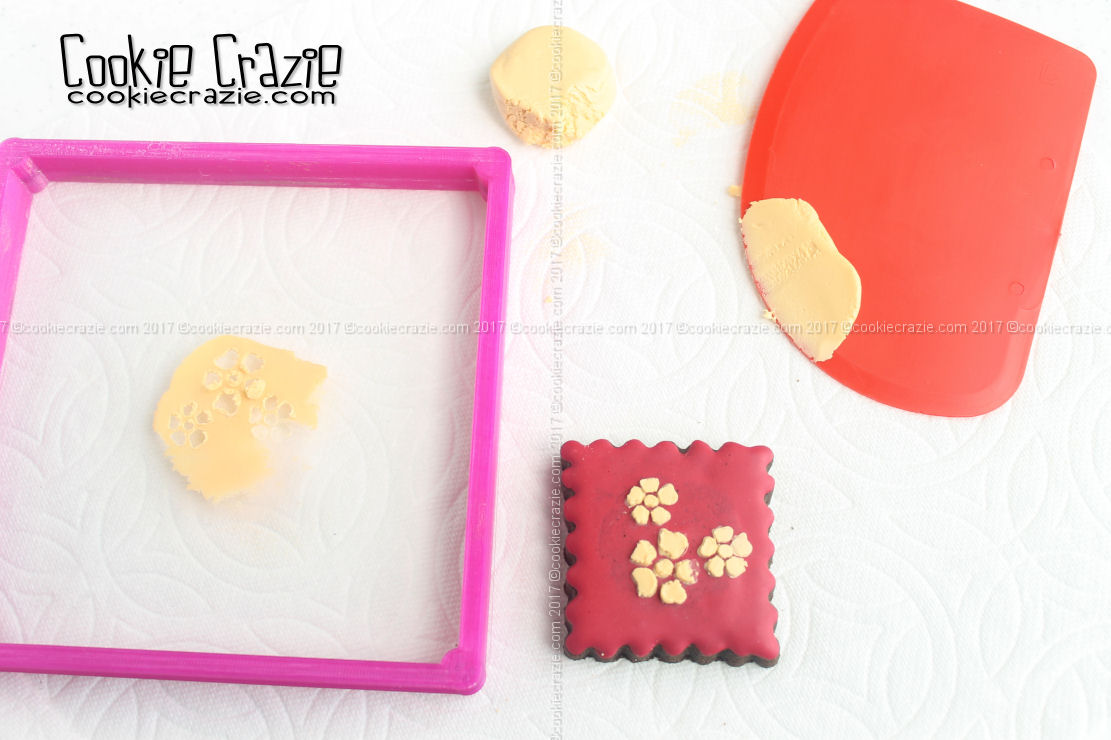
The consistency is important. The very thick (even moldable) glaze I used during this project was actually too thick. Even though I got it to work, it would have been easier if it had been a tad bit thinner. It was very difficult to spread this thick, clay-like glaze evenly across the stencil. Plus, it was so elastic, it didn't want to break away from the stencil when it was pulled up. 

I'm going to experiment with this more......but wanted my readers to know that this is possible and you should totally try it. FINALLY I have a use for some of those stencils I've been storing away for so long. :)

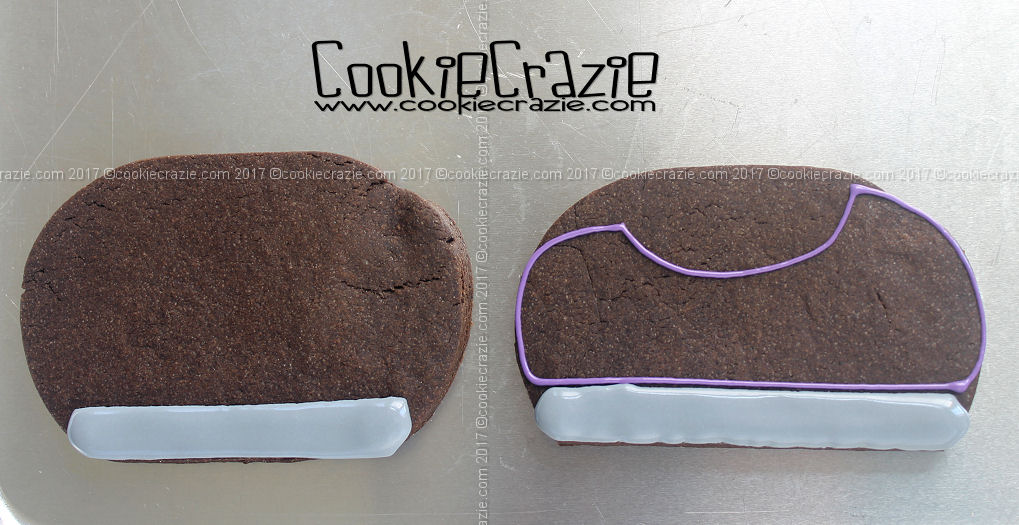
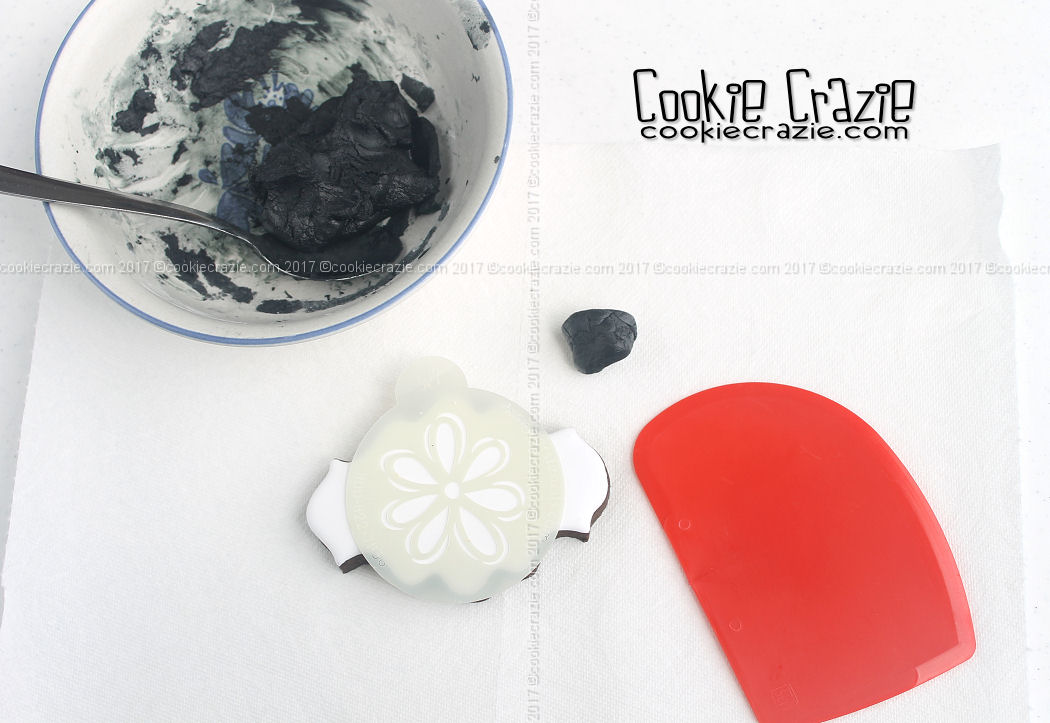
Add powdered sugar to glaze until it nearly comes together like clay. But make sure it is still sticky and not too thick. A friend described it as pasty, thicker than toothpaste, but not moldable. 

Place a small amount on top of the stencil to act as a "glue" to keep the stencil in place. Pull your scraper from top to bottom making an even coat of glaze. Then pull up the stencil. And there you have it.....a beautiful stenciled pattern. :)


Bird Egg Decorated Cookies (Tutorial)

Bird egg cookies are really simple.
I debated on whether or not they were too simple to include in a blog tutorial.
But some of my readers request simple cookies, so here it is.

Use a mini egg cutter like this one to cut the cookies.
Outline and flood the cookies with white glaze.
Allow the cookies to dry overnight.

Rub some blue forget-me-not dust onto random spots of each egg with a cotton swab.
Add speckles to the eggs using Sugarbelle's template markers.


Member Login
Welcome, (First Name)!

Forgot? Show
Log In
Enter Member Area
My Profile Not a member? Sign up. Log Out