white

Make them BOLD with Red and Gold Cookie Collection

Every once in a while, I just pick a few basic colors and then create a ton of different random shapes using as many techniques as possible. It allows my creativity to blossom and it produces some pretty strange combinations. But it is pure fun to pull it all together.

Here's my BOLD with Red & Gold cookie collection......in all it's boldness. ❤️


CookieCrazie Chatter...... Friday, March 14, 2014


Cookie Con 2014 is this next week.
Stay tuned for a full report once I return. :)


_________________________________________________________


CookieCrazie's Week in Review

/www.cookiecrazie.com//2014/03/cookie-bag-tags-tutorial.html


/www.cookiecrazie.com//2014/03/layered-stitched-3d-cookies-tutorial.html


/www.cookiecrazie.com//2014/03/red-black-white-cookies-only-three.html


_________________________________________________

Personal Side


This is going to be fairly short and sweet.
I'm preparing to fly to Salt Lake City for CookieCon 2014......
and so I've got a to-do-list a mile long.

I can't tell you how excited I am to meet many of you for the first time.....
and to reunite with others I met at the first Cookie Con.
It is going to be an amazing time in the cookie world.
If you are unable to go this time......PLAN NOW for next time.
You won't want to miss it.

I hope to get lots of photos and report back to you about all that happened.
While waiting, you could check out my CookieCon post from last time.

I'll try to peek in next Friday, but CookieCon will be in FULL swing, so my time may be limited.

Here we go......


Instagram photos for this week:


Happy Friday!


I'm ready.....how about you?


Happy Monday!


Just "coloring" with luster dust today.
So happy that it's spring-like outside!!!


It won't be long..... 


Getting in on the fun....just one week from today, heading to SLC for CookieCon14!
Can't wait to see everyone and go CRAZIE over cookies! :)
 #cookiecon14 #imgoingtocookiecon14


_________________________________________

Last CookieCrazie Chatter....


Red, Black, & White Cookies: ONLY Three Colors of Icing :)


I'm not good at limiting how many colors of glaze I make for each set of cookies.
Rarely do I make less than 6-7 colors in any collection.
But I was intrigued with the idea of using just THREE colors
to make as many patterns and textures as I could think of.

I was astounded at how much I loved making this set.
Of course.....the three vibrant colors of red, black, and white are distinctive on their own.
But the "simplicity of color" does something crazy with the brain. haha

This is one of my favorite sets of cookies ever. :)

I'll be doing this again......for sure!


/www.cookiecrazie.com//2014/03/layered-stitched-3d-cookies-tutorial.html


Layered & Stitched 3D Cookies (Tutorial)


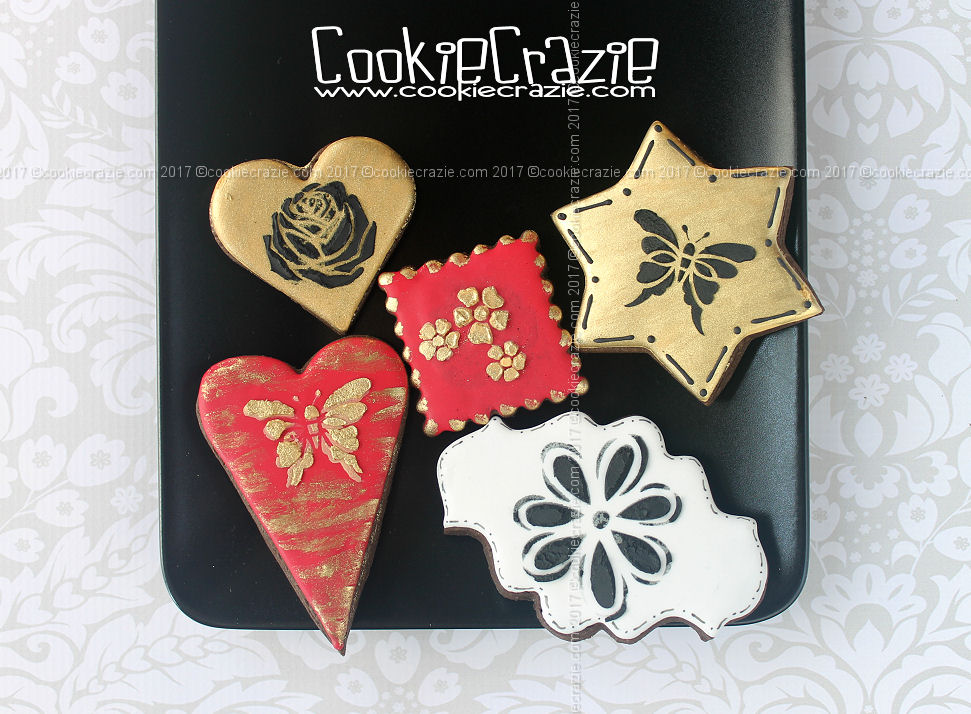
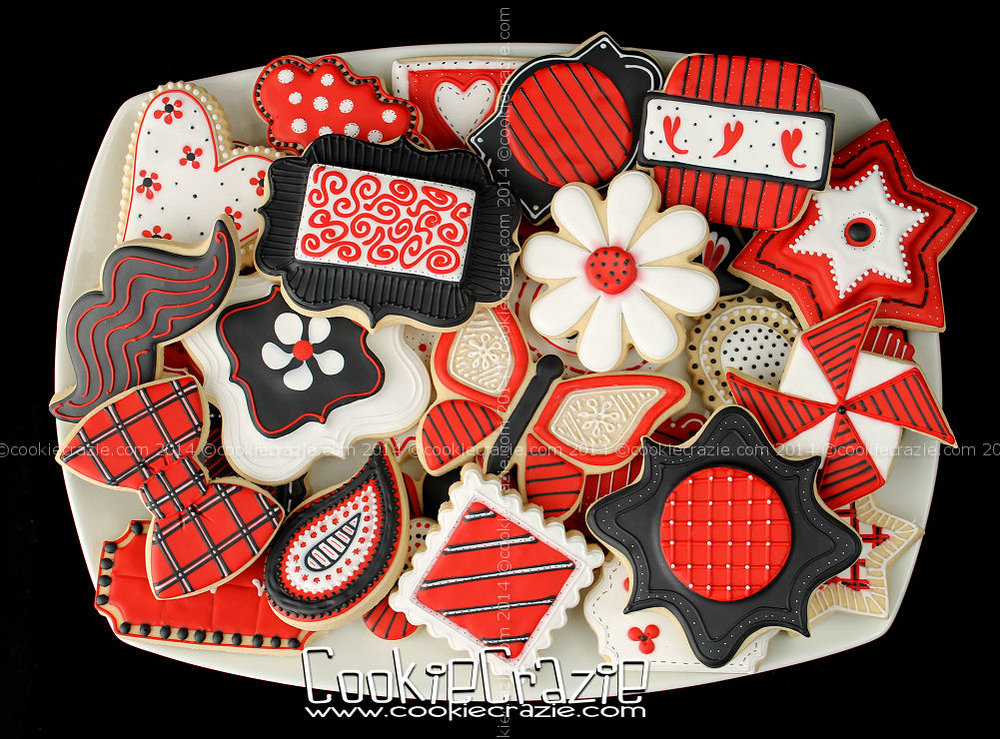
If you know me at all......I love to put stitching on cookies. :)
I've been doing it for 5-6 years now.
I love that folksy, hand-sewn look.
It fits in perfect with all the quilt cookies I love to make.

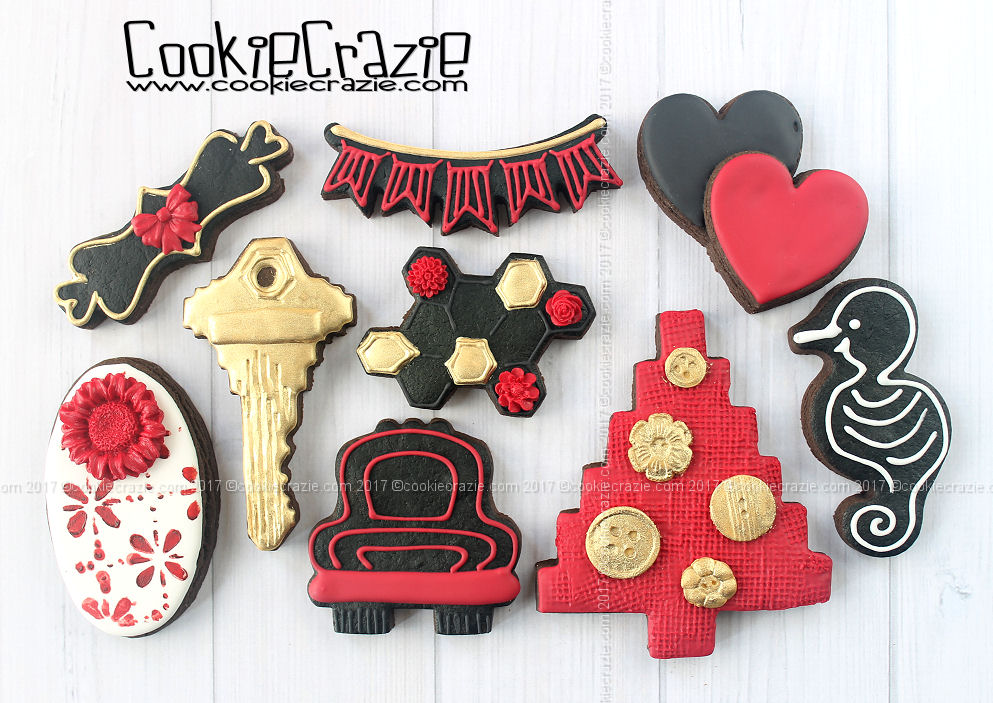
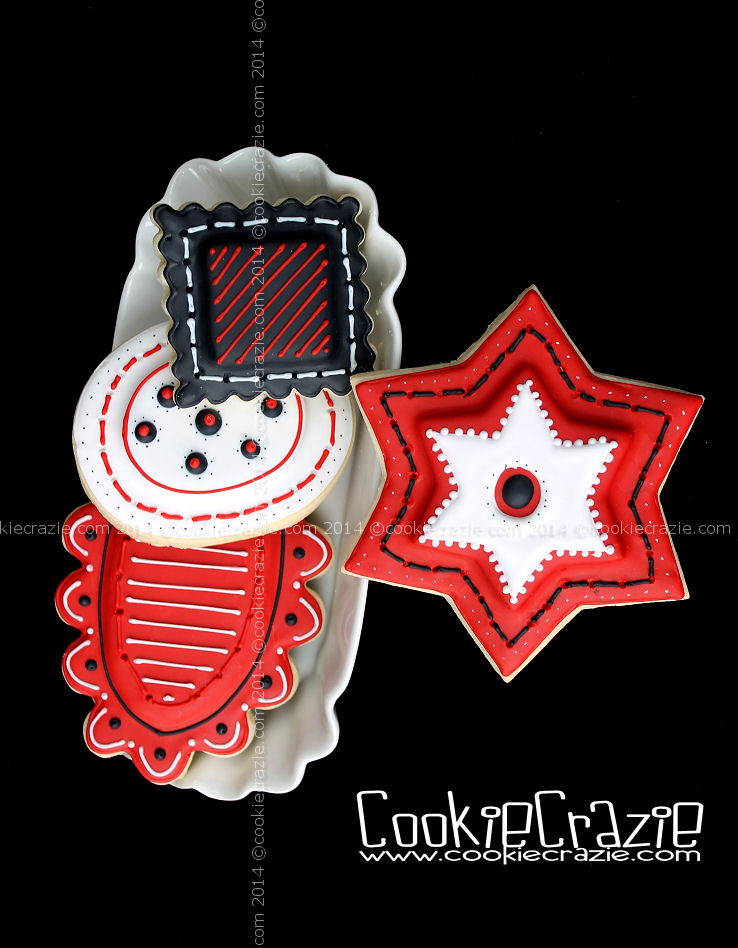
For Valentines Day, I had saved a photo of a "puffy" heart that had stitching around it.
It prompted me to make some layered heart cookies with 3D-looking stitches.

I fell in love with the effect.....I decided to share it here on the blog.


When layering cookies......you can use nested cutters so that shapes are exactly the same.
Or......you can add a complimentary shape on top of another.
I did both in this set of cookies.

The top cookie is thinner than the base cookie.
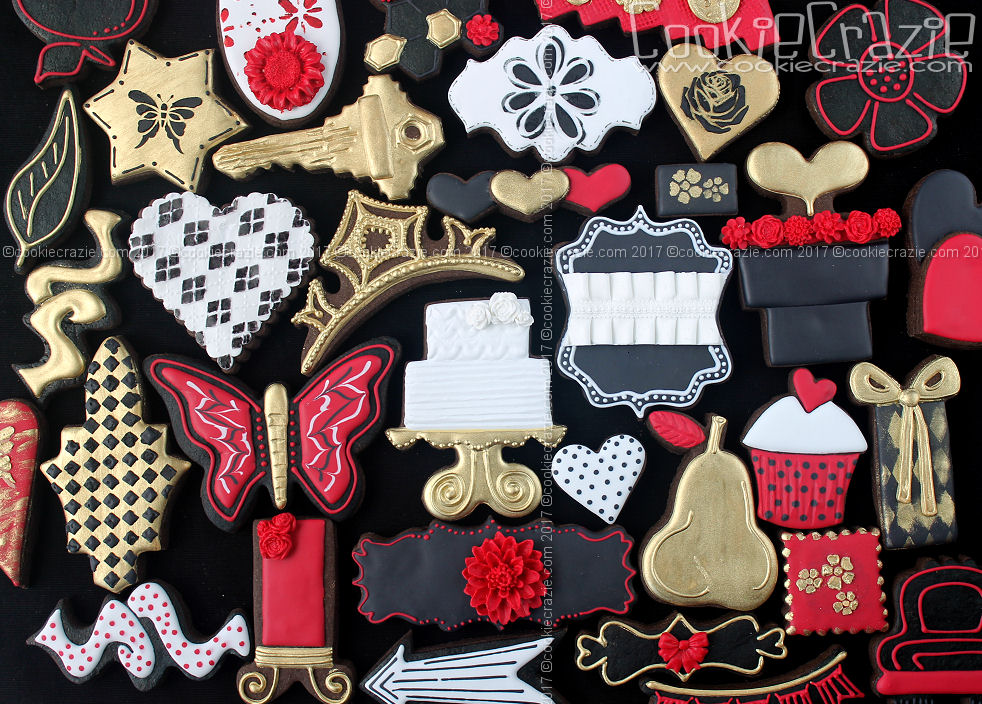
There's sideviews of the heart cookies HERE.

Bake the layers of cookies together.
You might need to bake them a little longer to get the middles fully done.


When decorating the full cookie, the glaze is going to "cascade" down the sides of the top cookie
onto the surrounding lower layer cookie. 
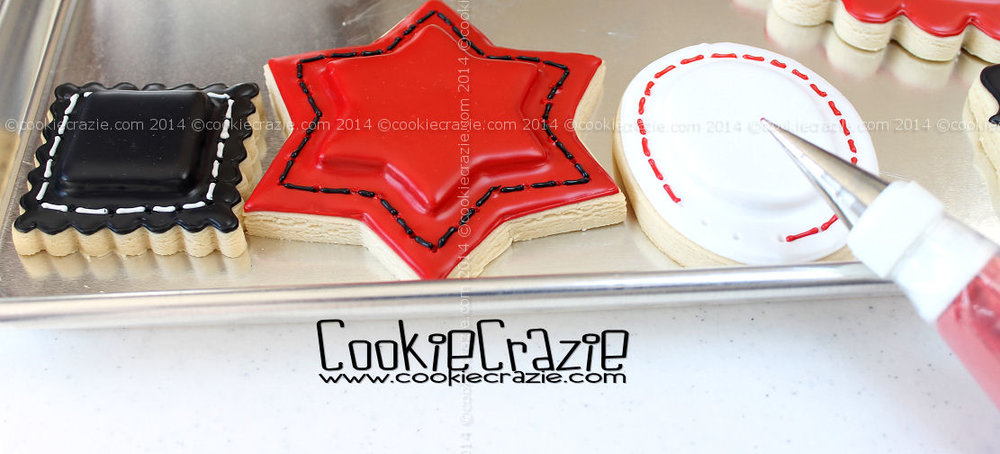
Start by adding a thicker outline around the bottom cookie.....letting it dry well (30+ min).
The begin flooding the top cookie allowing the excess to flow over the sides.
Push the glaze around on the bottom layer until it reaches the sides.
Be careful not to add too much glaze to the base layer since you have overflow from above.


Allow the cookies to dry for 2-3 hours.
I found that the glaze was pretty thick on these cookies and
more time was needed to get the glaze to "crust over".

Use a cake tester to make "stitch holes" all around each cookie as shown in the photo below.
(I found a new cake tester that is a lot bigger diameter than my Pampered Chef one.
It was perfect for these cookies.)


Allow the cookies to dry overnight
(especially if you are using bleed-prone colors like red, black & white!).

Using a small tip (PME 1.5 is my favorite), add stitches in between the stitch holes.
I've tried it with both contrasting colors (here) and same colors (hearts) and like it both ways.


I couldn't be happier with how these turned out. :)


Greyscale Glamour Cookies


My cookie friend, Georganne, challenged all of us to make a set of cookies with "no color".

So I mixed up some black, white, and a few shades of grey......and made a bunch of cookies. :)
I was pleasantly surprised at how fun it was to take the color out of the equation and just decorate.


Hey.....you can join in the fun too.
Make some cookies void of color and link them to LilaLoa's Link Party
Member Login
Welcome, (First Name)!

Forgot? Show
Log In
Enter Member Area
My Profile Not a member? Sign up. Log Out