sugar cookie

CookieCrazieBasics: Sugar Cookie Recipe

It all starts with a good sugar cookie recipe.

And if the basic cookie is not delicious, it doesn't really matter what it looks like.

I've been using the following recipe for many years. I think it's "secret ingredient" is the sour cream. It holds its shape perfectly and tastes the best of all I've had.

CookieCrazie Sugar Cookies

1 cup (227 grams) butter, softened (2 sticks)

1 1/2 cups (300 grams) sugar

1 egg

1 teaspoon vanilla

1/2 cup (125 grams) sour cream

4 & 3/4 cups (600 grams) flour

1/4 teaspoon baking powder

1/8 teaspoon baking soda

1/2 teaspoon salt

Cream butter and sugar. Beat in egg, vanilla, & sour cream. Blend in dry ingredients.
No refrigeration of dough is necessary.
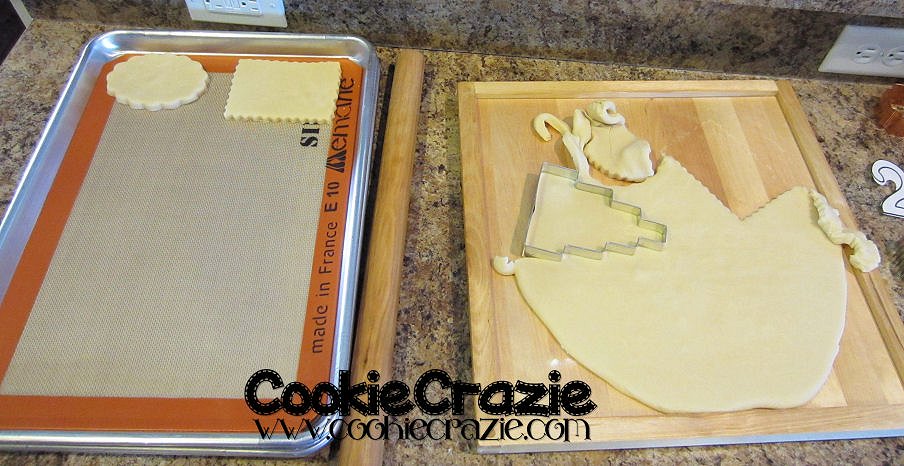
Preheat oven to 325 degrees. Roll dough to desired thickness. Cut into shapes.
Place cookies on ungreased cookie sheet. Bake approx 20 minutes.

Yield: 20-25 medium cookies


Poinsettia Basket Decorated Cookie (Tutorial)

At the last minute last Christmas, I made a basket cookie with a poinsettia, and decided to revisit it this year with a tutorial.

The sweet part about the time lapse is that I have acquired an even better basket weave texture mat. :)

Rustic Basket Weave by Karen Davies (favorite)
Basketweave Embosser

There are two ways to achieve the basket weave effect on the cookie.

  1. Impress the weave into the cookie dough before baking
  2. Flood the cookie with glaze and use the mat once it is partially dry


To impress the dough, you'll need to initially roll the cookie dough thicker than usual, and use the rolling pin on top of the mold to impress the weave deeply into the dough.

(see photo below)

Once the dough is molded, use your rectangular cookie cutter to cut the desired shape.

After the cookie is baked and cooled, brush dry cappuccinodogwood, and caramel dusts over the cookie for a more dimensional look.

(Note: I used these lighter colors on the dark chocolate cookie.
If the regular sugar cookies are used, you will need to use different colors of dust.)

Add the first layer of the poinsettia with red glaze.
(see photo below)
Add a second layer of petals at least 30 minutes after the first.

Carefully place yellow pearls within the center of the poinsettia.


For molding partially dried glaze, outline and flood the cookie with brown glaze.

Allow the cookie to dry for 4 hours and then press the mat into the glaze.

Dry the cookie overnight.

Brush over the dried glaze with dry chocolate dust.

In the same way as above, pipe a poinsettia with red glaze over the top of the basket.
Then add the yellow pearls to the center.


Autumn Leaf Thanksgiving Turkey Decorated Cookie Collection

Making a platter of cookies look like a turkey for Thanksgiving is nothing new. But the twist on this set is to use the feather shapes to make autumn leaves.

Any way you construct it, the results will be charming.

Gobble gobble......

Cookie Cutters found HERE.


May your Thanksgiving dessert table be adorned with a cute turkey cookie platter.....


Thanksgiving Dinner Place Card Decorated Cookies (Tutorial)


I've dreamed of making place card cookies for Thanksgiving year after year and it hasn't happened until NOW. Hurray! What fun it is to gather family and friends around the table and designate their places with personalized cookies.

There are so many possibilities for place card cookies. Pick a plaque or geometric shape that fits the event or the people invited, and personalize them for each guest. And of course, this idea is not limited to Thanksgiving. It could be used for any holiday, birthday, wedding, etc.

I always hesitate to write words on a cookie. I'm rarely happy with my printing on a cookie. So anytime I can get out of it, I will! This time I tried out these awesome Snap Together Letter Embossers and they worked well.

Outline and flood the cookie with glaze. Allow it to dry for about 2-3 hours.


Pick out the words you desire to express on the plaque, snap them together, and gently press them into the glaze.


Embellish each cookie as desired.
 

Once the cookies have dried overnight, use a food color marker to add the names of the guests to the cookies.

P.S. Don't be surprised if this year's Thanksgiving Dinner starts with dessert! ;)

Indian Corn Decorated Cookie (Tutorial)

For some reason, Indian corn cookies have been hard to emulate in the past.
Either they were way too detailed and time consuming, or
they didn't appear the way I wanted them to.
Now with fondant embossers, I found a design that I really like....
and it's not too time-consuming.


Believe it or not, I used a tall Easter egg cutter for this design.
But a longer oval will work just fine.

Outline and flood the entire shape in gold glaze.
Allow the icing to dry for at least 3 hours, and then use either one of these embossers to imprint "kernel" marks into the glaze.

There are other brick texture mats that also might work to make these impressions.

Using orange and brown glaze, outline and flood a few random kernel impressions
throughout the cookie.
(see photo below)

Dry overnight.

Dust dry chocolate luster dust over the kernels to give it a shaded and rustic look.

 
Member Login
Welcome, (First Name)!

Forgot? Show
Log In
Enter Member Area
My Profile Not a member? Sign up. Log Out