drink

Top of the Mug Cookies (Tutorial)


I love hot chocolate and hot tea in the winter time.
Even though I'm not a coffee drinker......
my husband always says I like a tiny bit of coffee with my cream and sweetener. haha

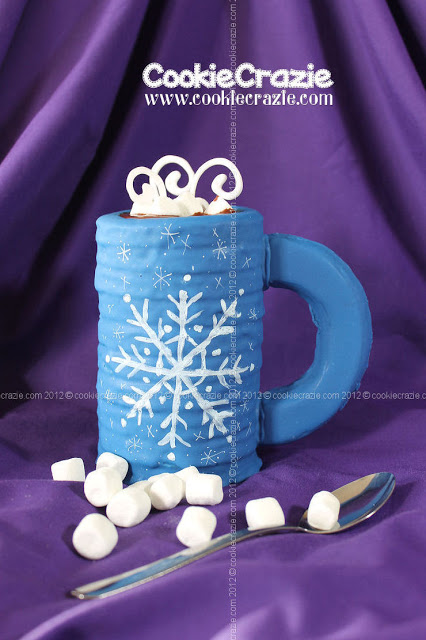
Before Christmas, I saw this really cute display in a catalog
with a bird's eye view of a mug of hot cocoa and a snowflake marshmallow.
I cut it out and hug it on my desk......wanting to remember the idea for after Christmas.

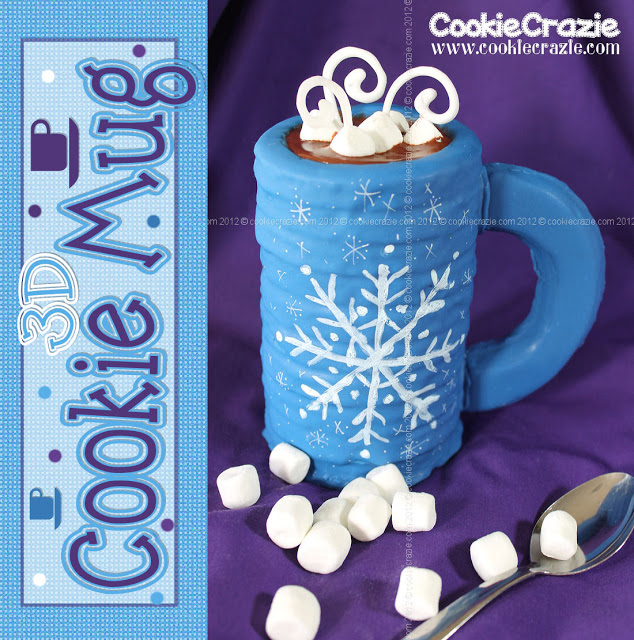
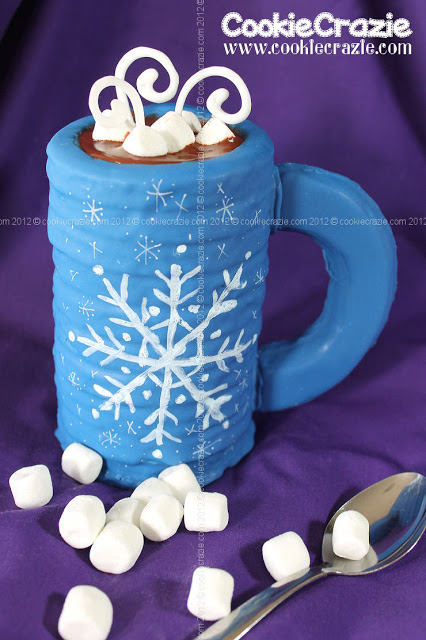
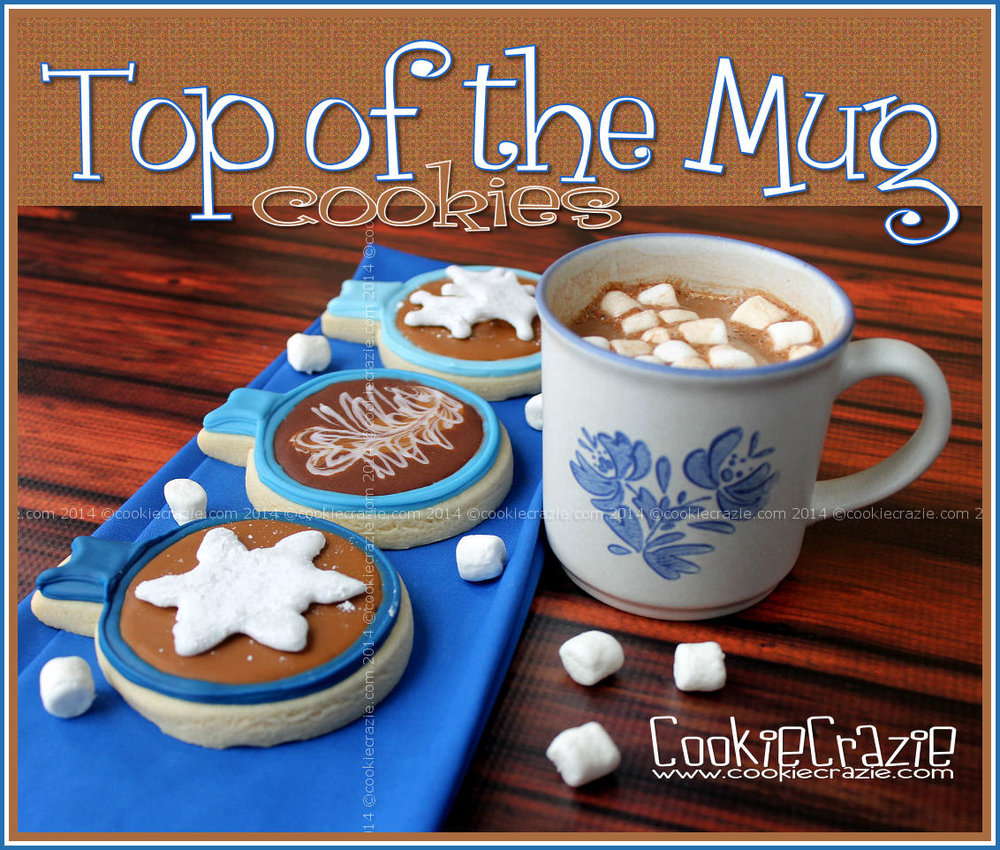
And here they are..... "top of the mug" cookies.

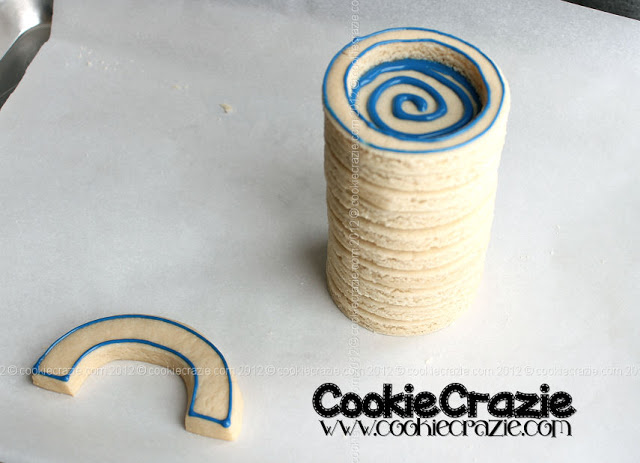
A large circle cutter with a small rectangle cutter are pieced together to make the mug.
Or  just hand cut the rectangle and add it to the circle.
Easy peasy.......


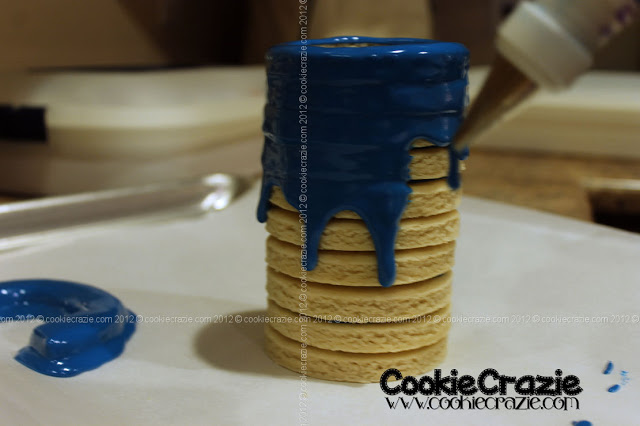
Outline and flood the top of the handle and a thick rim around the mug in your choice glaze color.


After it has dried for at least 30 min (longer if you're worried about bleeding color),
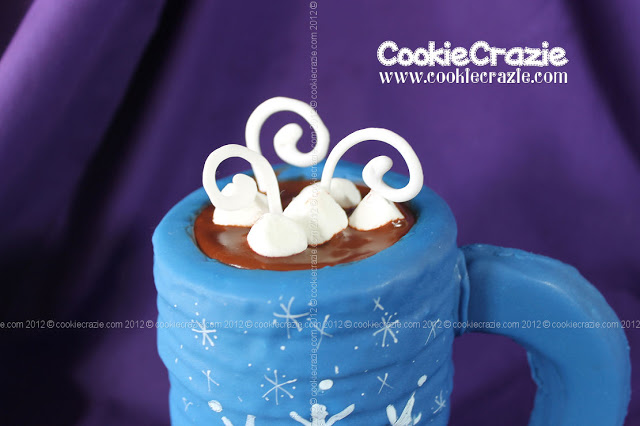
add light or dark brown glaze to the center of the mug (depends on your drink of choice, haha).

If you want to make "swirly cream",
add white glaze in a swirly pattern while brown glaze is still wet.


Even though real marshmallows (store bought or homemade) could be used
for the top of the hot cocoa,
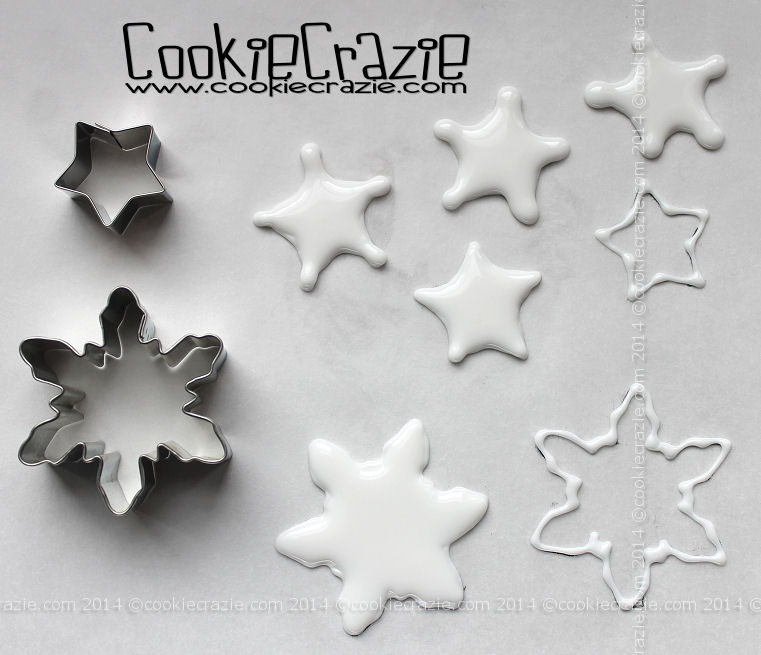
you can also make some glaze transfers to look like yummy marshmallows.

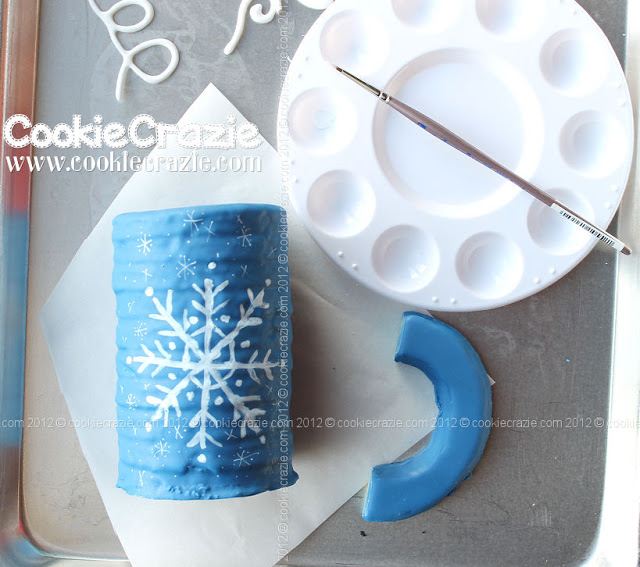
Trace the pattern you want to follow (snowflake, etc) onto parchment paper,
and then pipe white glaze over the pattern.
While it is still wet, sprinkle powdered sugar over it.


Finish up the mug details by piping an outline around the mug rim and the handle top
with a 1.5 PME tip in the same glaze color.


Once the transfers have dried overnight,
carefully peel them off the parchment paper and shake off the powdered sugar.
"Glue" the "marshmallows" onto the top of the "cocoa" with some extra glaze.


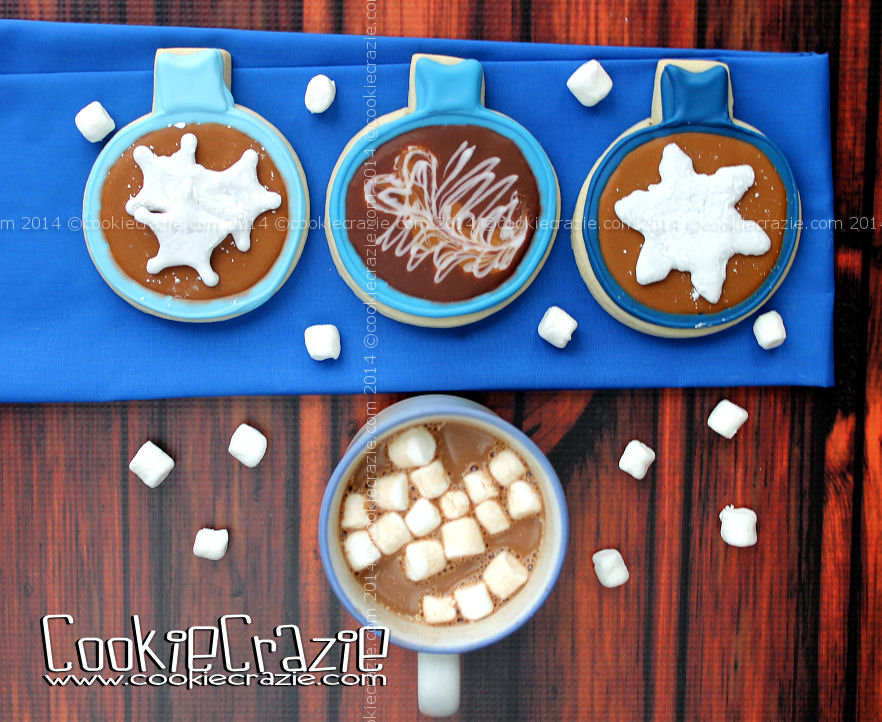
Mmmm.......double the pleasure......hot cocoa with hot cocoa cookies. :)


Winter 2014 Cookie Collection

Lemonade and More Cookie Collection


I receive tons of joy when I decorate cookies......it doesn't really matter what kind.

But occasionally a cookie theme gives me extra pleasure.

This Lemonade and More Cookie Collection definitely fits into that special category.
The theme itself, along with the color scheme was extra fun!!
Every time I look at these cookies, I smile. :)


Lemonade Glass Cookies (Tutorial)


Lemonade.....a cool refreshing drink on hot summer days. :)

Since I hand-cut both of these lemonade cookie shapes.....I don't have an exact cutter to link here.
However, I wanted to share the technique I used to get the "glass" effect.

Outline and flood the cookie with yellow 10-second glaze to "fill" the glass with "lemonade".
Be sure to leave space around the edges to later outline with white.
After the yellow has dried for about 1 hour, add a white outline with a #4 round tip.
(see pic below)

Once the glaze has crusted (approximately 2 hours......or 1 hour on low in a food dehydrator)
use mini cutters shaped like ice cubes and/or lemon slices 
and cut into the yellow glaze as shown.
 Add a white 10-second glaze outline to the lemon slices with a PME 1.5 tip.
Then allow the cookies to dry overnight.

The next day, paint the ice cubes with a thin mixture of
Americolor Bright White gel and almond extract.

If you have straws on your glass cookies, you can use a food color marker to add stripes.

Finally, cover the entire glass (not the straw) with Americolor Pearl Sheen airbrush  color.

3D Cookie Mug...... Hot Chocolate Anyone? (Tutorial)


To make a 3DCookie Mug you will need:

  • 8-10 Circle Cookies (top cookie with circle cut out)
  • 1 Handle Cookie (see below)
  • Color-of-Choice 10-Second Glaze
  • White 10-Second Glaze
  • Brown 10-Second Glaze
  • Mini Marshmallows (optional) :)

On the day prior to building the cookie mug, make some steam curl glaze transfers.
Pipe white glaze on parchment paper with a #2 round tip in "steam like" patterns.
Allow to dry overnight.

 Cut and bake 8-10 circle cookies (I used a 2 -3/4" circle).
Be sure you cut a smaller circle out of the cookie that will go on the top of the mug.

For the handle, use a circle cookie with the center cut out and then cut it in half. 
You can widen the height of the handle by stretching it out a tad before baking.

"Glue" the mug circles together with glaze as shown.


 Cover mug and handle with glaze.
Allow to dry overnight.

If desired, you can paint a design on the side of the mug using color gel diluted with almond extract.

Glue the handle to the mug with glaze and place a small bowl or other object
under it to keep it in place while it dries.

 (Please excuse the poor quality photos from my cell phone for this last part of construction.)

Fill the small indentation at the top of the mug with brown glaze. 
With some type of rack or support system (and fancy scotch tape!),
 stand the steam curl glaze transfers up in the wet glaze until they dry and are secure.
You can also add some mini marshmallows for the hot chocolate effect. :)


Member Login
Welcome, (First Name)!

Forgot? Show
Log In
Enter Member Area
My Profile Not a member? Sign up. Log Out