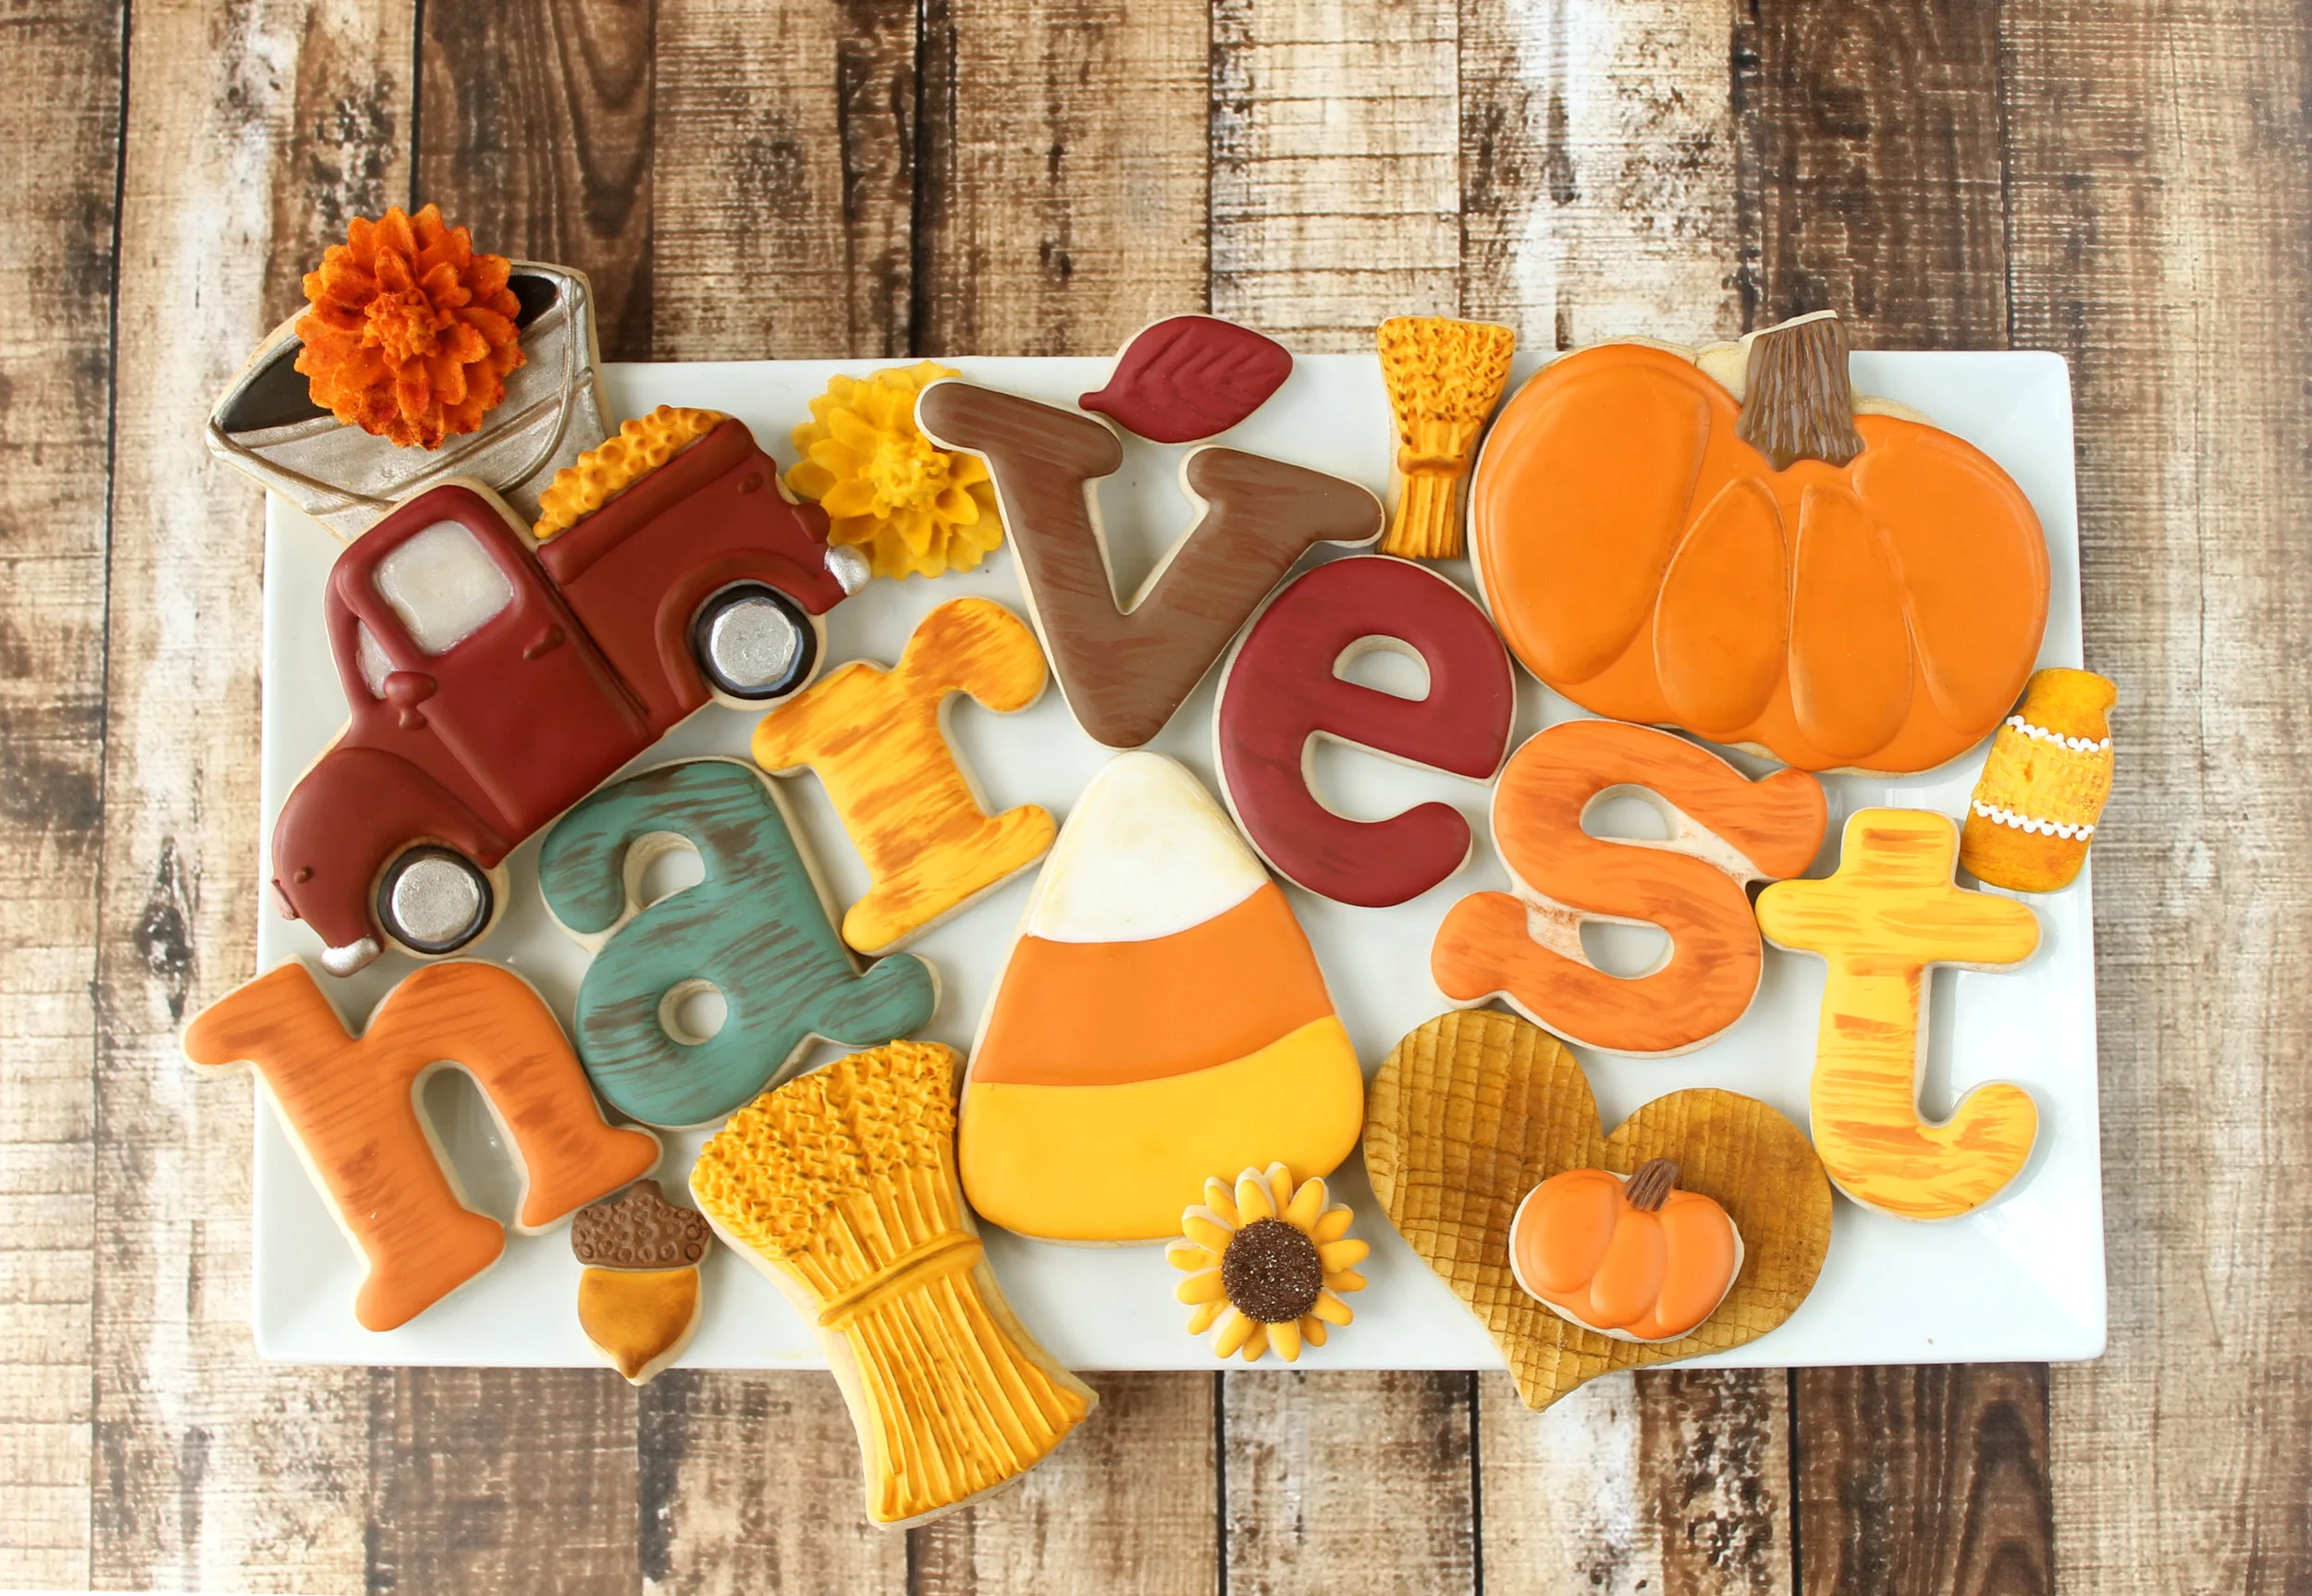
This season gets me EVERY time.
I LOVE IT!
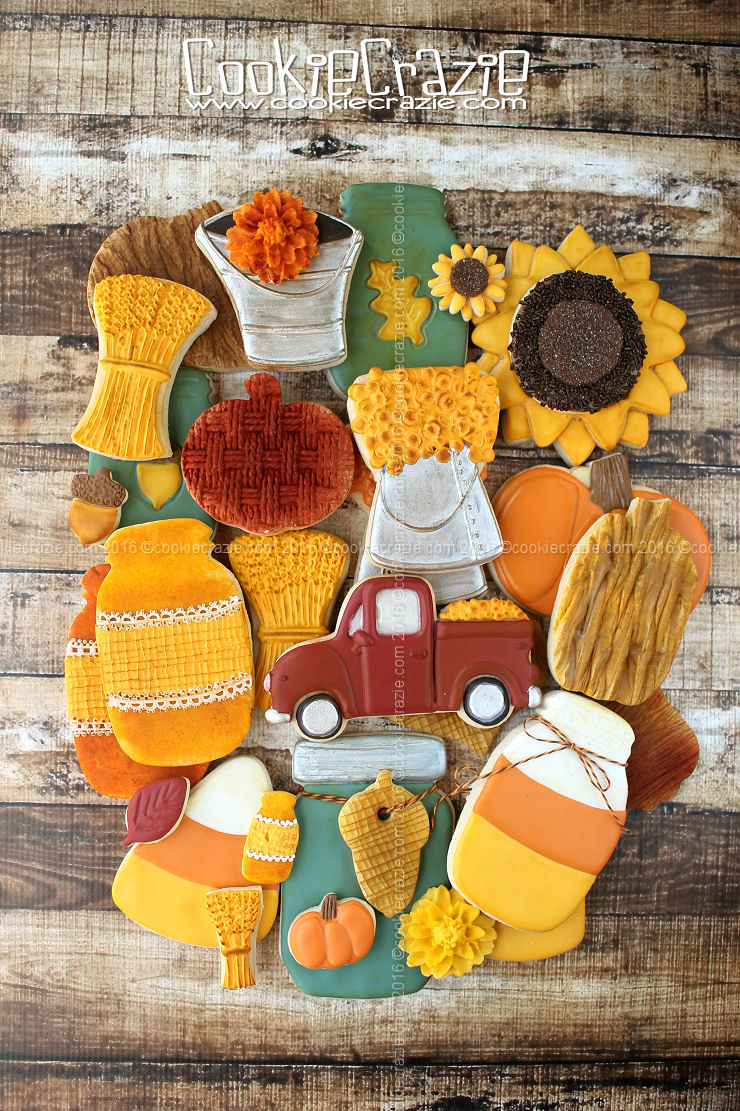
I'm always amazed at how easy it is to re-create new cookie designs for harvest. What a pleasure to emulate a rustic country vintage harvest season via cookies.

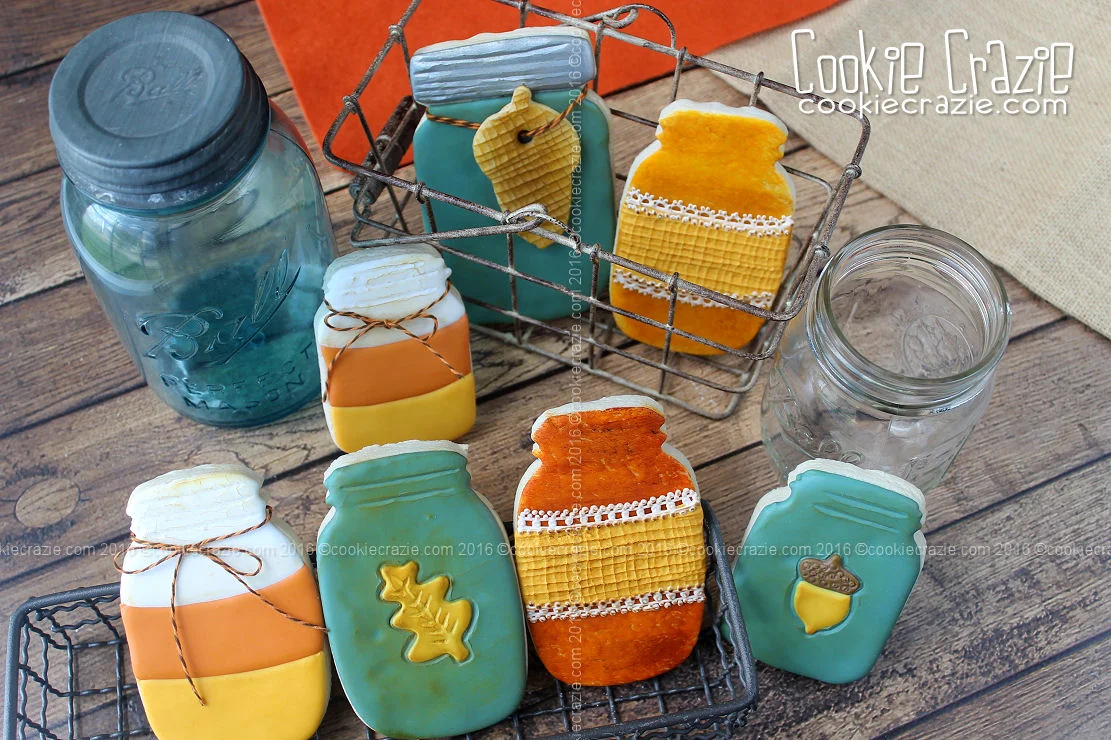


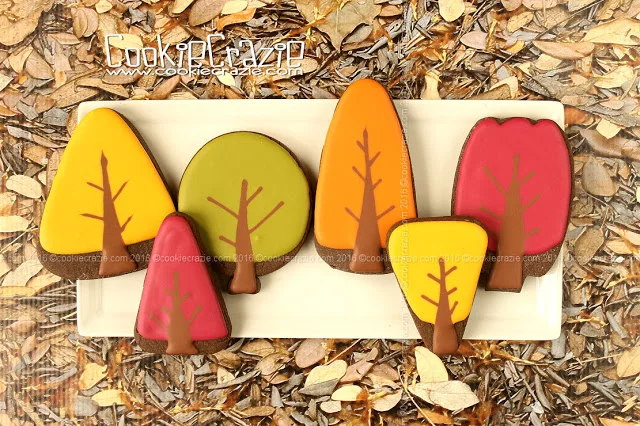

Harvest Mason Jar Decorated Cookies (Tutorial)

Mason jars continue to be a common staple shape in the vintage, shabby chic, & rustic genre. Here's four different ways to decorate them.
First Option
After you have cut, baked, and cooled the mason jar cookies, paint them with diluted autumn colors like lemon yellow, orange & chocolate brown. These gels were diluted with almond extract.
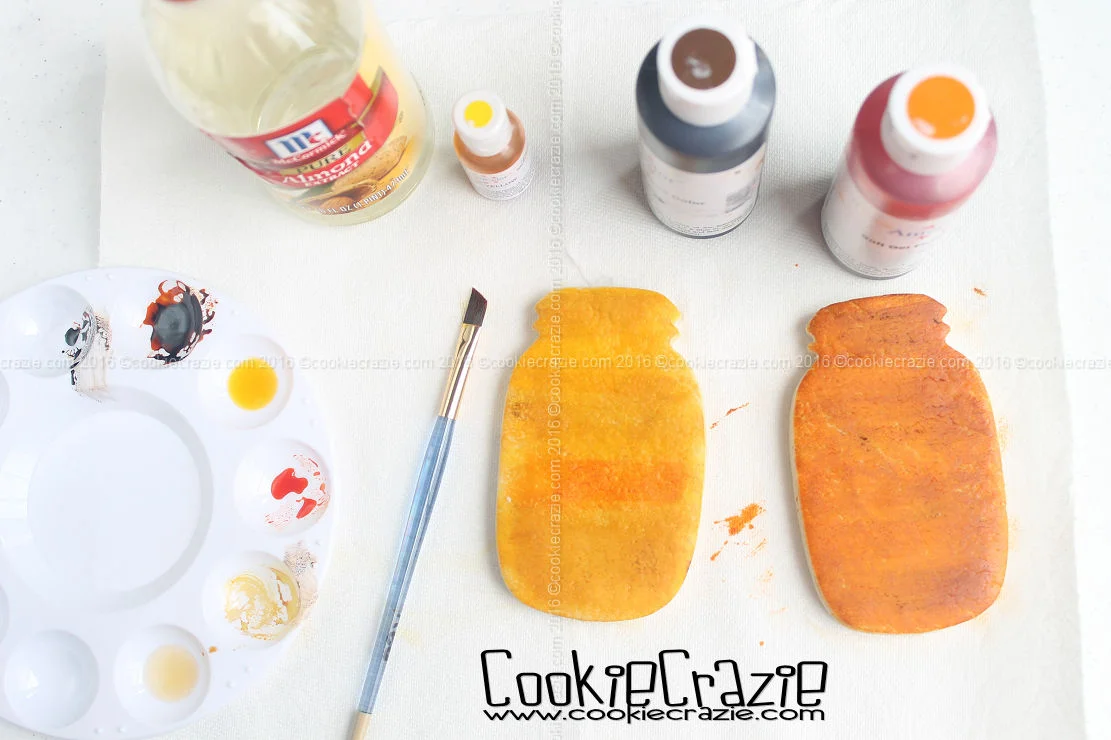
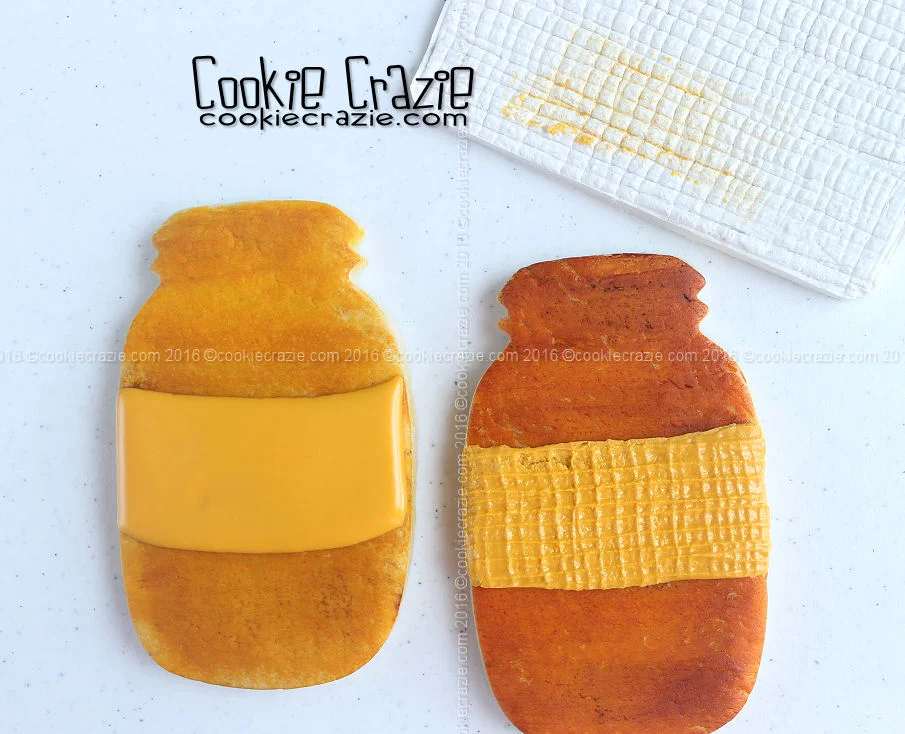
Allow the gel to dry on the cookie. Outline and flood a wide swath of the jar with gold glaze.
(see photo below)

Allow the glaze to dry for 3-4 hours. Use a burlap texture mat on the partially dried glaze to create a burlap-look.
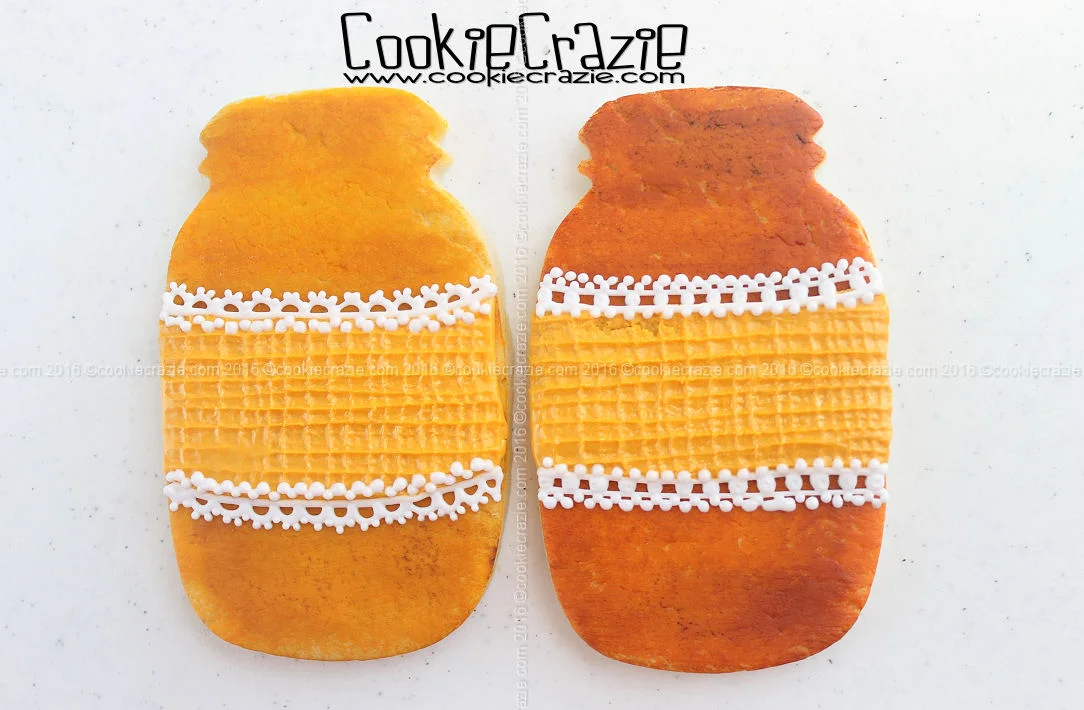
Add dots and lines of white glaze to the edges of the "burlap" to create a lacy border.
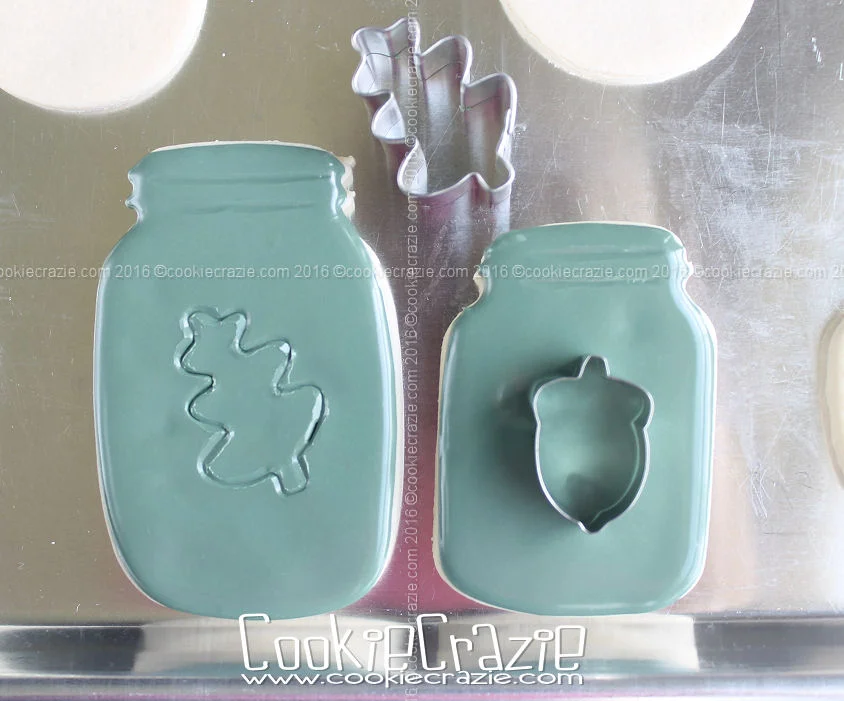
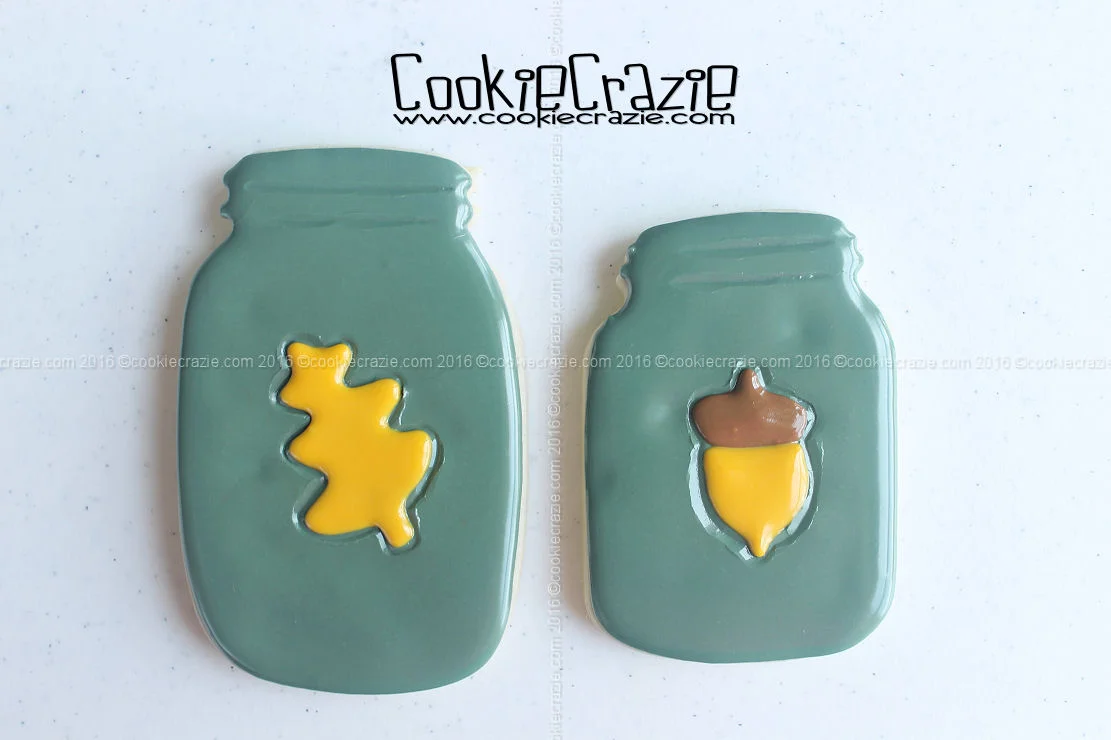
Second Option
Outline and flood the entire jar with a glaze color of your choice. Allow the glaze to dry for 2-3 hours and then press a mini cutter into the partially dried glaze. Use that impression outline to create a cute autumn shape on the front of the jar.
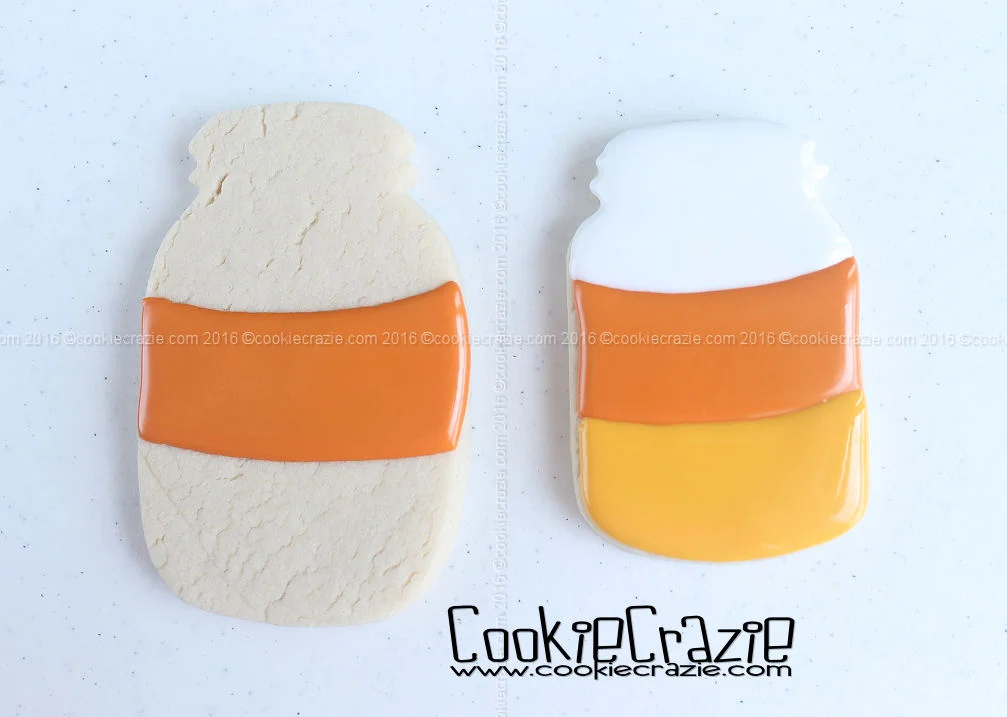
Third Option
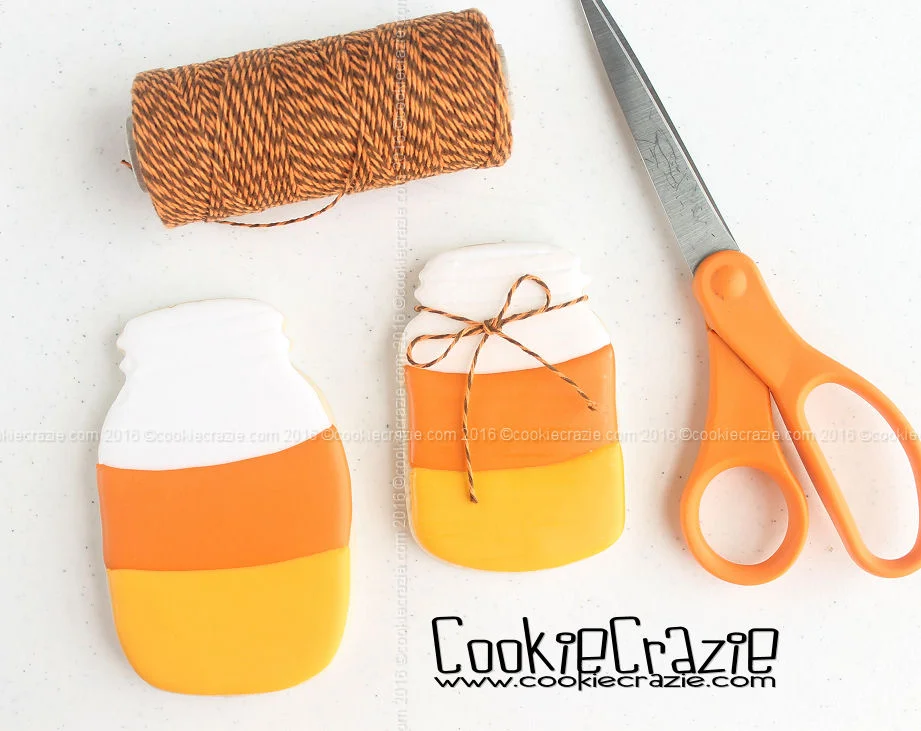
Divide the jar into three portions and outline and flood each part with the colors of candy corn.
Once the cookie is dry, you can tie bakers twine around the jar and tie it in a bow.
Fourth Option
When baking the mason jar cookies, impress some dough with the burlap impression mat, and cut out a mini cookie using the same method shown in this tutorial. Be sure to cut out a hole at the top of the cookie (with a straw) so that you can tie it to the mason jar.
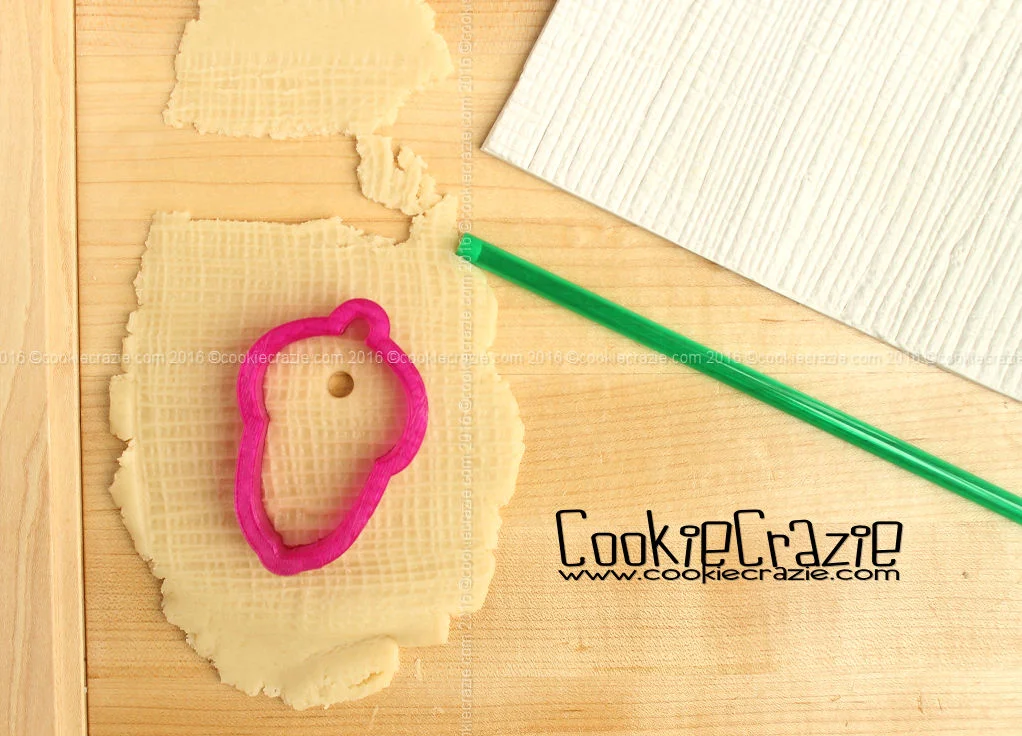
(Scroll down below to see the finished burlap impressed cookie....a mini acorn hanging on the jar.)
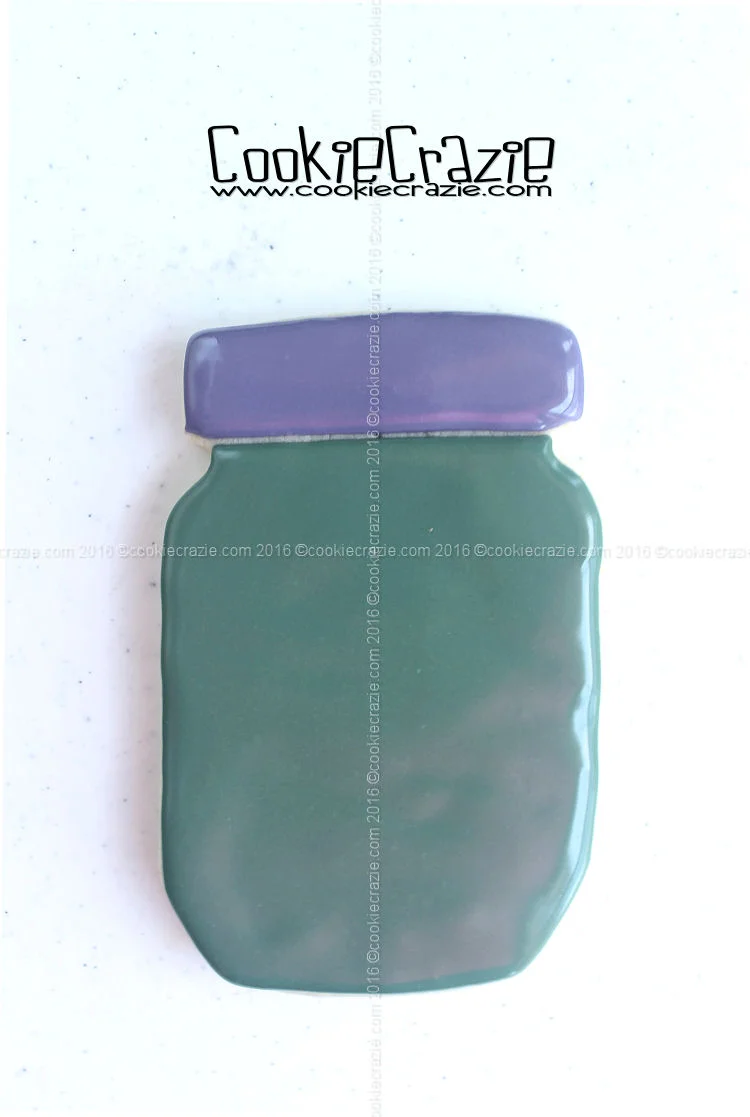
Outline and flood the jar in your choice of glaze color. Outline and flood the lid with grey glaze.
Dry overnight. Make a mixture of silver dust and vodka or almond extract,and paint it over the lid of the mason jar.
Brush dry caramel dust over the burlap impressed mini cookie to give a rustic look.
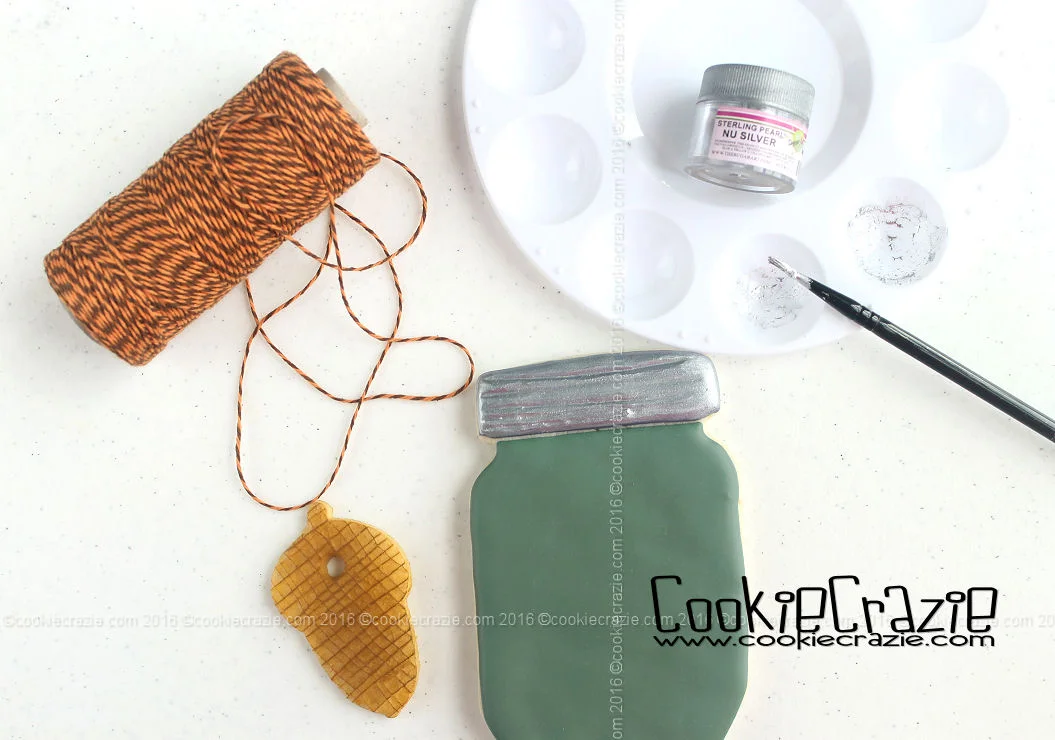
Attach the mini cookie to the jar with bakers twine.


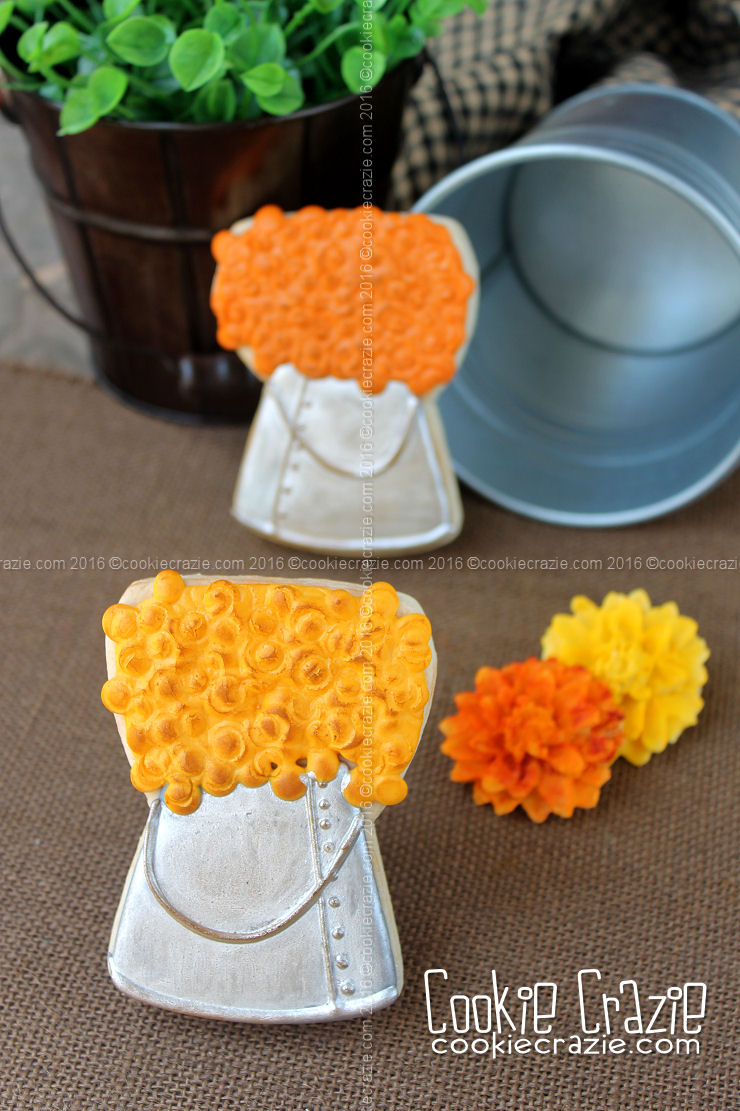
Metal Bucket of Mums Decorated Cookie (Tutorial)

I'm seeing metal buckets everywhere these days.
I guess it's a new trend.....but I've always loved the rustic look they bring.
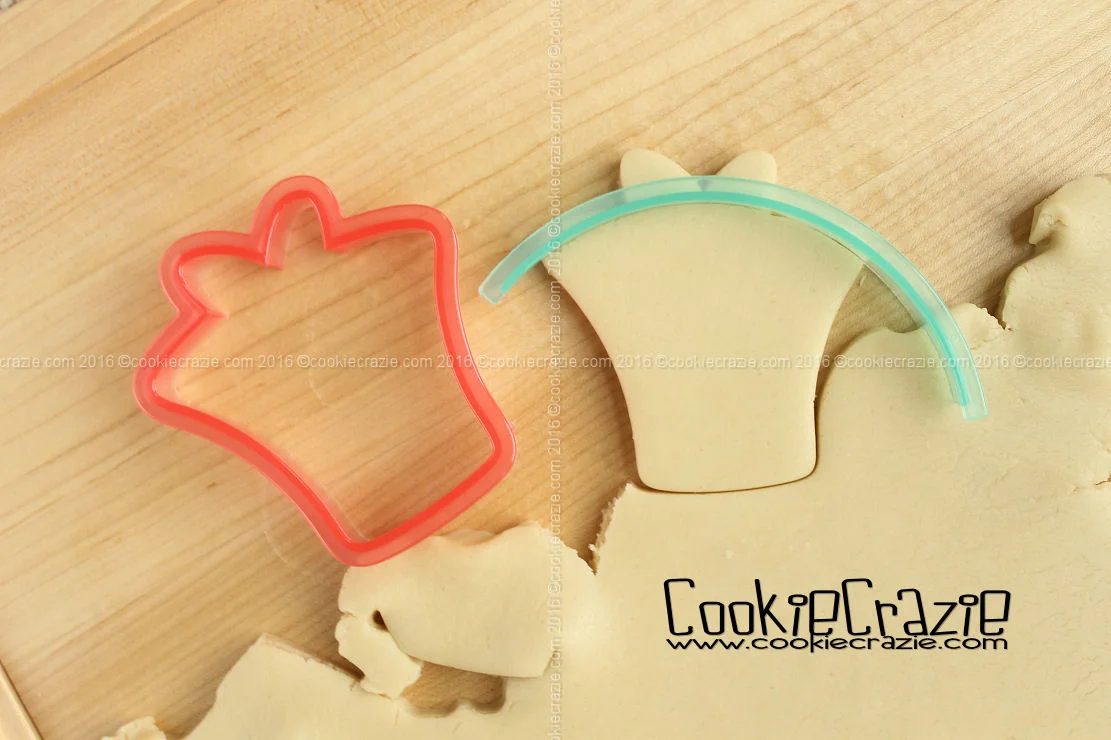
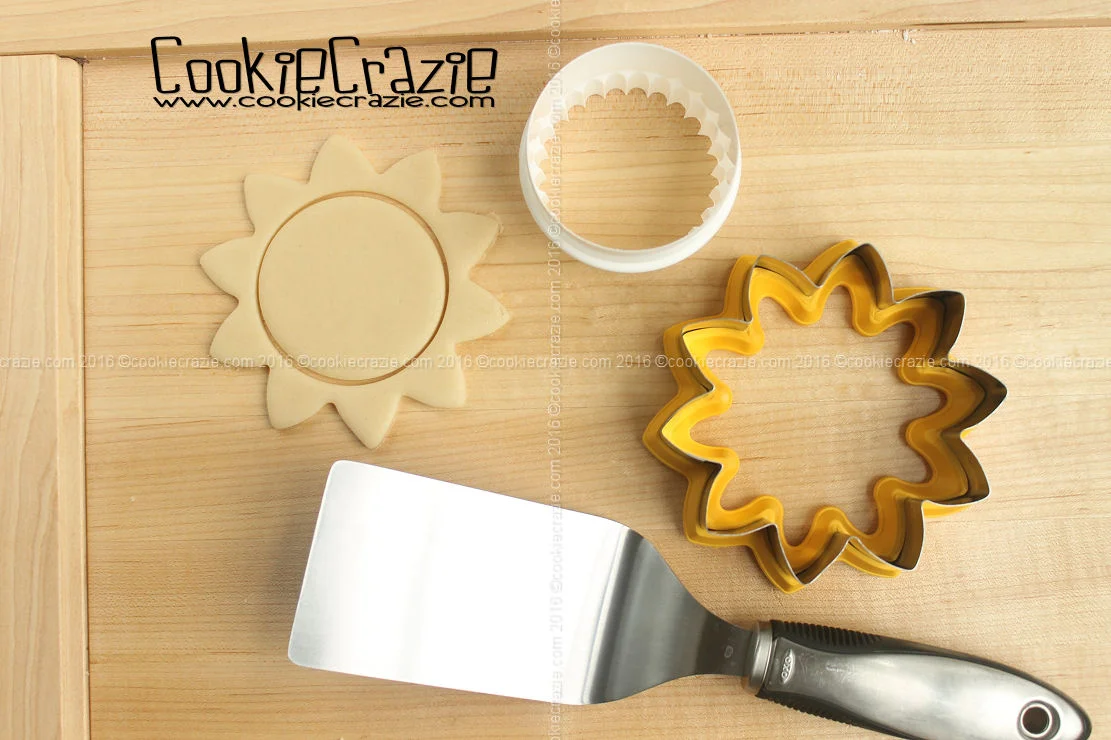
To make a bucket of mums, I used cutters from SugarBelle's Shapes Shifters set.
This is the wedding cake/sand castle cutter with the rounded edger.
As seen in the photo below, cut out the shape and trim it with the edger.
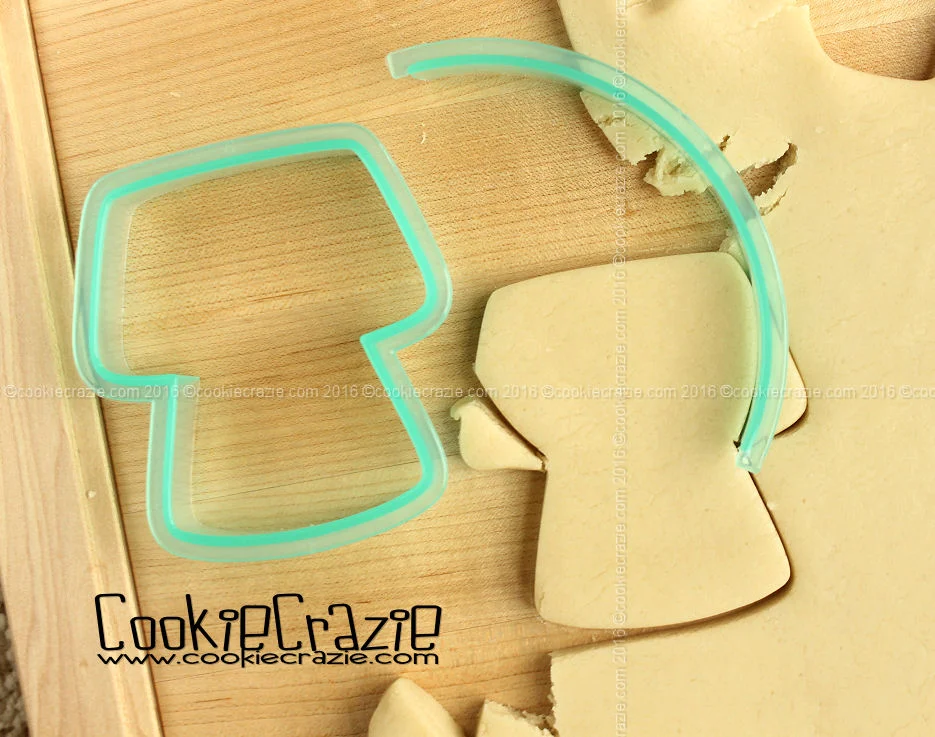
If you'd like to make just a plain metal bucket, use the gift cutter and cut off the bow.
(see photo below)
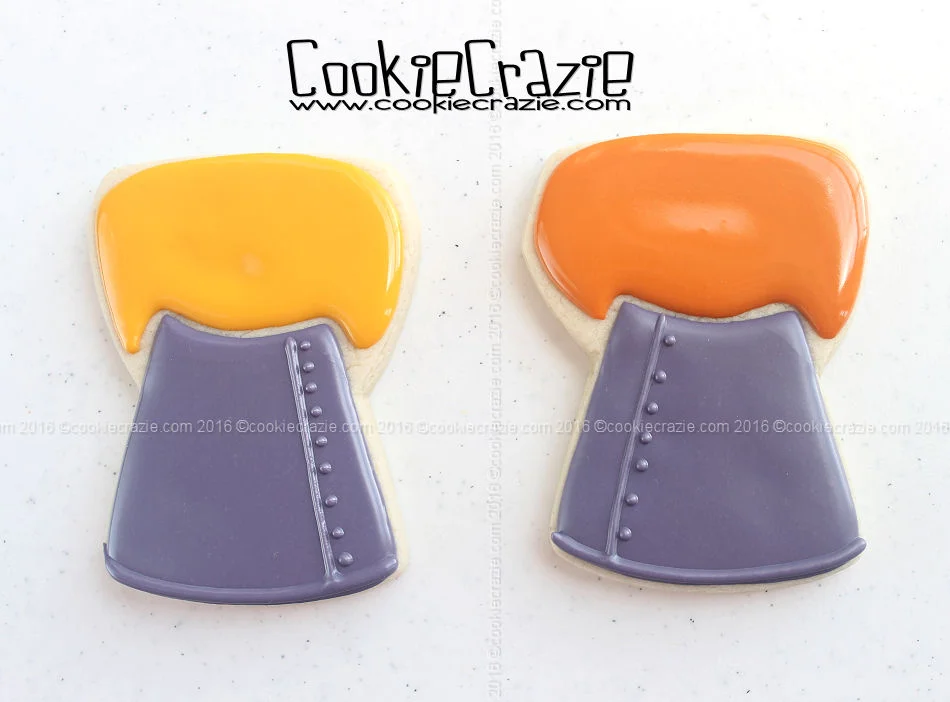
Outline and flood the bottom of the cookie with grey glaze. After it has dried for 10 minutes or so, add a line and the rivet marks as shown below.

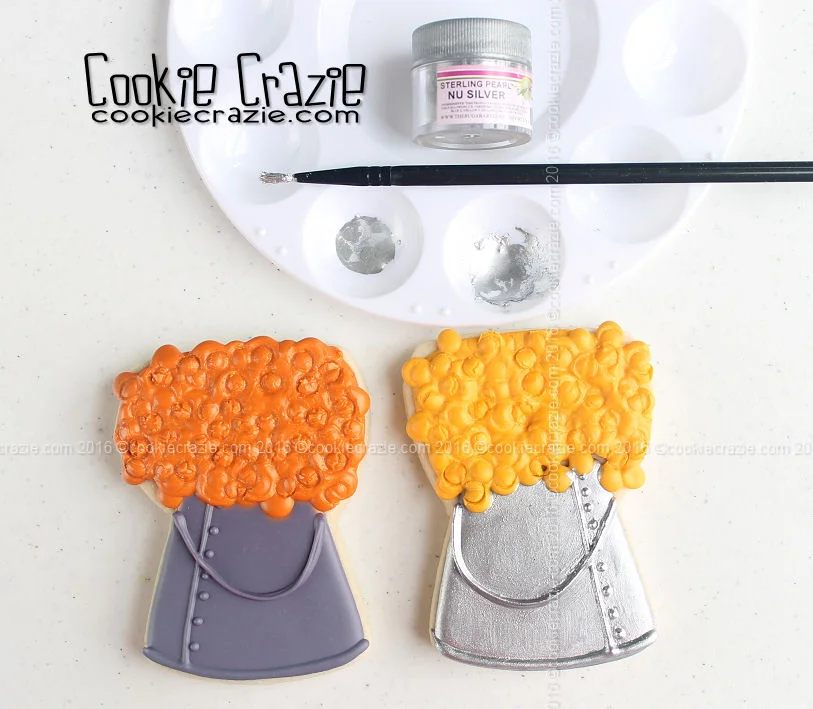
Outline and flood the top with orange or gold glaze to represent the background of the mums.
After an hour of dry time, use a large round tip (I believe this is a #10 round) to indent "mum marks" in the partially dried glaze.
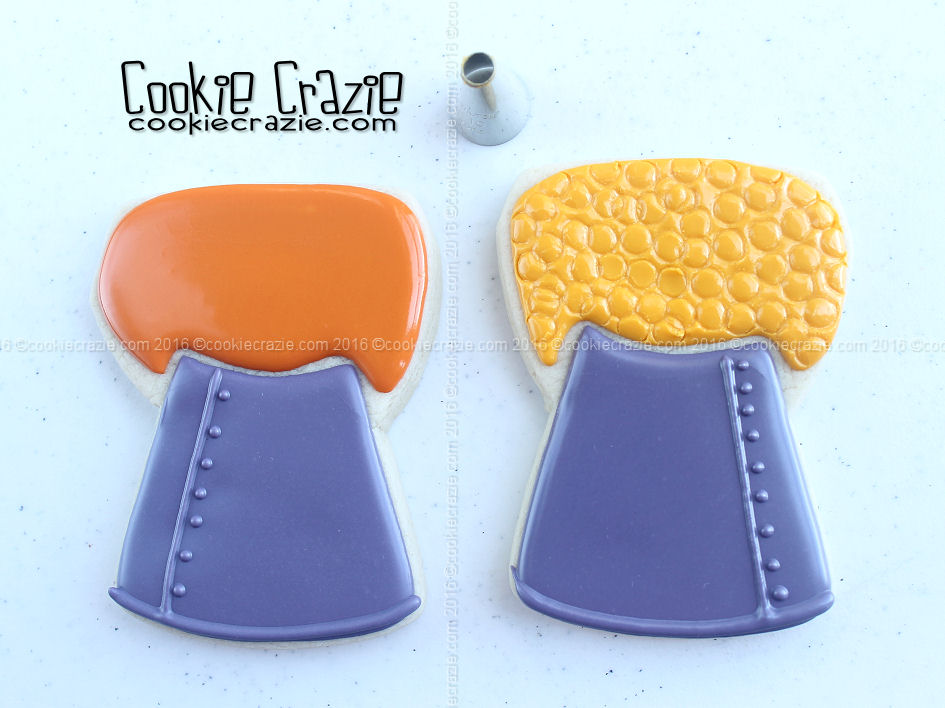
Over the top of the indented glaze, add dots of mums.

After another hour, add more indent marks for more dimension. Also, add a bucket handle in grey glaze.
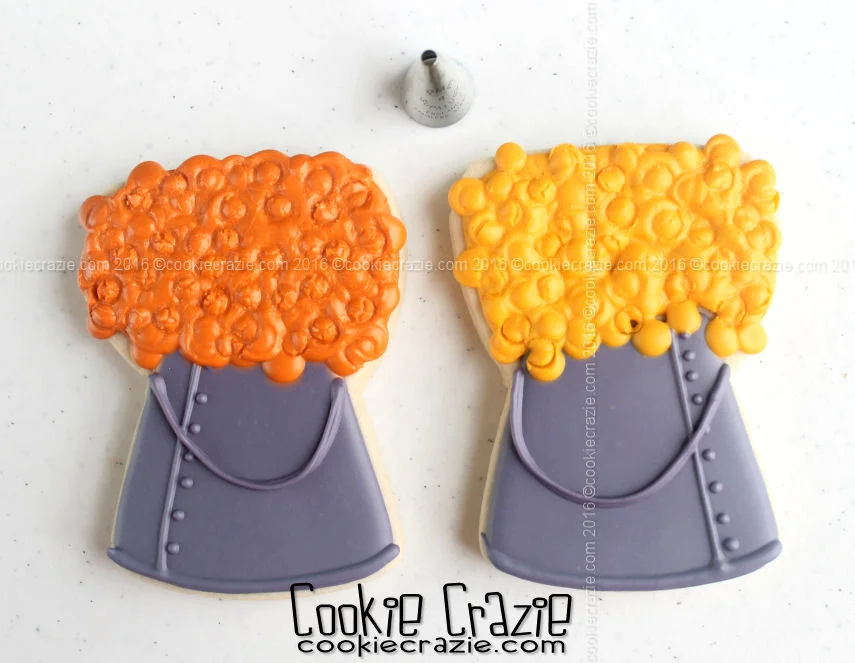
Dry overnight.
Combine silver luster dust with vodka or almond extract, and paint the bucket.

Sunflower Decorated Cookies (Tutorial)

Oh how I love sunflowers. You can always tell my favorites by how many tutorials I've done in the past on a particular shape. Trust me.....I've done a few sunflower cookies. ;)
This design is a little different in that an additional layer of cookie dough petals is added to the flower. Also, the flower center is a separate cookie in order to add more dimension.
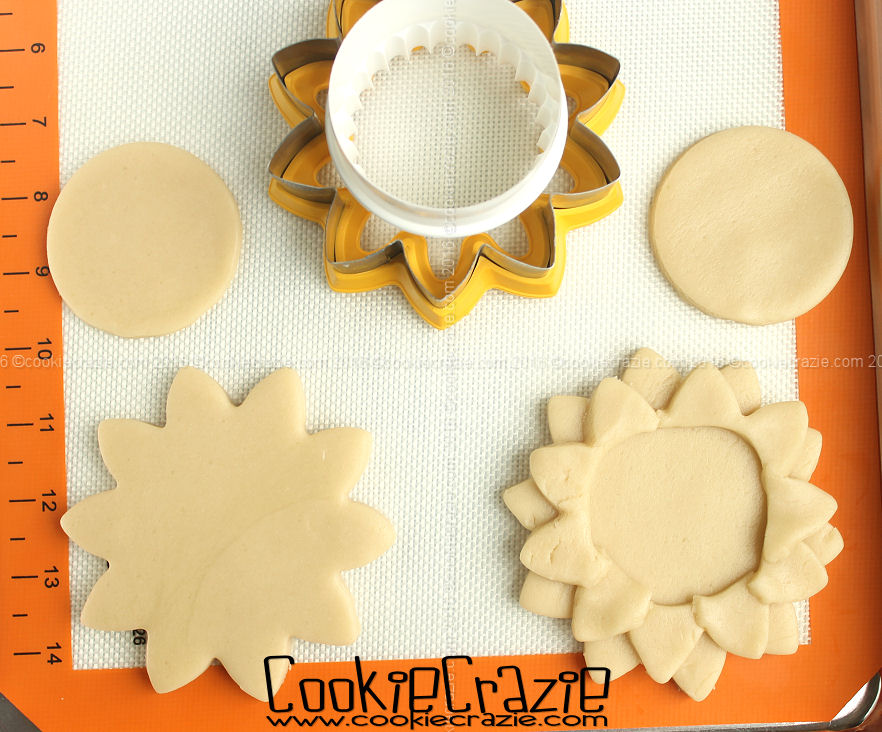
Cut out two sunflower cookie shapes and one circle cookie that will fit over the top as the center.
To the second sunflower cut-out, remove the center dough with a round cutter.
(see photo below)
Using a pancake turner, carefully move the extra sunflower petals to the first sunflower cookie. Lay the petals so they are alternating with the bottom base petal positions. Bake and cool the cookies as usual.
Outline and flood all of the petals with gold glaze.

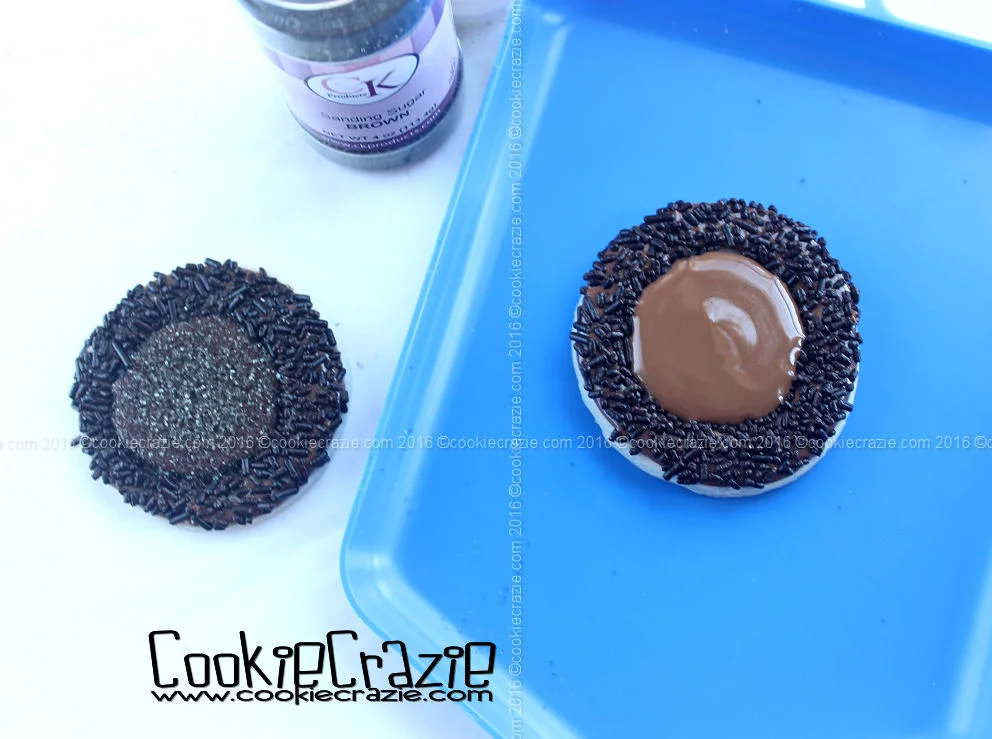
Make a thick outline on the circle cookie with dark brown glaze.
(see photo below)
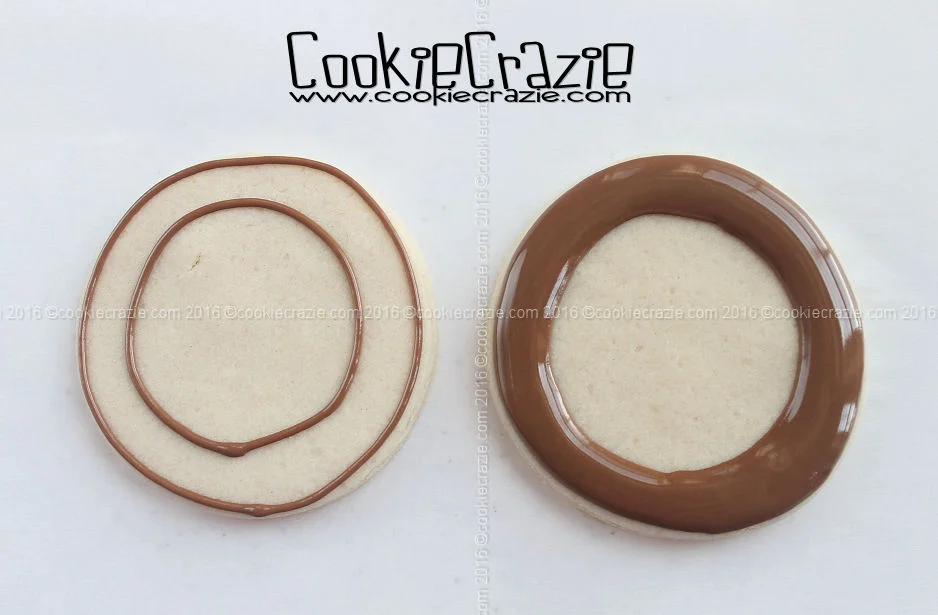
Immediately cover it with chocolate jimmies and shake off the excess.

Allow the circle cookie to sit for at least 15 minutes. Fill the inner circle with medium brown glaze. Cover it with brown sanding sugar and shake off the excess.
Lay the round center on top of the sunflower petal cookie. If desired, you can "glue" the two together with some extra icing.

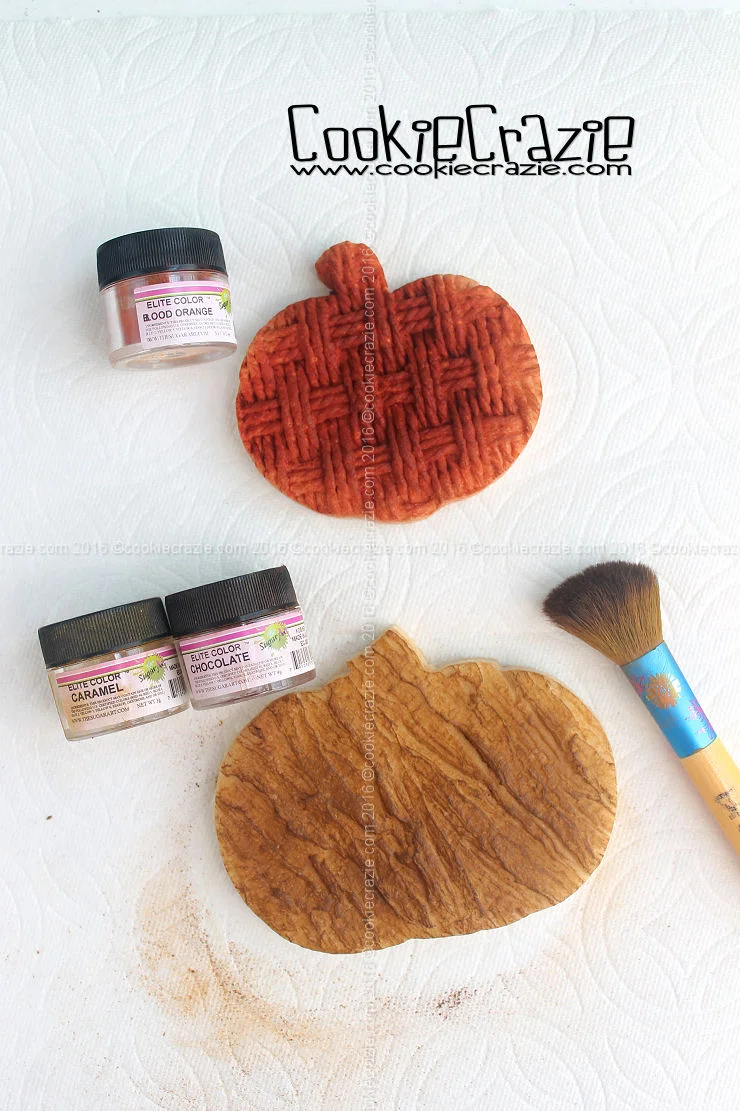
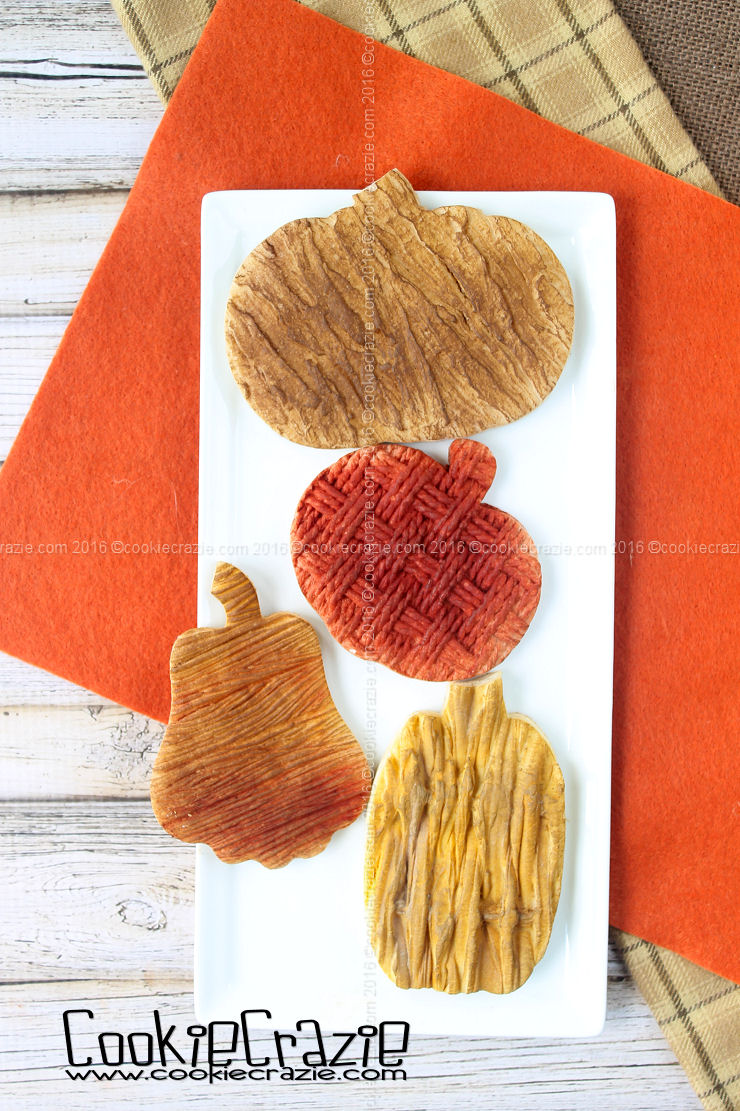
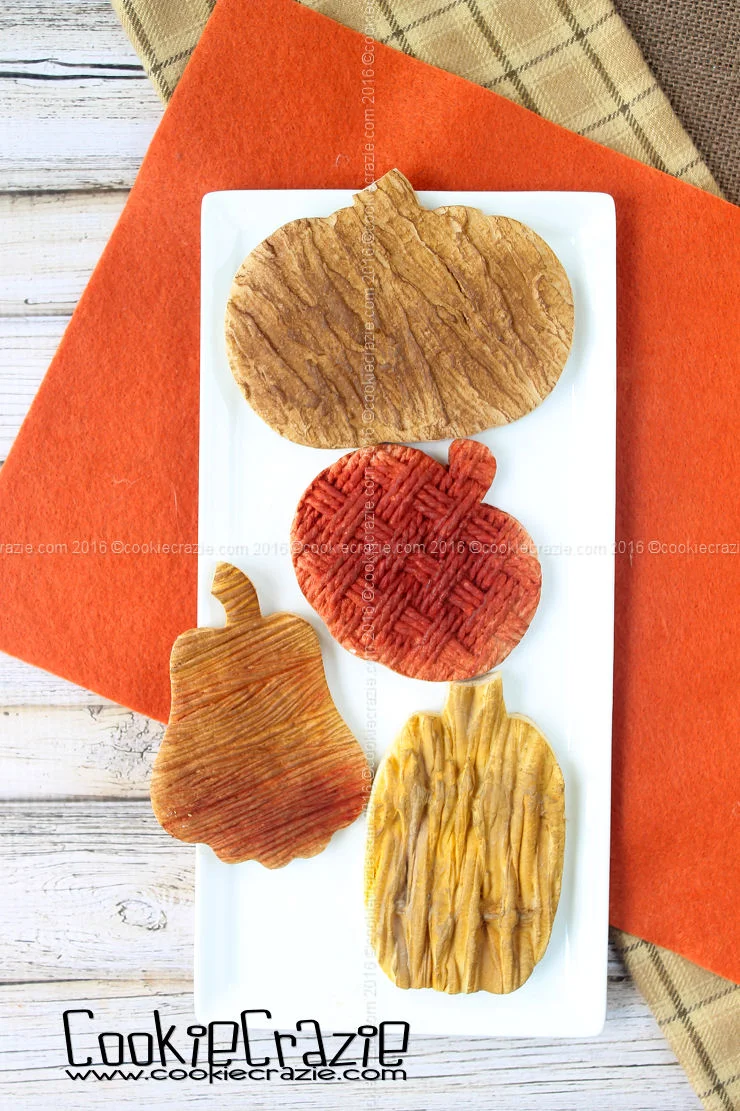
Textured Pumpkin Decorated Cookies (Tutorial)

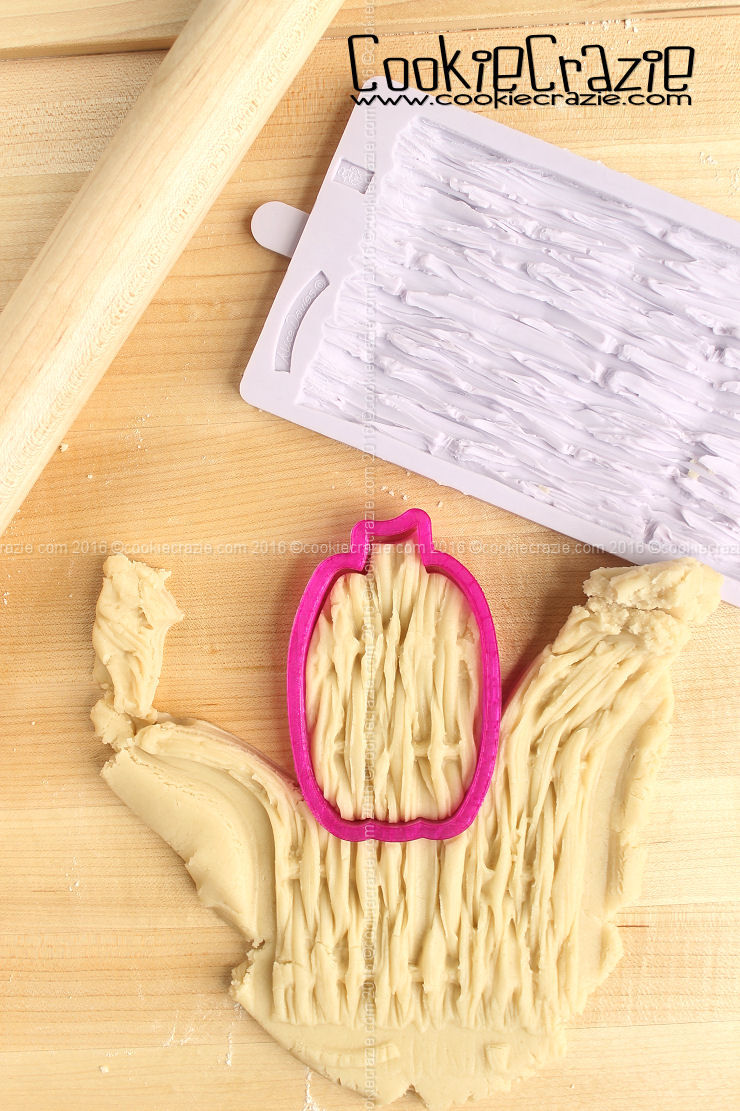
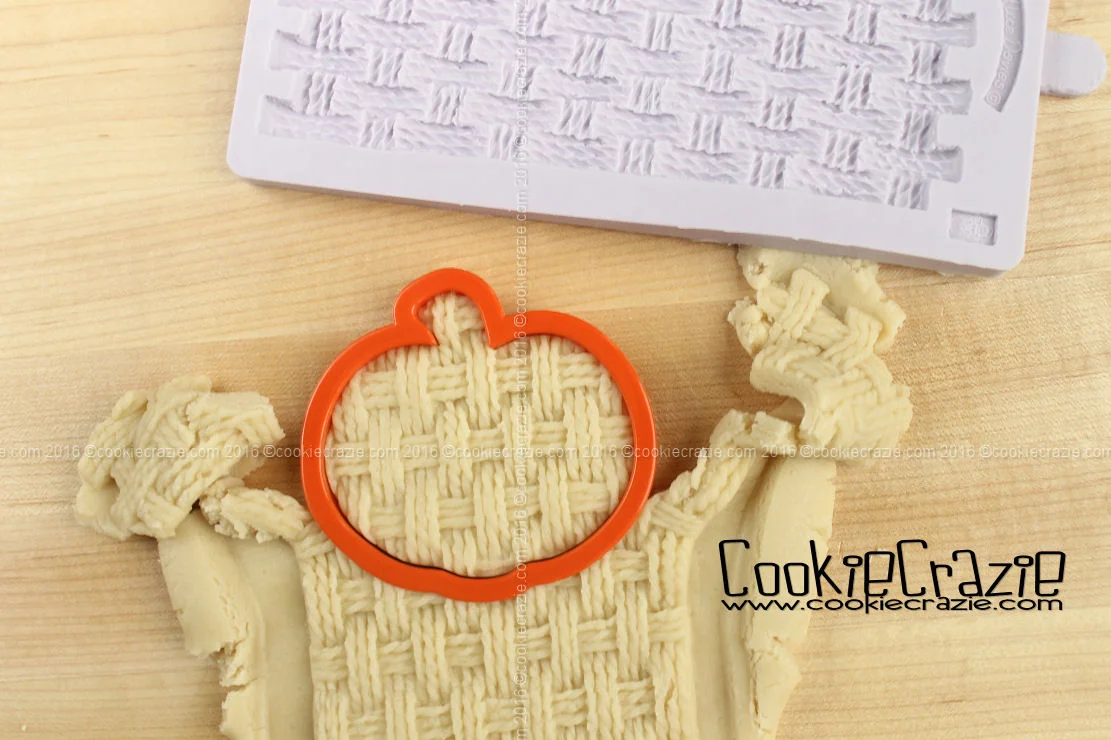
Here's some super easy textured pumpkin cookies that look fairly realistic.
The dough was rolled onto texture mats and then the shapes were cut out. Try some of these fantastic molds:
Once the cookies are baked and cooled, brush on some dry color dust. Here's the dust colors I used for these cookies:
- Sunflower
- Caramel (my favorite)
- Blood Orange
- Chocolate