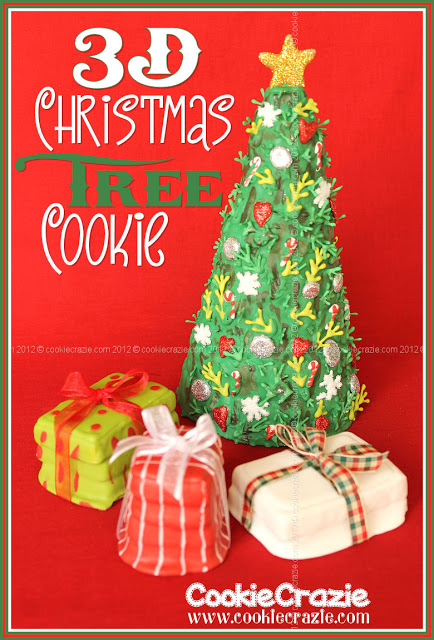
To make a 3D Christmas tree cookie you will need:
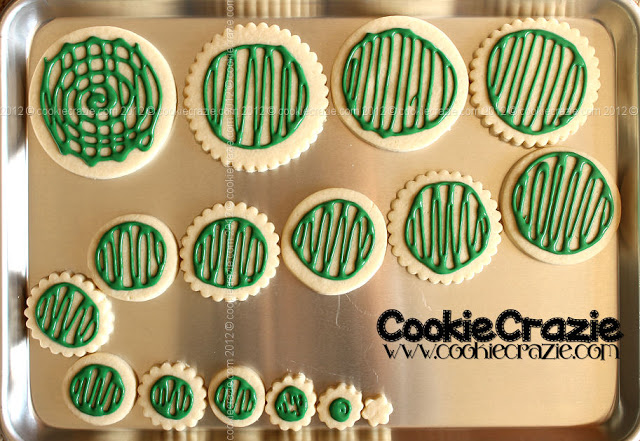
- Circle Cookies in graduated sizes (see below)
- Green 10-Second Glaze
- Gold 10-Second Glaze
- White 10-Secod Glaze
- Red 10-Second Glaze
- Silver (Grey) 10-Second Glaze
- Parchment Paper
- White Sanding Sugar
- Red Disco Dust
- Silver Disco Dust
- Gold Disco Dust
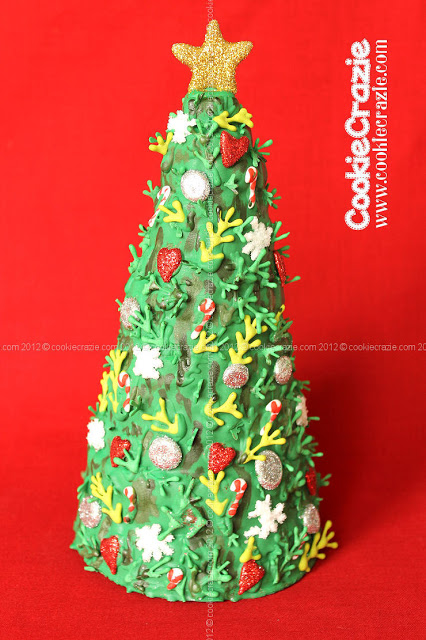
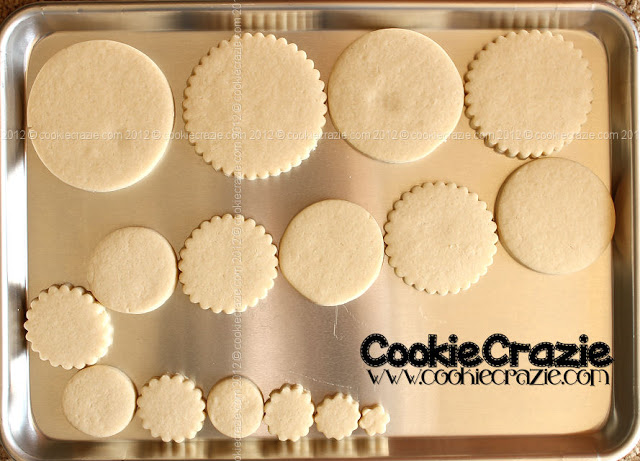
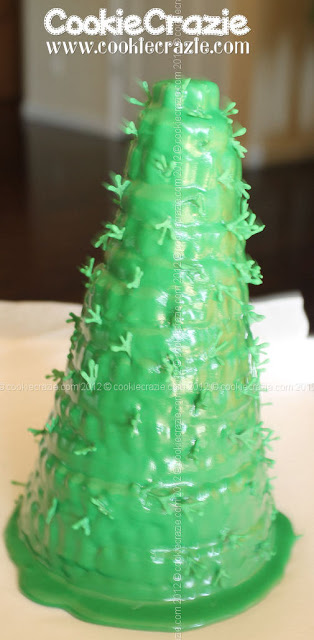
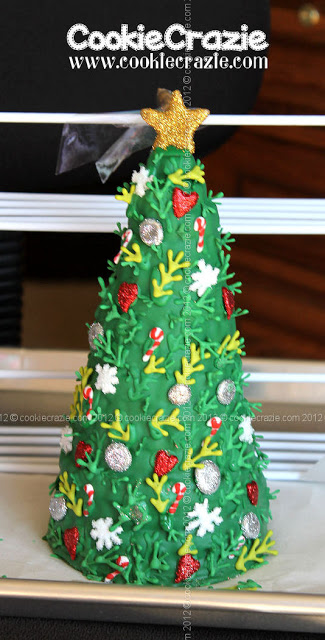
Decide how tall you'd like your tree to stand.
The one pictured above is about 12" tall.
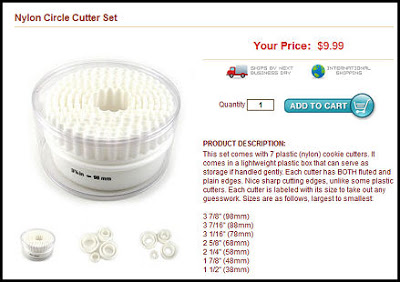
I used all of the round and fluted cutters from this set with a few added
mini fluted circles for the very top.....a total of 16 cookies.
On "baking day", also plan to make glaze icing transfers in preparation for "decorating day".
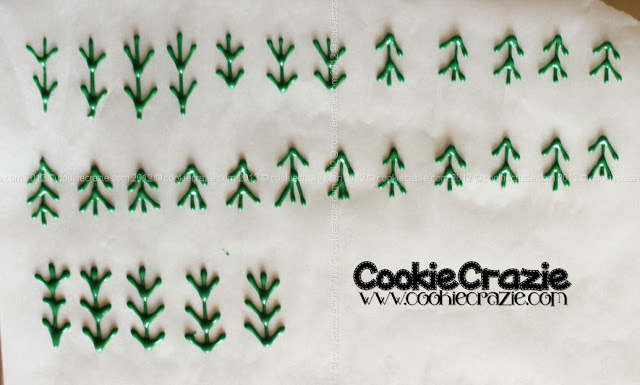
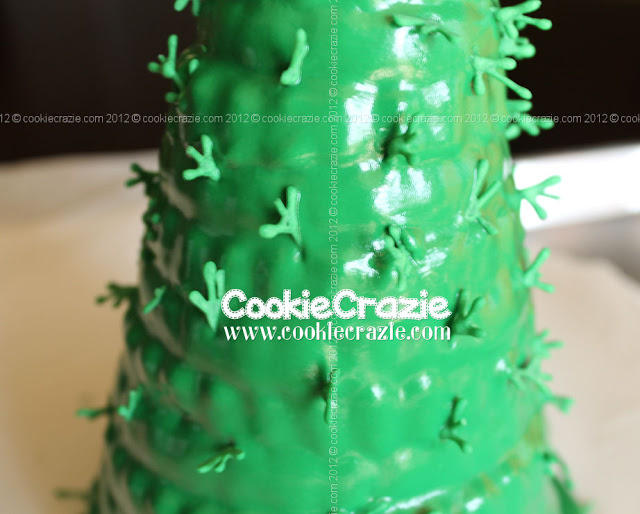
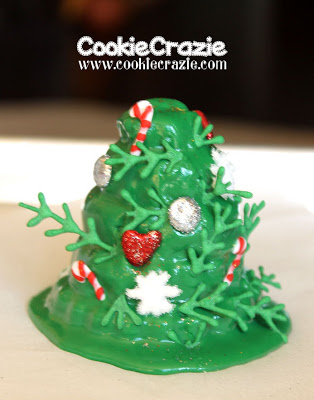
First I made some tree branches to add dimension to the tree itself.
Simply pipe green branches onto parchment paper and allow to dry overnight.
Let your imagination run with the ornament transfers.
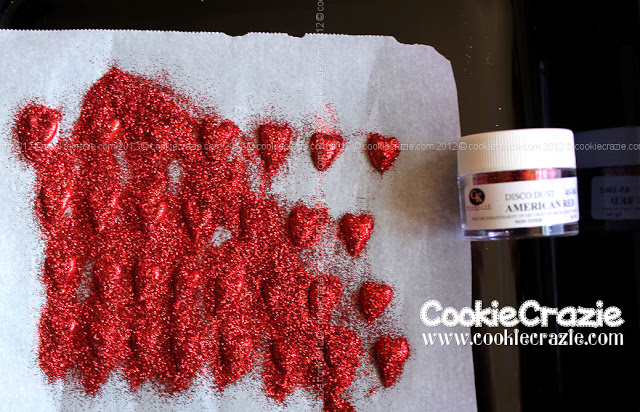
If you use disco dust.....prepare for a mess......and sparkly decor in your house for days!
For mine I made.......
red hearts with red disco dust sprinkled over them...
Silver (grey) round ornaments with silver disco dust....

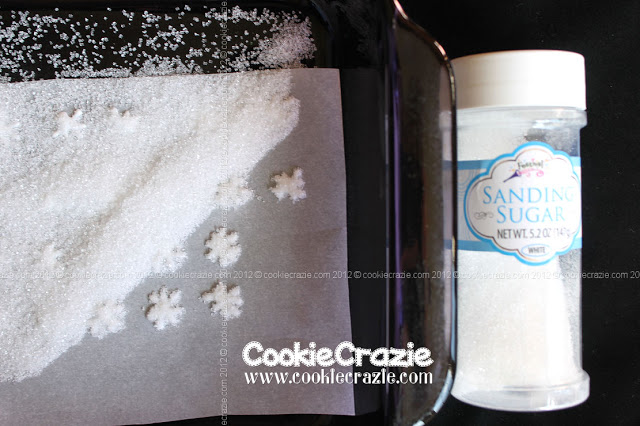
Snowflakes with white sanding sugar.....
and candy canes with white glaze and red stripes added while the white was still wet.

I failed to take photos of the stars I made for the tops of the trees.
I used gold disco dust on them.......the same method used to create the hearts and silver ornaments.
Allow all of these to dry overnight on the parchment paper.
The next day you can remove them easily.
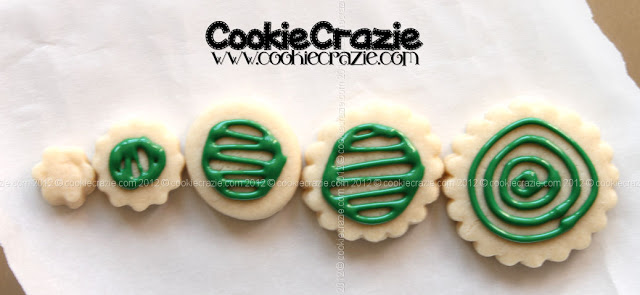
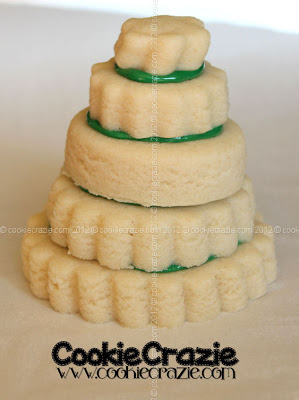
On decorating day, assemble your circles in the order you will glue them with green glaze.
Add glaze and let the assembly begin! :)

Starting at the top, cover the entire tree with green glaze.

Push the branch icing transfers into the wet icing.
Add your ornaments all over the tree.
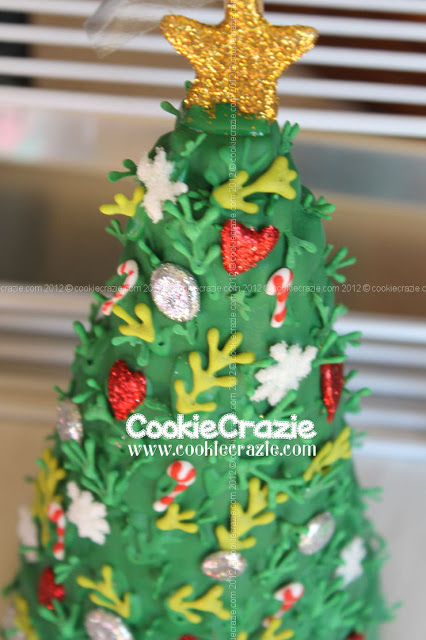
And for the grand finale.....add the sparkly golden star to the top.
To get the star to dry in place, I taped a stick to my shelf rack at the right height
behind the star to keep it from falling off the tree (see photo).
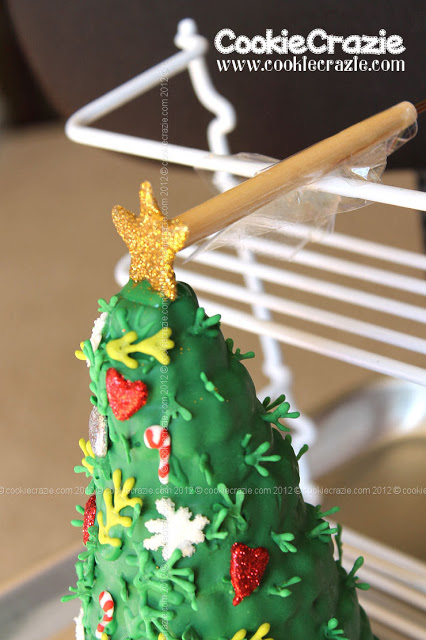
Allow the tree to dry overnight before moving it.
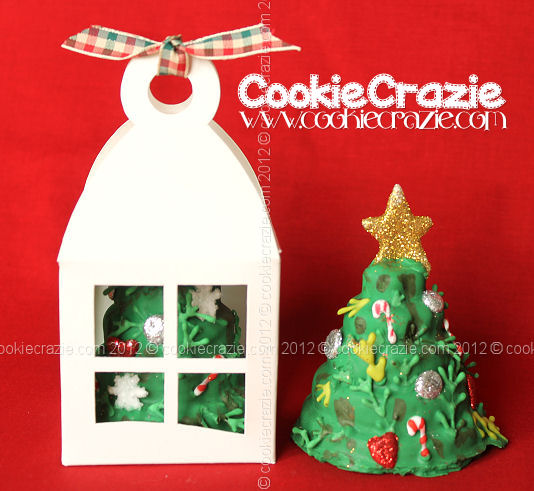
If you'd like to make a small version of this tree,
(one that will fit in the new BRP ornament boxes.....)
you do everything the same as above, but on a much smaller scale.
(I used two tiny mini fluted circles plus the three smallest cutters in the set above.)


Unfortunately, the cute gold star makes the tree too tall for the BRP box
so you'll have to leave it off if you're using the boxes....or make it much smaller.
It's a challenging cookie project......
but well worth the oooos.....and ahhhhs you'll hear when they see this tree on display as a centerpiece,
or receive the mini tree in that cute little box. :)