
In the same vein as the Cookie Nests,
let's build some cookie Easter baskets. :)


To make a cookie basket, you will need:
- several custom cut round cookies (see below)
- handle cookie
- 10 second glaze in your choice basket color
- parchment paper
- some kind of "drying rack" to hold handle in place
- a little bit of patience...ummm make that LOTS ;)
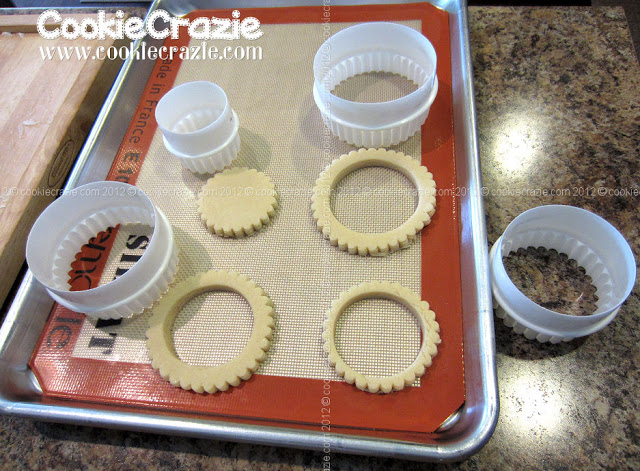
I highly recommend a set of these
round cutters for this project.
You'll need to cut 4 round cookies.
I used the largest four circles in my set.
3 7/8" (98mm)
3 7/16" (88mm),
3 1/16" (78mm)
2 5/8" (68mm)
It is totally up to you how big you make the
circles which will determine the size of your basket.
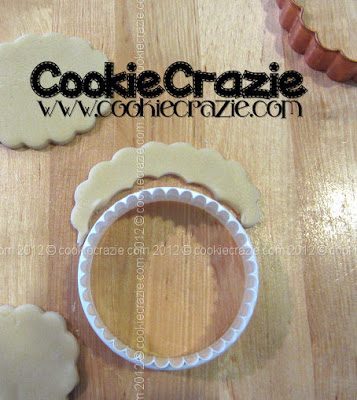
Start out much the same as with the nest.
Bake up graduated circles or ovals.
This photo shows the nest's fluted circles.
For the baskets, I used plain circles, not fluted.
Your choice.....
Cut out the middle of all of them
EXCEPT the base (the smallest one).
For the basket handle, cut out an oval,
turn the cutter to cut out most of the center.
What is left will be the handle.
I pushed the sides apart before baking (photo on rt).

Measure the handle with your largest circle/oval cutter
to make sure it will stretch across the entire basket.

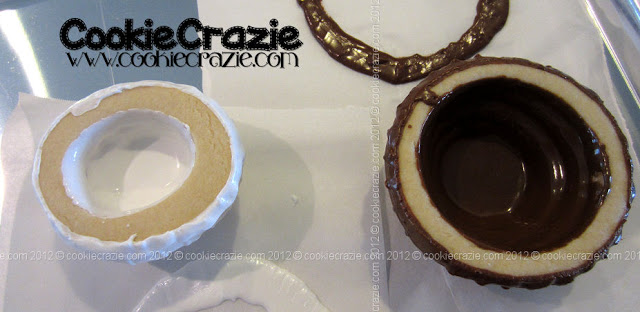
Stack the cookies as a basket.....

then turn it upside down and
start adding icing to the inner rim of each cut-out circle.

Carefully place them one on top of the next
to build the basket.
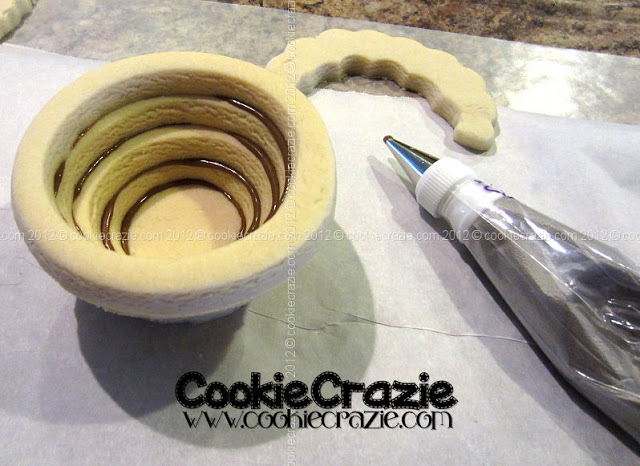
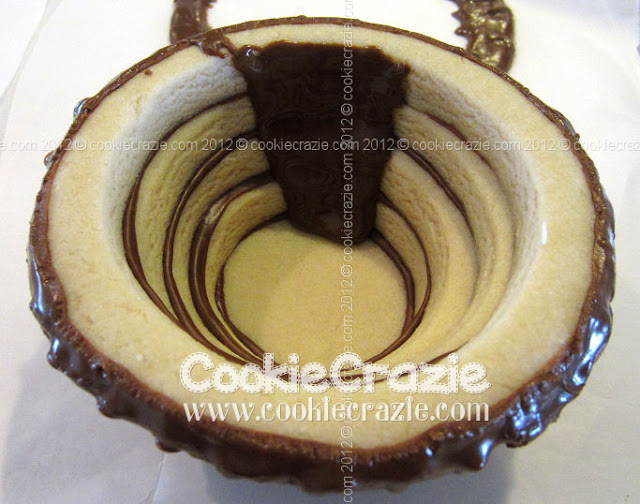
Turn your basket upside down.....
and start adding icing from the "top" down.
and start adding icing from the "top" down.

Once covered, let it dry for a couple of hours.

Meanwhile, you can work on the handles
so they can be drying too.
so they can be drying too.
Cover the "backside" of the handle
(sides and all)
and let it dry for a couple of hours.
(sides and all)
and let it dry for a couple of hours.

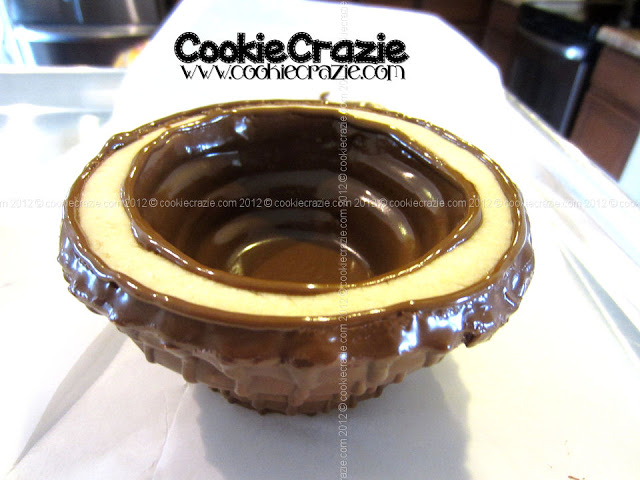
Back to the basket.....
Start at the top (actually bottom) of the basket,
add vertical lines all the way around.

Let it dry for another hour or two.

Once the basket is good and dry,
turn it upright.
Allow it to dry a bit that way
since the rim will still be rather wet.

Turn the handles over
and outline and flood the "front" side.

Allow them to dry for 30 minutes or more.,
then add vertical lines
to the front side.
then add vertical lines
to the front side.

Allow to dry while you finish the basket.
Start at the top rim of the basket
and fill the inside.
Allow it to dry for 20-30 minutes
and then outline and flood the top rim.
Once the rim has dried for about 30 minutes,
add some cross lines around the rim.

Once everything is fairly dry,
it is time for assembly.
Add a patch of icing to each side of the rim
where you want the handle to attach to the basket.
(see the arrows in the first photo)
Set the handle on the wet icing
and allow the makeshift "drying rack"
to hold the handle in place to dry overnight.

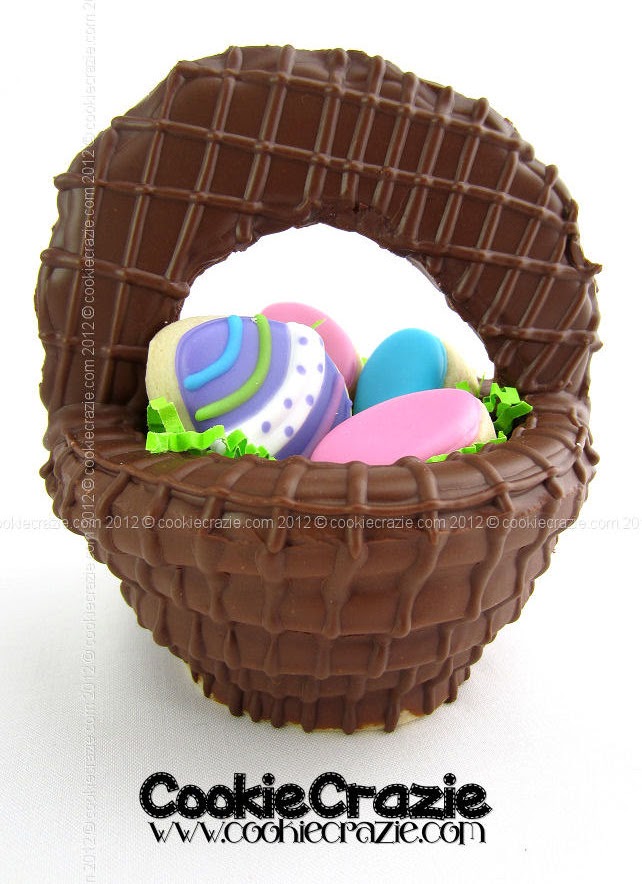
And FINALLY......
you have a cute little basket to fill
with whatever your little heart desires. :)


Wow...this tutorial wore me out.
I'm not sure I'll continue to do
tutorials on such complex projects. lol
To build a cookie nest, go here.
So much to show you this next week!
Get ready... :)