
I would think that birds like these....

build COOKIE nests, wouldn't you?
Better yet..... WE could build one for our
cute little birdie and egg cookies. :)

To build a cookie nest, you'll need:
- several custom cut round fluted cookies (see below)
- dark brown 10 second glaze (a larger amount)
- light brown 10 second glaze
- medium brown 10 second glaze
- parchment paper
- a little bit of patience...ummm make that LOTS ;)
I highly recommend a set of these
round cutters for this project.
You'll need to cut 4 fluted round cookies.
I used the largest four fluted circles in my set.
3 7/8" (98mm)
3 7/16" (88mm),
3 1/16" (78mm)
2 5/8" (68mm
(It is totally up to you how big you
make the circles which will determine
the size of your nest.)
Oh....and you don't have to use fluted cutters.
Plain circles will work fine.
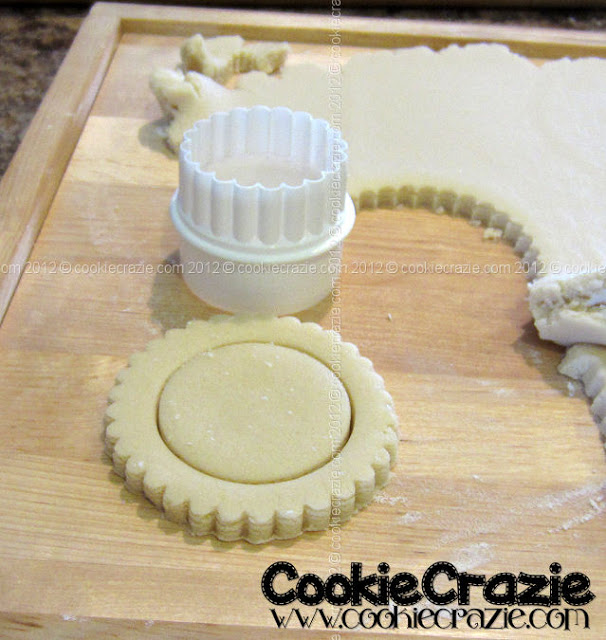
The base of the nest will be the smallest circle.
Don't cut a hole in the middle of that cookie!
With the other 3 cookies,
cut a hole with a round cutter smaller than it.
I found that the size just below it
usually made the cookie rim too thin.
so you might have to go down two sizes
for cutting out the center circles.
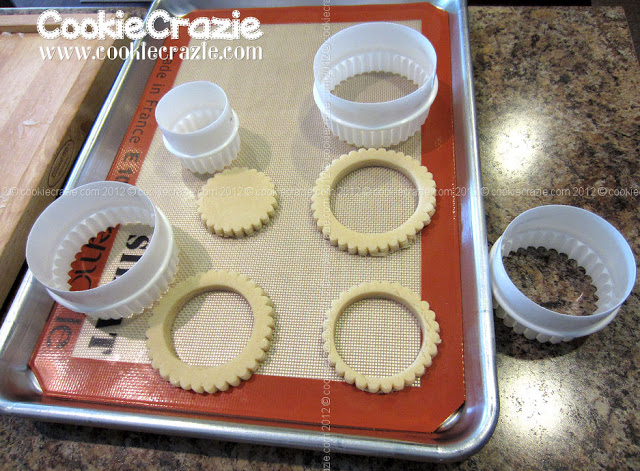
When you're finished cutting,
you should have four graduated circle cookies
with the largest three having a
hole cut out of the center.
Once you've baked them
and have the brown glaze prepared,
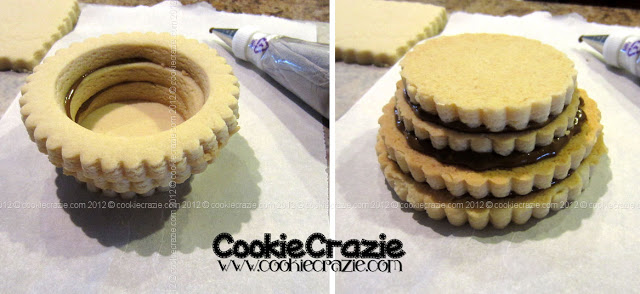
stack the cookies like a nest
on a piece of parchment paper.
Then turn the stack upside down
to start building. :)
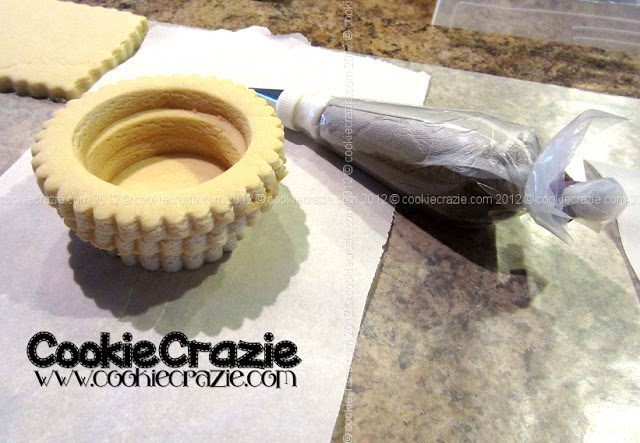
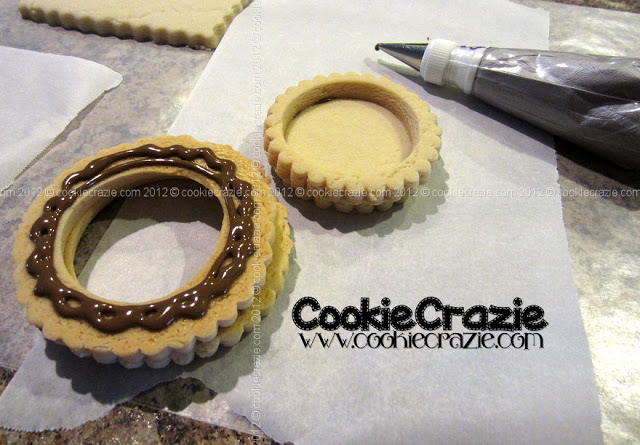
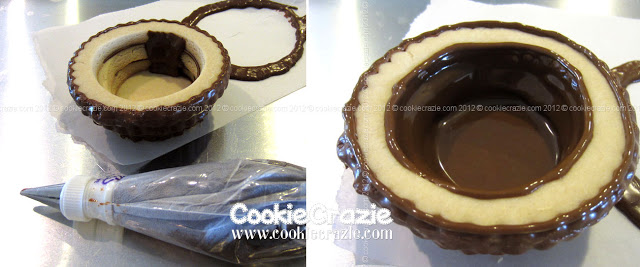
Place your base whole cookie upright,
and add dark brown icing (#4 round tip)
to the inner edge of
next cookie. (see photo below)
Turn it right side up and place it carefully
on top of the base.
Repeat with the
final two cookie "rims"
until you've built your entire nest.
Isn't it cute?!
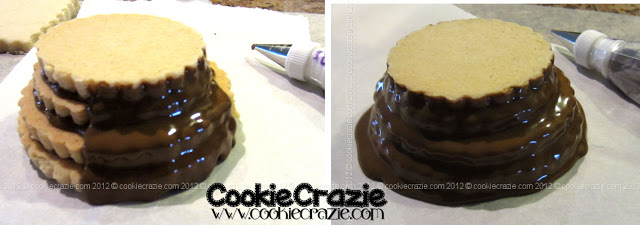
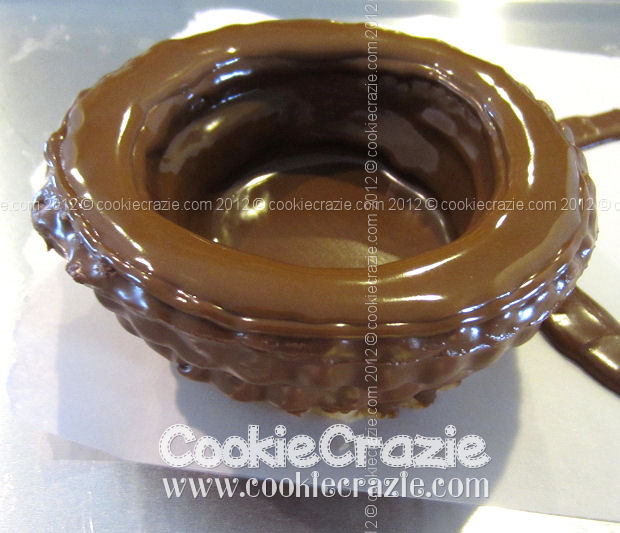
Now turn the built nest
upside down.
This is where it gets a little messy!
Start at the top
(actually it is the bottom of the nest)
and work your way down,
covering all the sides with
dark brown glaze.
Try not to get any glaze on the top
(actually the bottom of the nest)
to keep it nice and flat
when you set it upright.
It's OK if glaze flows down around the rim.
That icing will not remain when
you turn the nest upright.
After you've let the sides dry for a
couple hours (hence needed patience)....
turn your nest upright.
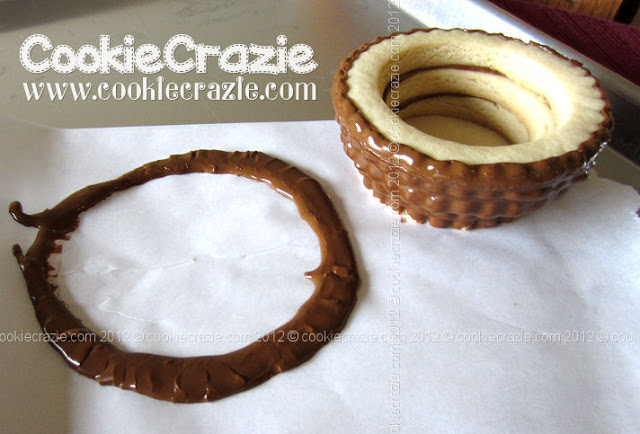
Give the nest more drying time
since that top rim will be very wet
when you turn it over.
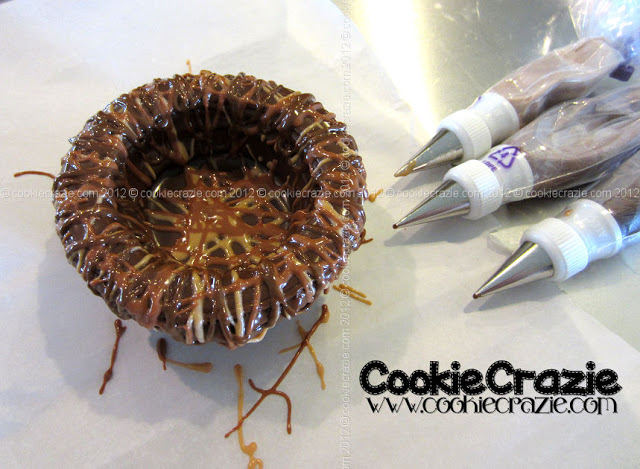
Start filling the inside of the nest with glaze.
Again, work from top to bottom
on the sides.
Fill the bottom once the sides are complete.
(You'll already have lots of glaze
on the bottom and will only
have to add a little more to fill it in.)
Allow the inner nest some dry time...
then outline the top rims
(inside and outside).
Allow them to dry for 20-30 minutes
before flooding the top rim.
Allow another hour or so of dry time
(see what I mean about the patience!)
and then the fun part begins...
Take your three colors of brown glaze
and using #2 round tips,
add lots of lines all over the nest.....
giving it the look of twigs and
anything our birdie could find. :)
Allow your nest to dry overnight.
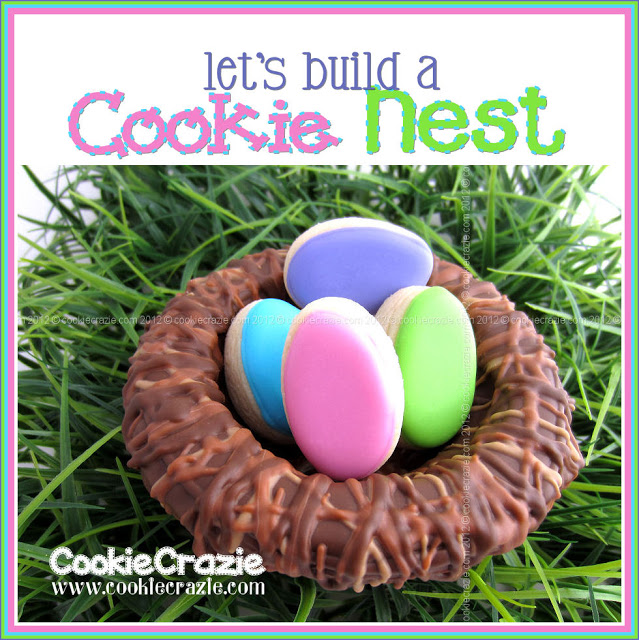
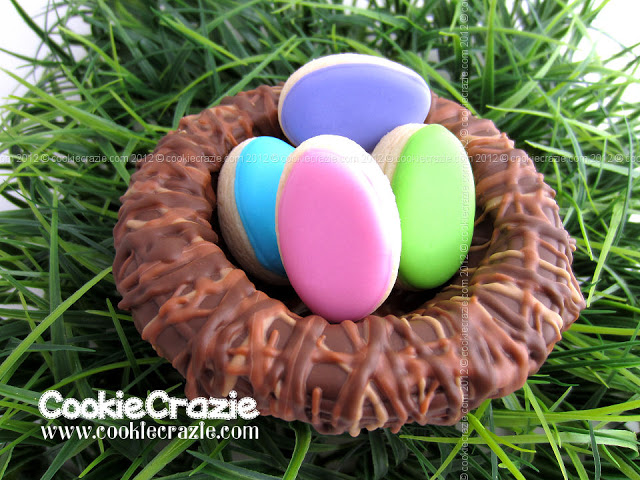
And then you will have this.....
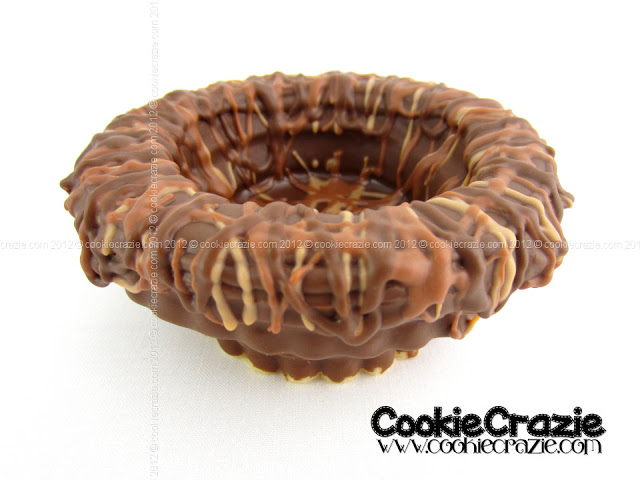
a wonderful little nest to fill with
egg cookies, candy, or whatever you wish.
Shewww.......
That was a long one.
To see more birds & nests:
My sincere thanks goes out to my dear friend Callye,
who encouraged me to make this tutorial.
You're the best-est, my sweet friend!