Tutorial

Pumpkin Patch Sign Decorated Cookies (Tutorial)

Oh how I love all the rustic styling that is so appropriate for the harvest season!
Just the thought of all the wood and "antiqued"-looking decor makes me giddy. :)

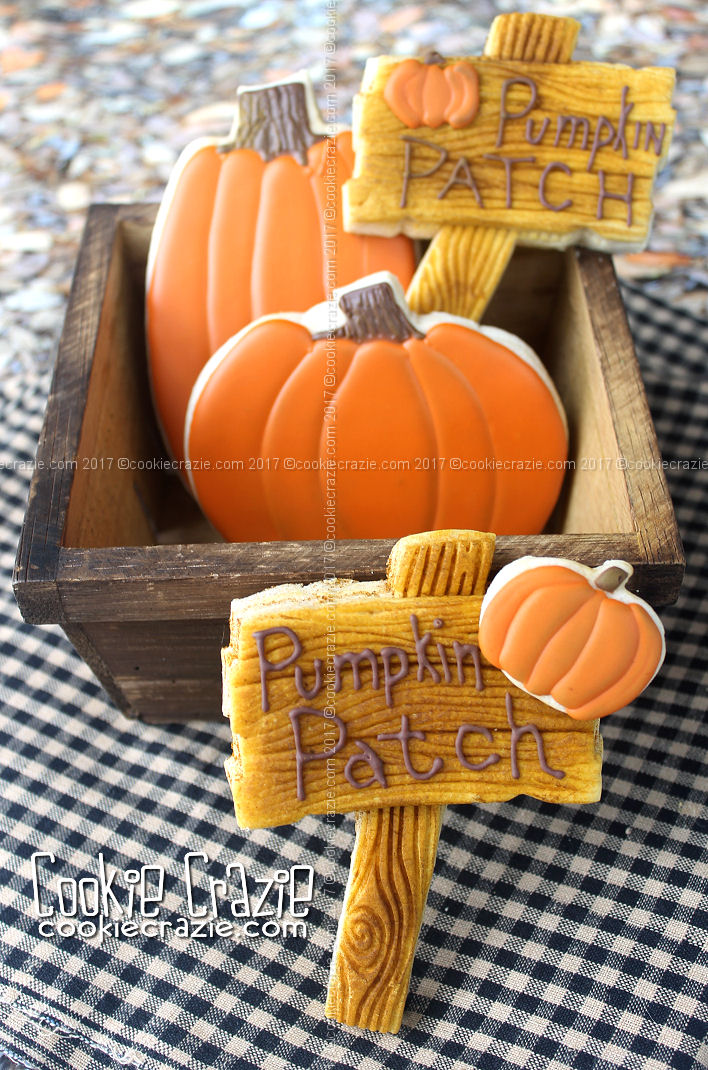
The pumpkin patch is a favorite go-to place for folks to celebrate the season.
What better location to point out on an adorable sign cookie....

I wanted to incorporate the wood grain effect into this cute sign-shaped cutter from BobbisCookiesCutters on Etsy.


As you'll see on the video, I used two different impression mats to create the wood effect.
I pushed the mat face down into the dough and rolled the rolling pin over it to make a marked impression.
For the main post I used this woodgrain mat.
For the actual rectangular sign, I used this wood panel texture mat.
You'll need to cut out the sign within each pattern, but you'll trim the second one to include only the rectangular sign, and lay it on top of the first one.
(This explanation will only make sense once you've watched the video.)

After assembling the impressed dough to make the sign, bake it and cool it.
And then it's time to brush the entire surface with dry dust. First cover it with Golden Leaf dust, and then with Caramel dust. That combination gives an authentic wood color.
(This is also shown on the video.)

You can write anything on the sign you'd like.
Adding an embellishment like the mini pumpkin cookie (or piping a small one on with glaze icing), adds some rustic charm to the sign.


Autumn Leaf Tree Decorated Cookie (Tutorial)

As I got out all my autumn cookie cutters and began to think about how to make something different this year, I notice how a plain leaf cutter could represent an autumn tree very well. 

Sadly, the cutter I used on these cookies doesn't appear to be available any longer. I've had it for many years....and even with an extensive search just now, I couldn't find it anywhere. But there are cutters available that are conducive to this design. Look for a leaf shape that has a pronounced bottom stem to serve as the "tree trunk".

Here's a set of cutters that could work well.


Refer to the video below to see the details on decorating these cookies.


Brush the surface of the cookie with some dry caramel dust to give it a nice background.

Using dark brown glaze, pipe a trunk and random branches all over the leaf shape.

Allow the glaze to dry for several hours.

Brush the entire cookie, except for the trunk portion with a thin layer of corn syrup.
Immediately sprinkle this sugar pearl fall mix by Sweets & Treats over the corn syrup and lightly push the pearls down into the sticky corn syrup.
 

A simple and lovely autumn tree in no time at all. :)


Tree Trunk Decorated Cookie (Tutorial)

For whatever reason, I always think of tree trunks and tree bark when I envision a rustic fall setting. Thankfully they are fairly easy to emulate on cookies using texture mats.

Here is where you'll find the tree trunk cutter offered by Ecrandal that I used for these cookies.

There are two varieties of tree trunk bark:

RUSTIC BROWN TREE BARK
Outline and flood the entire cookie with brown glaze.
(see video above to view the details of this tutorial)

Allow the glaze to dry for approximately 4 hours.

Using a bark texture mat, mold the partially dried glaze by pressing firmly on the mat that is laying face down over the glaze.


BIRCHWOOD TREE BARK
Cover the entire cookie shape in dry grey dust.
(see video above to view the details of this tutorial)

Paint over the gray base layer with Americolor Bright White gel.

Use a scribe, boo boo stick, or any other small instrument to carve out random dips, holes, lines, and texture all over the tree trunk.

Brush the carved out areas with dry black dust.


And there you have it......two varieties of tree trunk bark.
Simple and authentic.


Acorn Decorated Cookies (Tutorial)

Here's a fairly simple version of an acorn decorated cookie just in time for autumn.

My favorite acorn cookie cutter is found here.

Using dry caramel dust, brush it over the bottom portion of the acorn cookie.
(see photo & video below)


Outline and flood the topper on the acorn with a dark brown glaze.

Allow the glaze to dry for about 2 hours.

Using a fondant tool, press in the arcs across the topper on the acorn.
(see photo and video below)


SImple and recognizable........just like we want 'em. :)


Birthday Cake with Candles Decorated Cookie (Tutorial)

I'm sending a little birthday cake love via these cookies with wonky candles. :)
It happens to be my youngest daughter's birthday today, so this post is quite appropriate. 🎉

Using the cake/sand-castle cutter found in Sugarbelle's Shapeshifter's set, start off by outlining and flooding the bottom portion of the cookie with your choice of glaze color.
Keep it plain or add polka dots or stripes......it's your choice.

Allow it to dry for about two hours and then using the Shapeshifter's scalloped edger, press it into the "cake tier" from top to bottom to give it a wavy icing look.
(see video for placement)

Add sideways candles on the top portion of the cookie, including any polka-dots or stripes that you'd like to each candle. (I added 3 candles, but there's plenty of room to add more.)
Make a small wick above the candle and then add a flame.
For the set shown, I applied wet silver luster dust to the flames for a shiny silver color.


Brighten someone's birthday with these cute cake with candle cookies. 🎂 ❤️

 
Member Login
Welcome, (First Name)!

Forgot? Show
Log In
Enter Member Area
My Profile Not a member? Sign up. Log Out