I divided my rectangle buddie cookies into two sets......
Here's the snowmen, reindeer, and penguins...
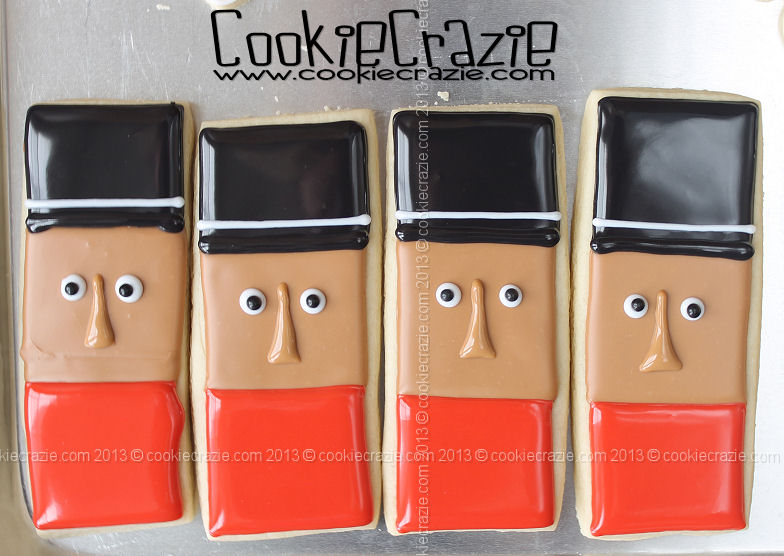
For the rectangle snowman cookies, I did a top hat snowman and a knitted cap snowman.
Outline and flood the entire cookie with white 10-second glaze.
Give it a few hours to dry since black and white tend to bleed together.
Add the top hat shape in black glaze, a knit cap in your choice color,
and the draping part of the scarf with any pattern you'd like.
At this point you can also add white circles for eyes and drop black pearls in the middle of them.
Add a white glaze carrot nose and paint it the next day (once it is dry) with orange color gel.
(I always try to keep from making extra colors of glaze that can be dealt with other ways.)
Add tiny dots of "coal" in black glaze for the smile.

Once the hat and scarf have dried a bit,
add the pom pom to the top of the hat and the hanging end of the scarf.

The next day, if desired, you can add details like pink cheeks by brushing on pink pearl dust,
and eye brows with a black food color marker.


Reindeer require outlining about 2/3 of the rectangle with brown glaze.
Add some curly antlers also in brown glaze.
Add some curly antlers also in brown glaze.

After they've dried for an hour or two,
add huge white glaze circles for the eyes and drop a black pearl in the centers.
Make the muzzle with a large brown circle under the eyes.
Drop a black or red pearl on the top part of the muzzle for a nose.

The next day, use a black food color marker to add eyebrows, mouth, and other details.


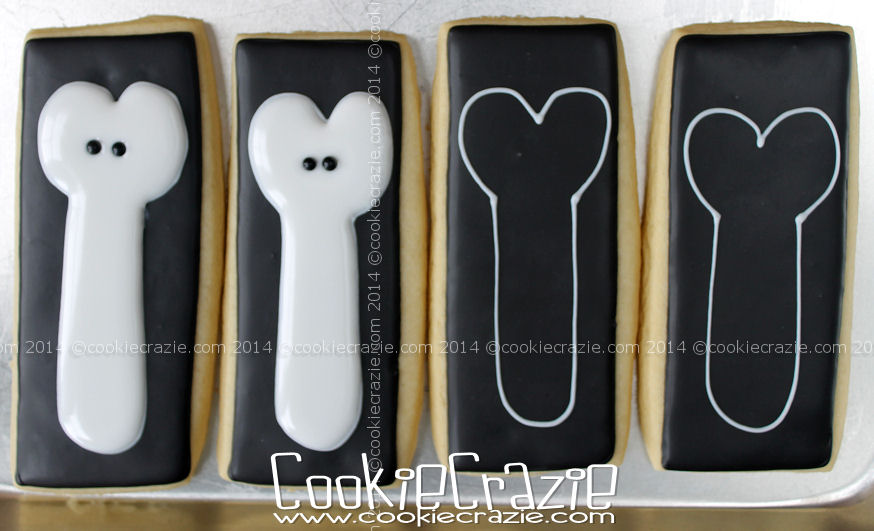
Penguins.....always a favorite!
Cover the entire rectangle with black 10-second glaze.
Because of bleeding problems, I dried mine overnight.
On Day 2, add "heart shaped" face and a long white front with white glaze.
Drop black pearls onto the white glaze for eyes.
Add brown glaze "feet".

I wanted the penguin to have a red "plaid" scarf but didn't want to mess with the bleeding issues.
So I added a white neck band and then painted it with red color gel the next day.

If desired, add some pink cheeks with pink pearl dust and a mouth with a black food color marker.


Rectangle Buddie Cookies