

There's something to be said for simplicity.
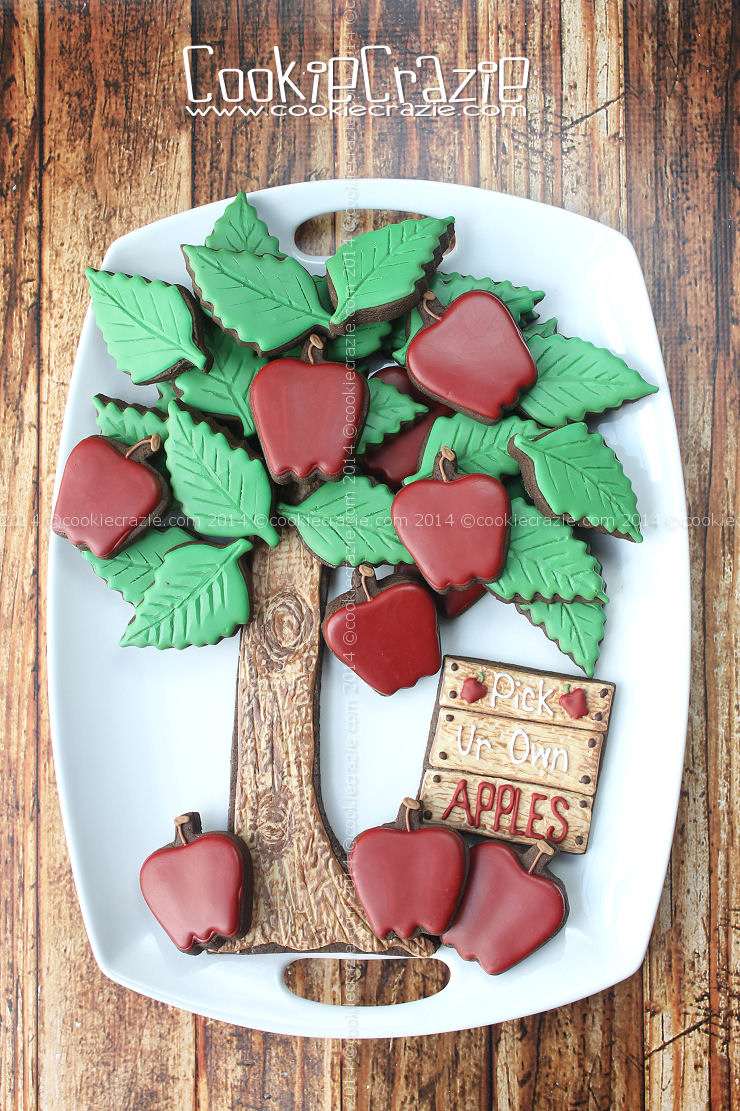
This platter is relatively simple.....but makes a big impression.
For this original cookie platter, I made a humongous tree trunk cookie.
Now that it is all said and done,
I realize how impractical it is to have a long thin gigantic cookie. :)
But alas, Ginny of Creative Cookier has made some CookieCrazie Custom Cutters for this platter.
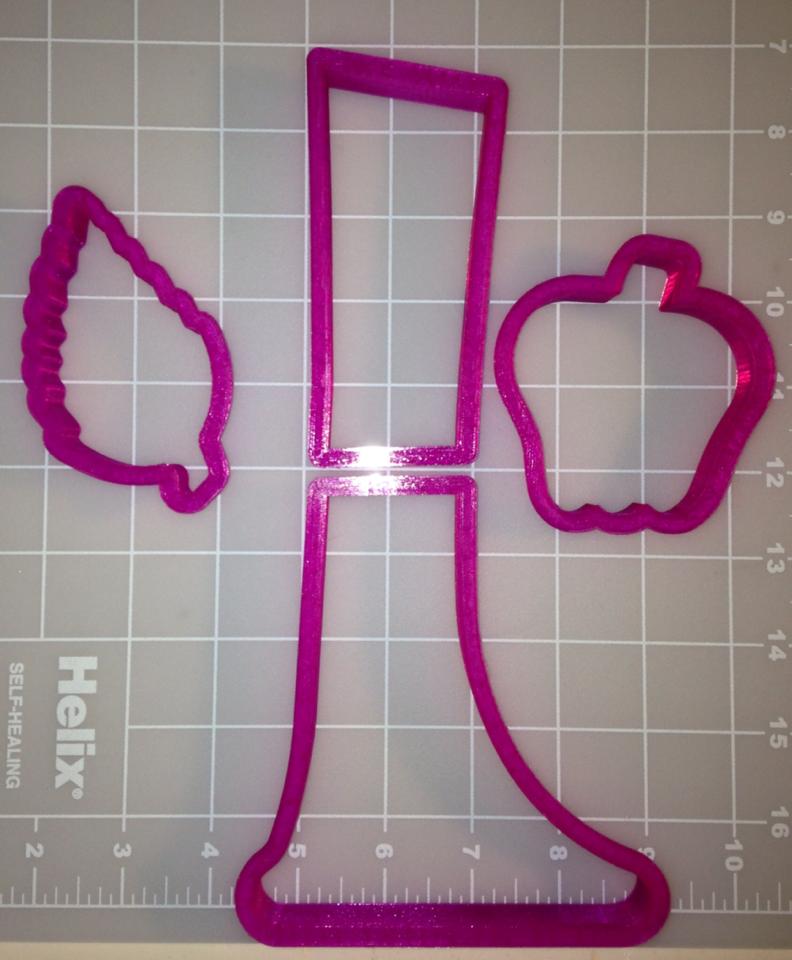
You can find the whole set HERE.
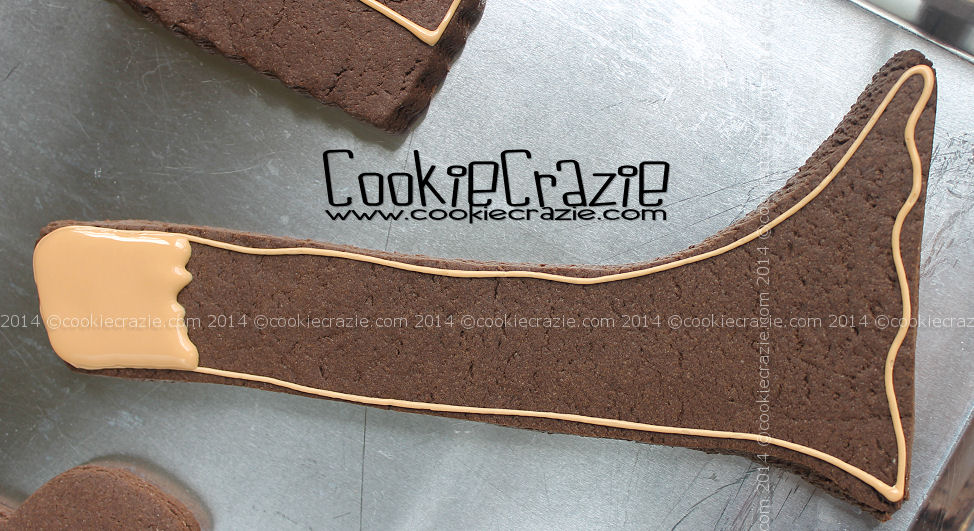
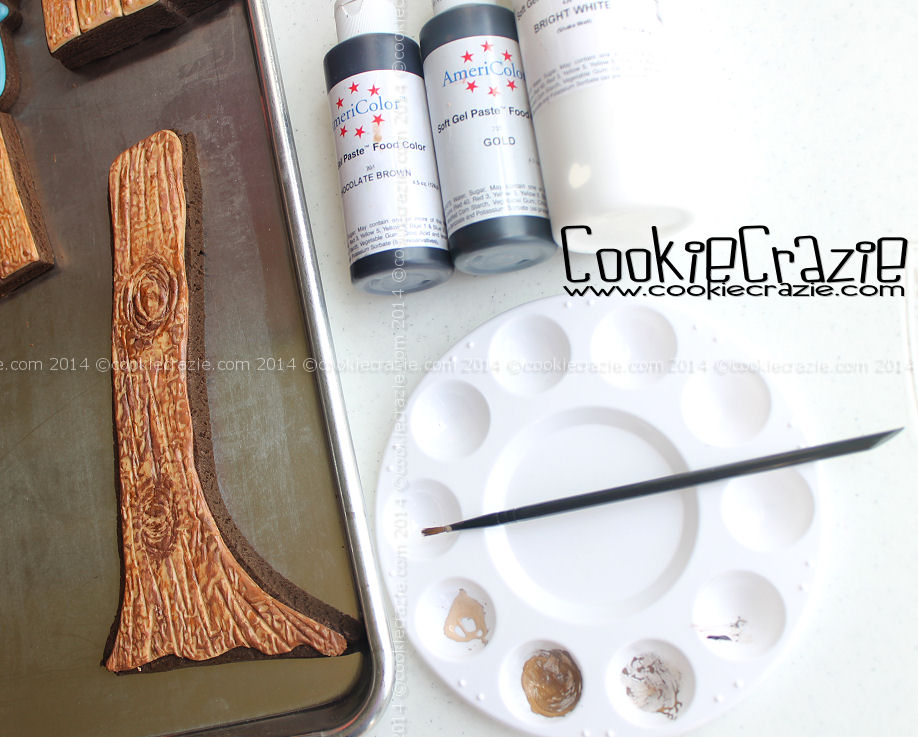
Outline and flood the tree trunk with tan glaze.
(If you use the custom cutter set, the trunk is in two pieces.)
Outline and flood the tree trunk with tan glaze.
(If you use the custom cutter set, the trunk is in two pieces.)
Allow it to dry for about 2 hours.
press texture into the tree trunk.
For vertical lines, use a cake tester.

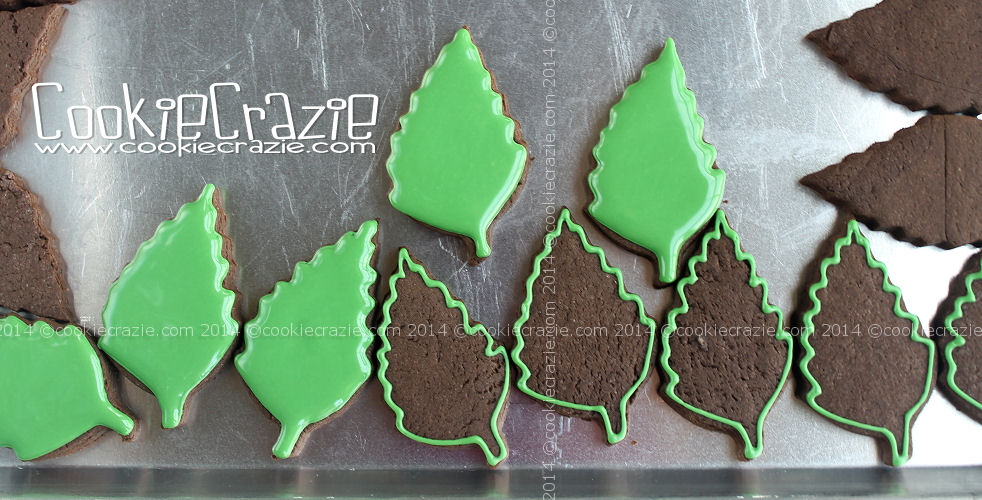
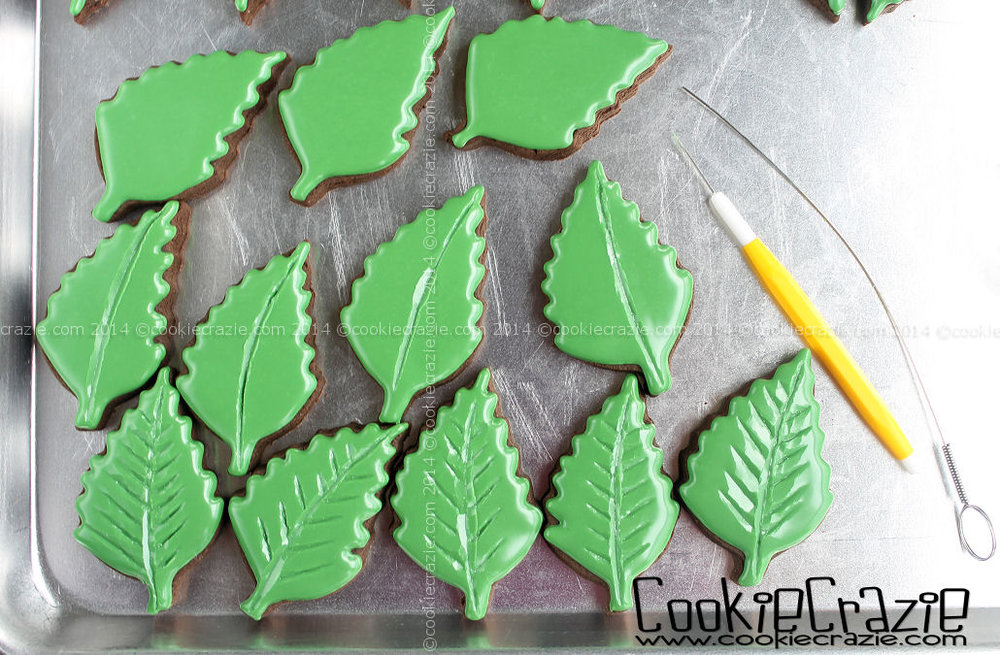
Outline and flood many leaf cookies with green glaze.
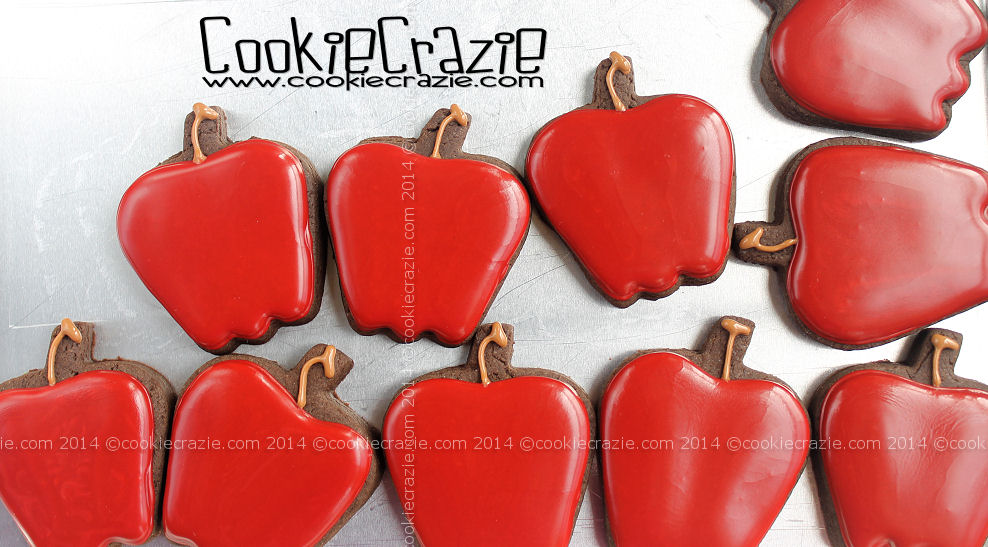
Outline and flood small apple cookies with red glaze.
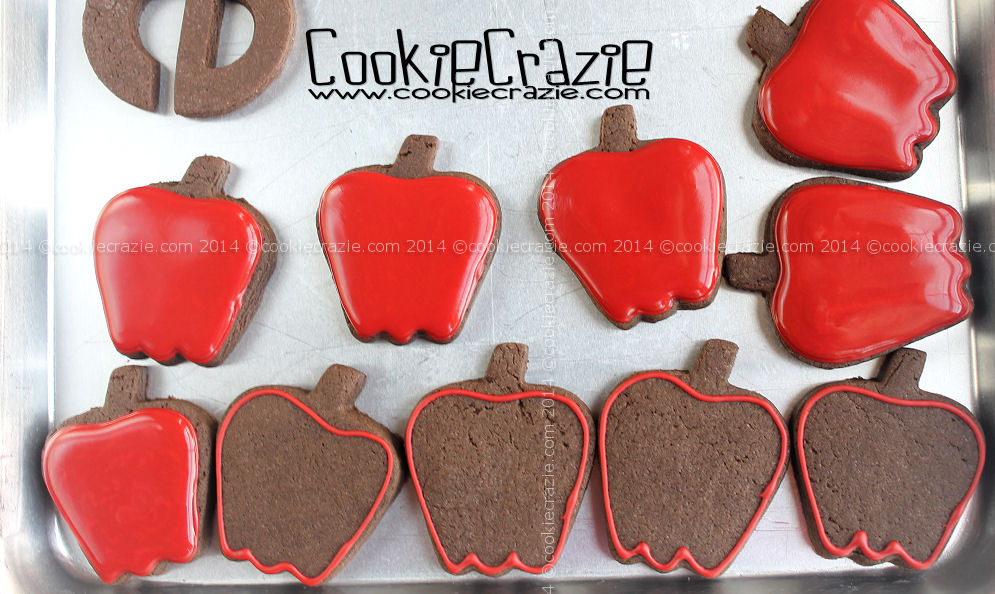
After about 1 hour, add a tan stem to the tops of the apples.
Once the leaf cookies have dried for about 2 hours,
Use a cake tester and/or a scribe to imprint vein markings in the leaves.
Allow the cookies to dry overnight.
Randomly paint it on the tree trunk.
Using a long rectangle-shaped platter, position the trunk, apple and leaf cookies.
2014 Apple Cookies Collection