simple

Harvest Neon Sign Decorated Cookies

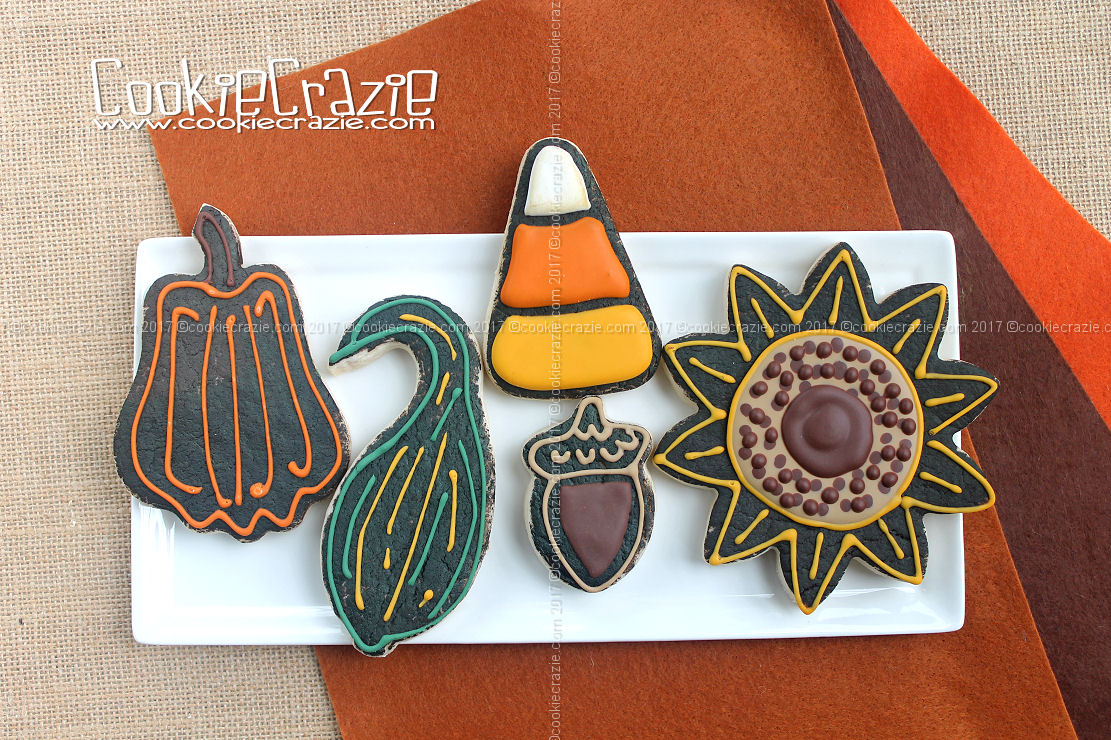
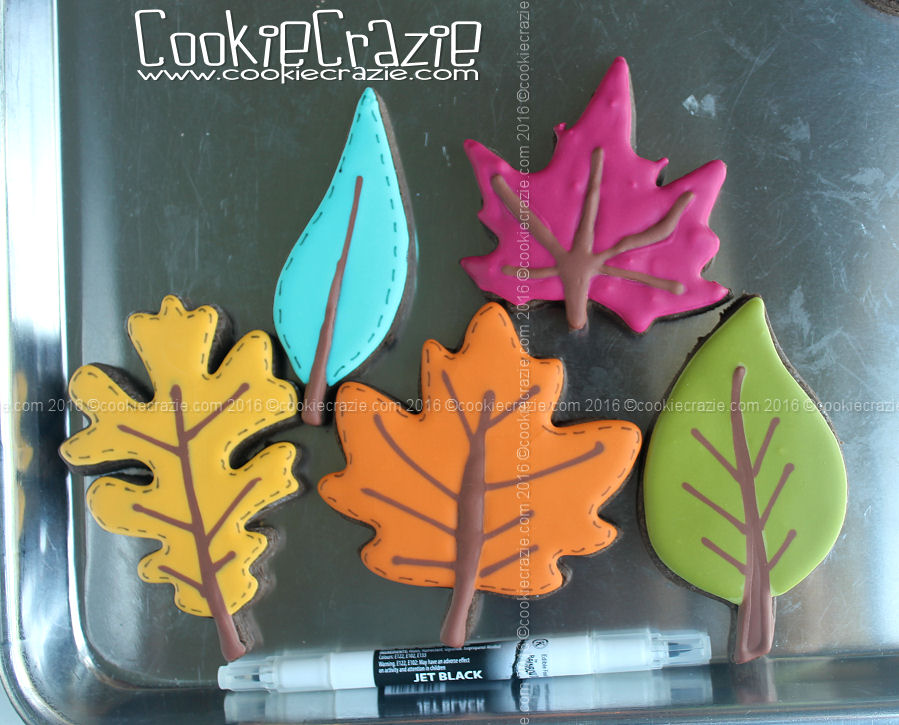
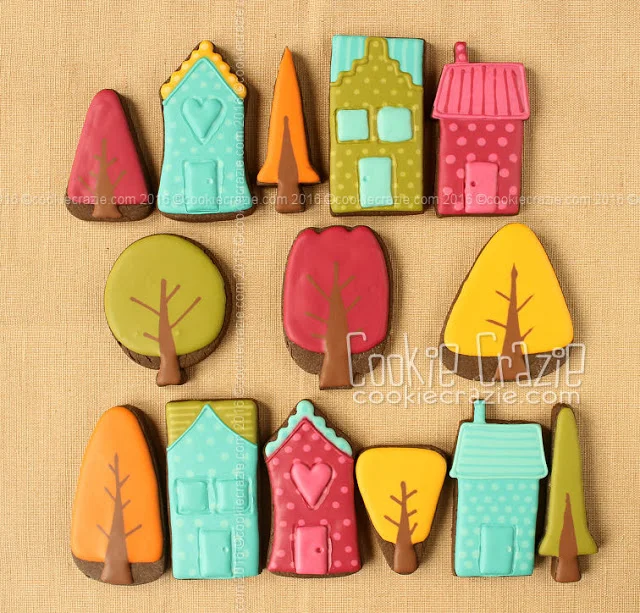
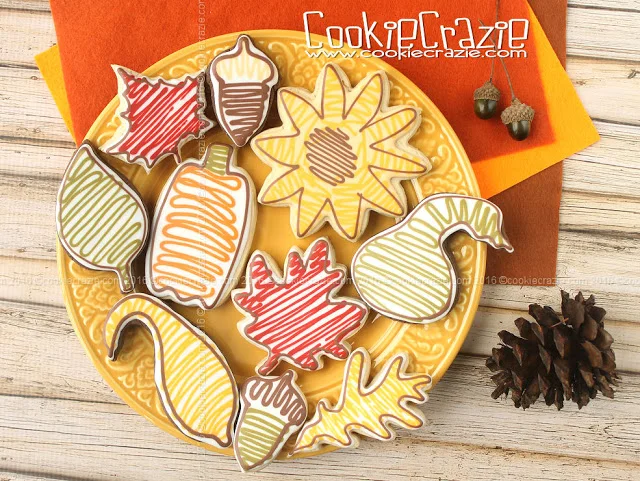
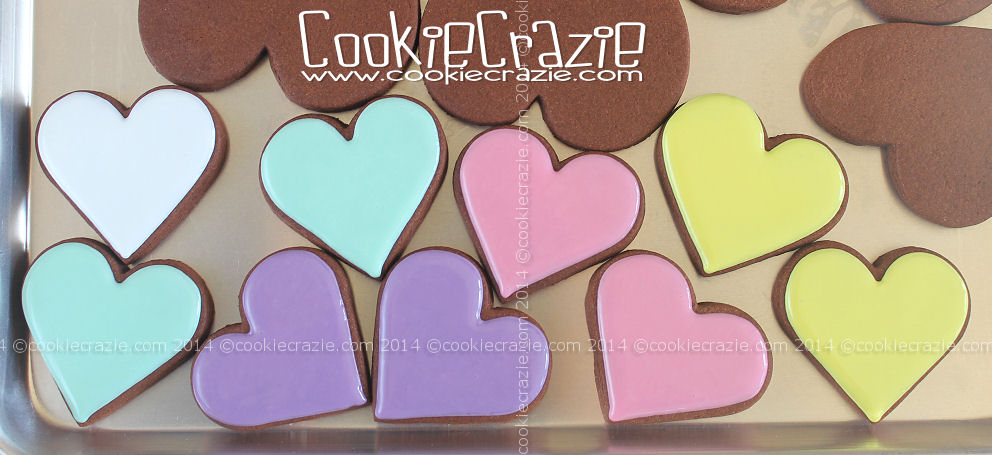
I just can't get enough of this "neon-sign-style" cookie that all started with the coffee-related cookie set shown below.....


Here's the tutorial post I did on this particular technique.

Apparently I'm going to have to do every season, holiday, and event in this decorating style over the entire year. haha

The best part about it is that it's super simple and the outlines pop against the dark background.

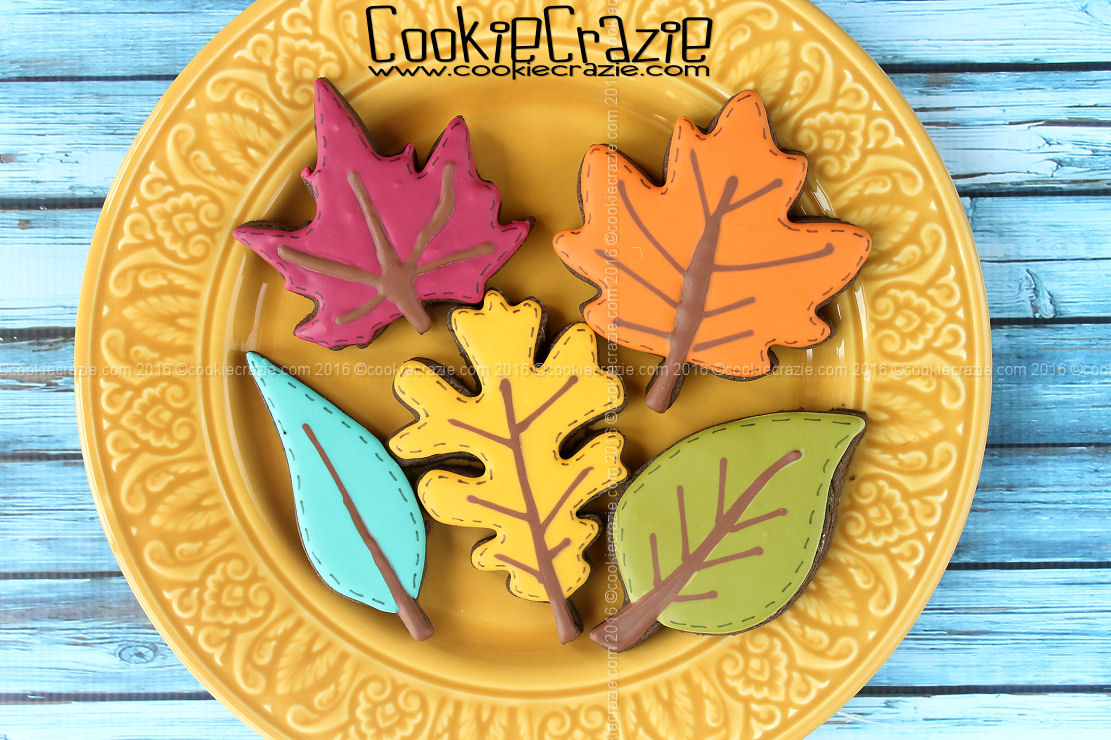
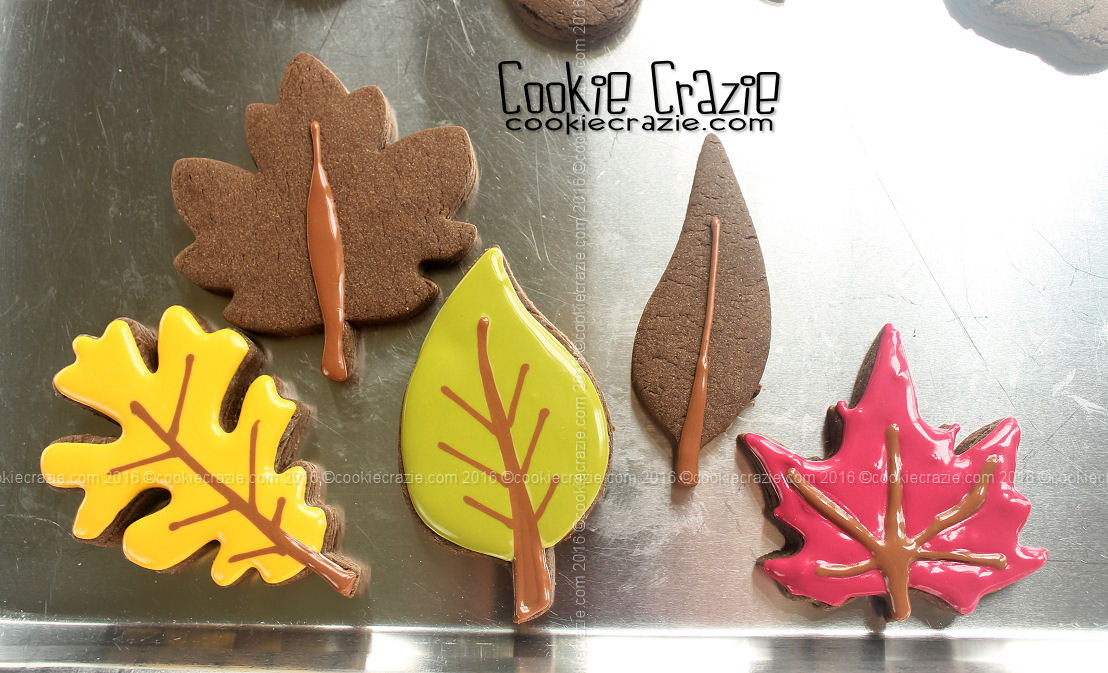
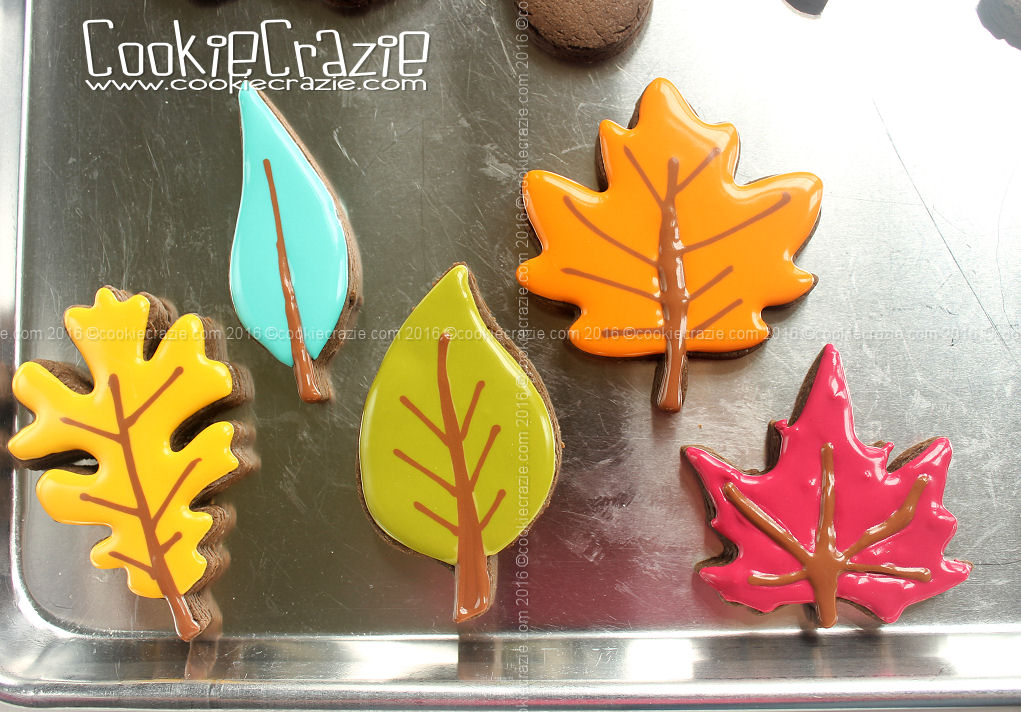
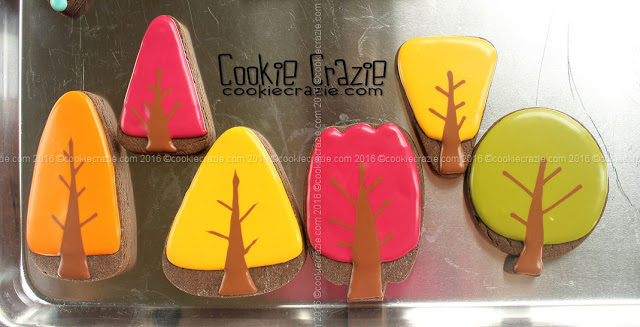
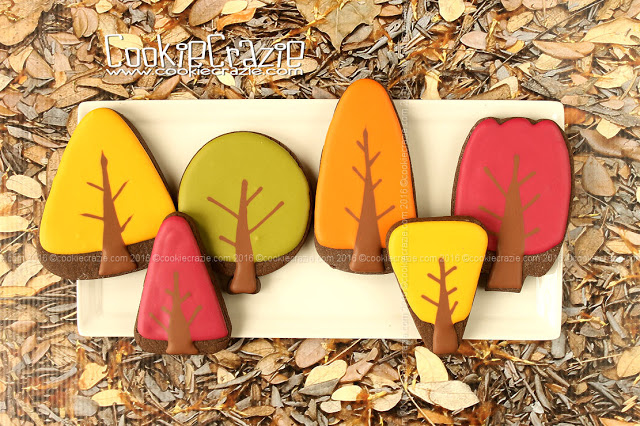
The harvest set was a little unique in that I tried to use brown coloring for the background. But it ended up being so dark that I'm not sure you can tell. I think if I did them again, I would try to lighten up the brown just a bit so you could see the brown-ish tones come through....which would pair well with the harvest colors and rustic theme.


Cookies for Ukraine 2017

Here are the simple and small cookies that I took on our Ukraine 2017 trip.
To read about the actual trip, check out this blog post.

Every year when I'm prepping for the Ukraine trip, the foremost thought I have is what shape and design of cookie I should take. (I know.....what a shocker?!)

I need to take at least 150 cookies, so they can't be too big.
And since I'm making so many, I want them to be as easy as possible.
But I also want to make something unique and beautiful to delight the recipients. :)

After CookieCon 2017, I branched out and tried The Painted Box's gorgeous watercolor techniques. Angela was especially helpful to me and answered all my questions. (Thanks Angela!) So it seemed fitting to decorate some watercolored cookies since the total decorating time is fairly minimal....especially when you're just dabbing on a rainbow of colors. 

For these cookies I flooded all of them with white glaze and let them dry overnight.
The next day, I just painted various colors across each rectangle and then splattered some wet gold luster dust over them. (The videos below depict my methods fairly well.)

The cookies were well received and brought many smiles. 


Simple Autumn Leaf Decorated Cookies (Tutorial)

I know, I know.......there's nothing new under the sun. 
I'm sure there are many many autumn leaf cookie tutorials.

This just happens to be a simple one adding a brown stem and vein to the center with wet-on-wet technique.

Start by adding a brown stem and main leaf vein to a leaf-shaped cookie. Add a contrasting color of glaze to the rest of the cookie without diminishing the stem. Then add secondary leaf veins once you flood the entire cookie.

(see photo below)

If desired, use a black food color marker on completely dried glaze (overnight) and add some stitches around the edge of the leaves.

Simple Autumn Tree Decorated Cookies (Tutorial)

Here's a clever way to add fall trees to your autumn cookie collection.

All you'll need are candy cornpumpkin and balloon cutters. :)

Outline and flood 3/4 of the top of the cookie with an autumn colored glaze.

While still wet, add a brown trunk to the bottom of the cookie,

and pipe brown on top of the wet glaze to form branch that goes almost to to the top of the "tree".

Use a toothpick or scribe to make branches coming out from the trunk.

(see photo below)

Super simple..... :)

Love Message Cookies (Tutorial)


Putting messages on heart cookies is perfect for Valentines Day.
 
And I received the BEST birthday present for doing just that!

This little set of impression letters is just the right size for putting little messages on hearts.
My dear sweet daughter-in-law saw this online and decided it would be something I might like.
She's so smart!


It's pretty inexpensive.....and comes directly from China.
Warning: These little letters have to be carefully snipped of their plastic sides 
to fit into the slider just right.
It's a bit tedious.....but worth it in the long wrong.


Here's the best part......
Decorating these cookies are a snap!
Outline and flood the heart cookies in your choice of glaze colors.


Allow them to dry for about 2-3 hours.
(The timing will be something you have to work out for your particular environment)
Then align the words you want to impress into the glaze on the slider.....
gently press them into the crusted glaze......
and you have a cute simple message cookie. :)


Valentines 2014 Cookie Collection
Member Login
Welcome, (First Name)!

Forgot? Show
Log In
Enter Member Area
My Profile Not a member? Sign up. Log Out