

For this new Back To School season, I wanted to do some shapes I'd never attempted before.
Even though a paper clip and a pencil sharpener might be funny shapes to put on a cookie,
they definitely don't require a special cutter.
And they are fairly simple to decorate. :)
I used this set of oval cutters for the paper clips.
The pencil sharpeners started with a 2" x 1" rectangle cutter.
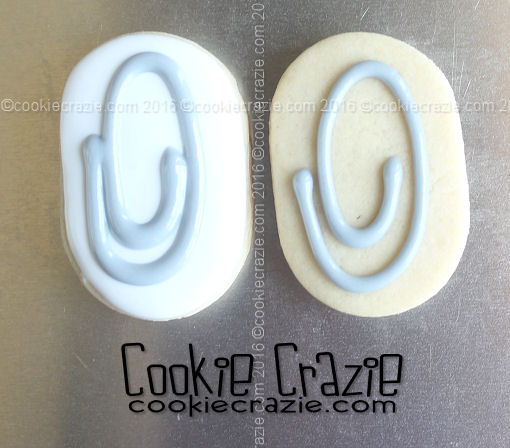
For the paper clip cookie, you can do it two ways.
You can add the silver paper clip (with glaze) to a naked oval cookie,
or you can outline and flood the cookie first with white glaze, allow it to dry for at least 1 hour,
and then add the silver paper clip.

Allow the cookies to dry overnight.
Paint over the paper clip with silver luster dust mixed with vodka or clear extract (ex. almond) to give it the metallic look.
(I apologize that I forgot to photograph this step.)
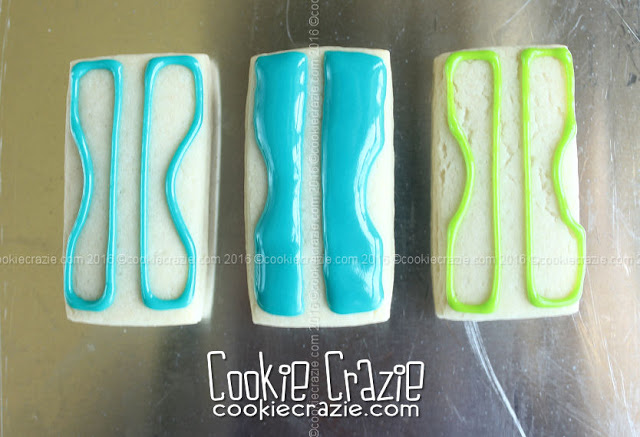
For the pencil sharpeners, outline and flood the side panels with glaze.
(see photo below)
After the cookies have dried for at least 1 hour, add the center gray area of the sharpener.

Allow the gray area to dry for about 1-2 hours, and then add the indented line to one side of the "blade" and use a #4 decorating tip to add a circle in the blade to represent a screw.
(see photo below)

Allow the cookies to dry overnight.
Paint over the silver middle (the blade) with silver luster dust mixed with vodka or clear extract (ex. almond) to give it the metallic look.

2016 Back to School Cookie Collection
Paper Clip & Pencil Sharpener Decorated Cookies (Tutorial)