
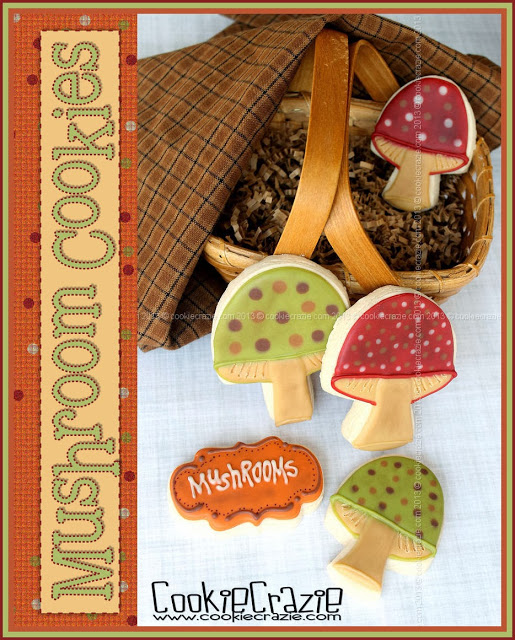
Mushrooms..... new cookies for me.
They are so popular and I've always loved looking at them.....but didn't have a mushroom cutter.
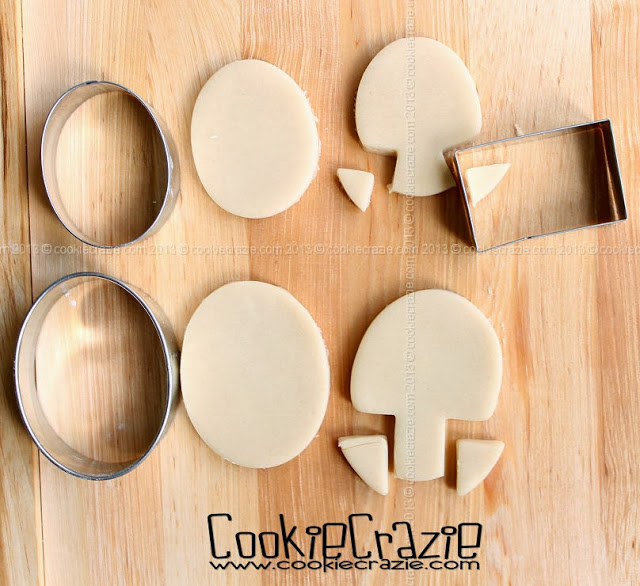
Well......you don't have to have one. :)
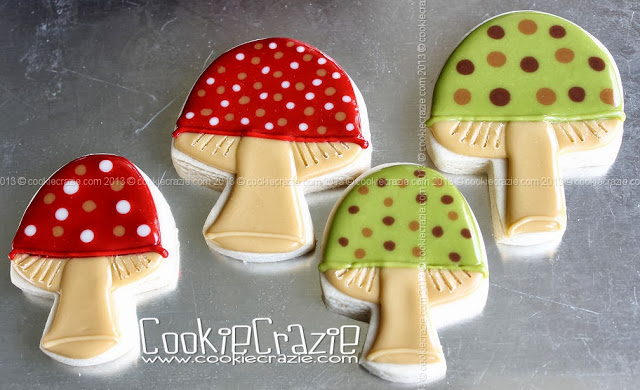
Colors are entirely up to you.
Start by piping the inside and stem of the mushroom (as seen below).
Allow the "insides" to dry for a bit before flooding the stem.
This gives it a bit more dimension.

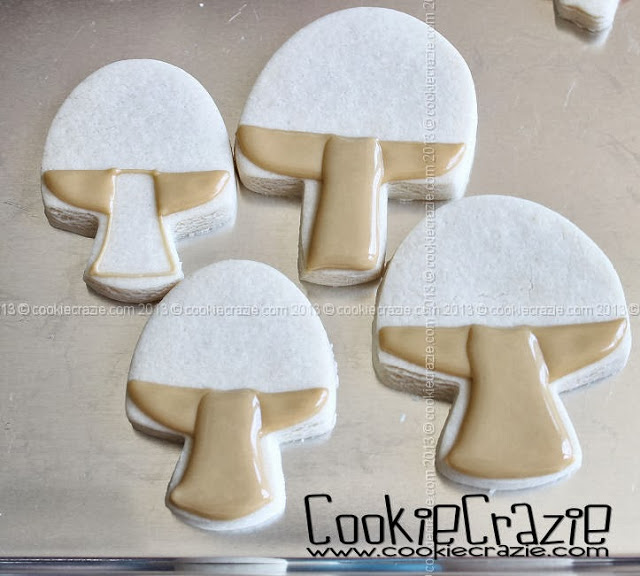
Allow that to dry for a while
(even longer if you are using RED glaze....which tends to bleed).
To make the mushroom inside "wedge" lines.....
use a long tool (like my handy cake tester) to add character to partially dried glaze.
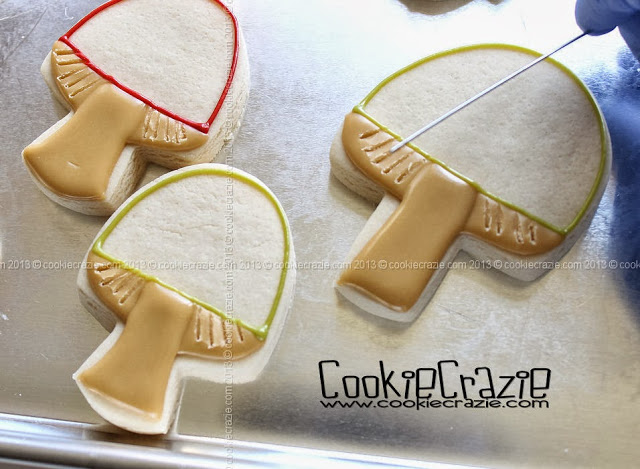
Next comes the outline and flood for the mushroom top.
Polka-dots are optional.
(Although I go with polka-dots ANY chance I get!)
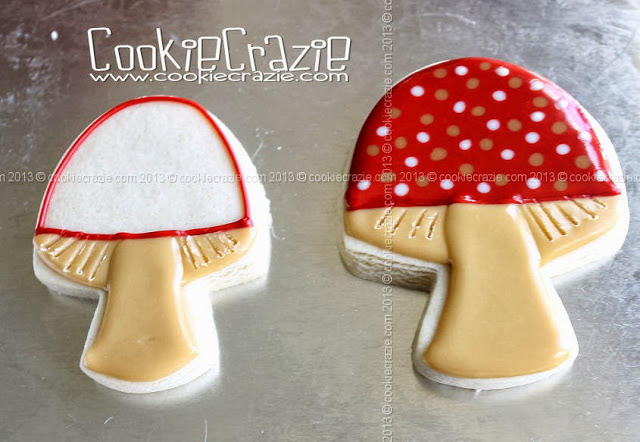
For a final detail, add a accent line to the bottom rim of the mushroom top
and another half circle to the bottom of the stem (as shown below).
Another entry into the book called "Cookies That Make Me Smile". =)

Autumn in The Country Cookie Collection