jungle buddies cookie collection

Zoo Animals Cookie Collection

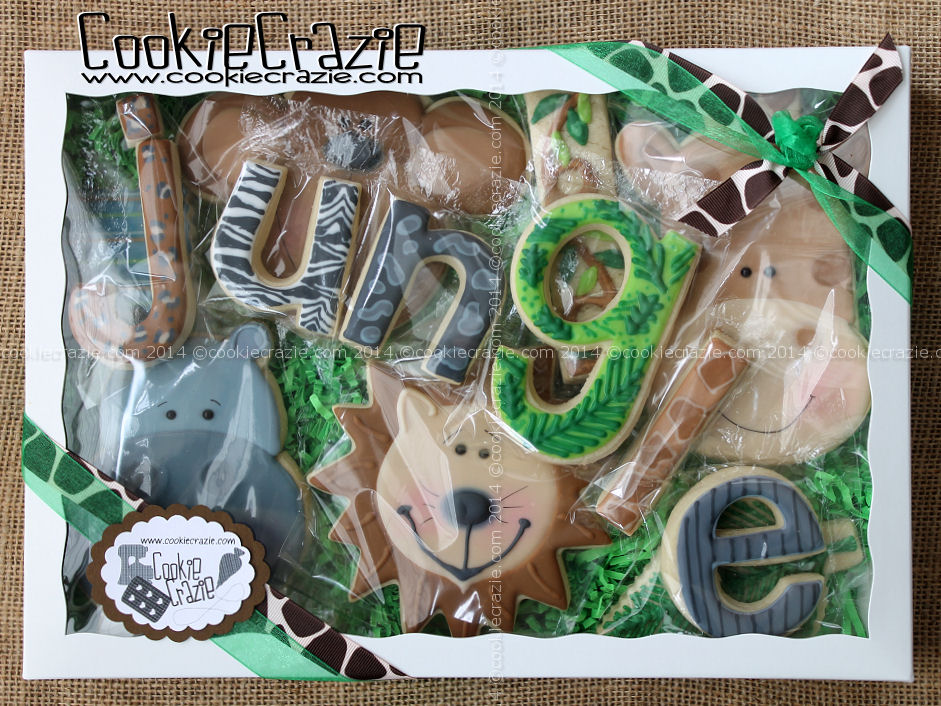
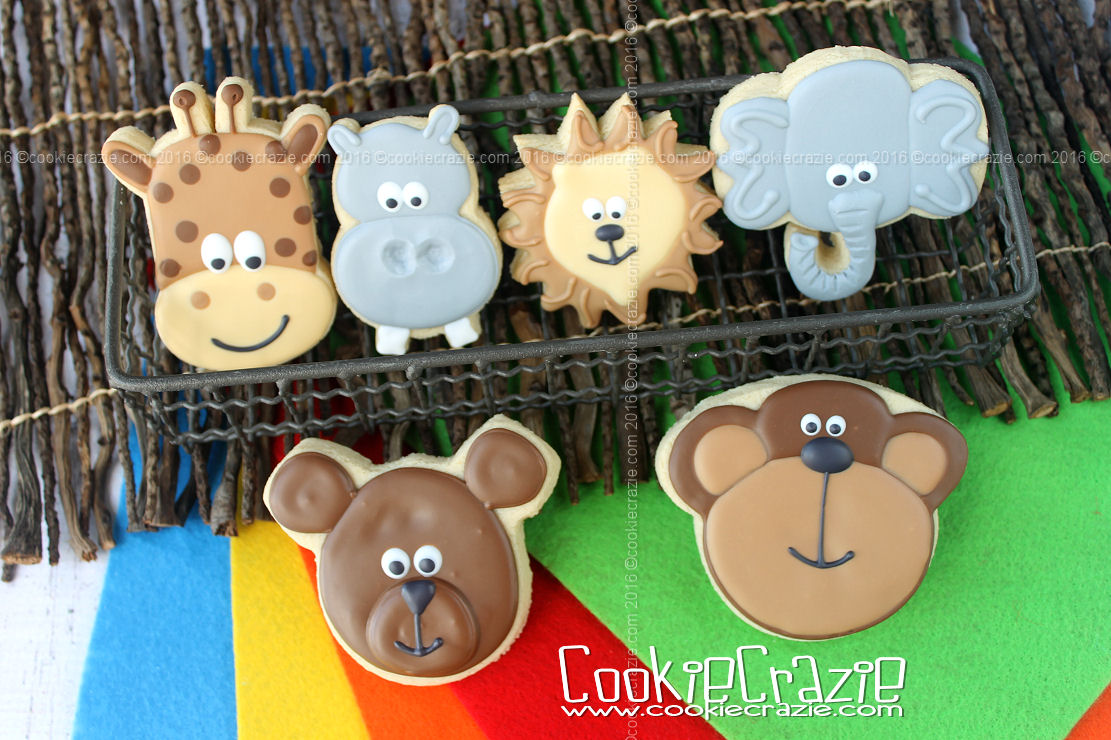
A very precious friend asked me to make some zoo animal cookies for her daughter's 2nd birthday. 
She wanted them to be grain-free, so that added a twist to the challenge. 
My Simple Grain-Free Cut Out Cookie recipe worked perfectly for this occasion.

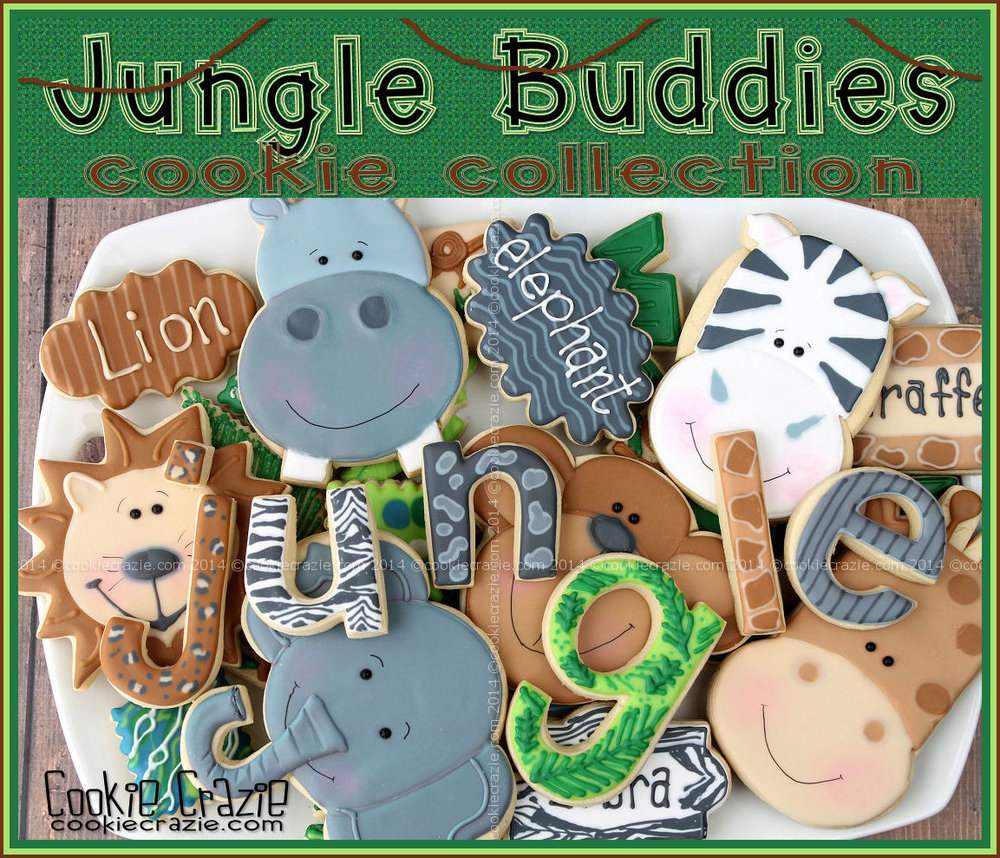
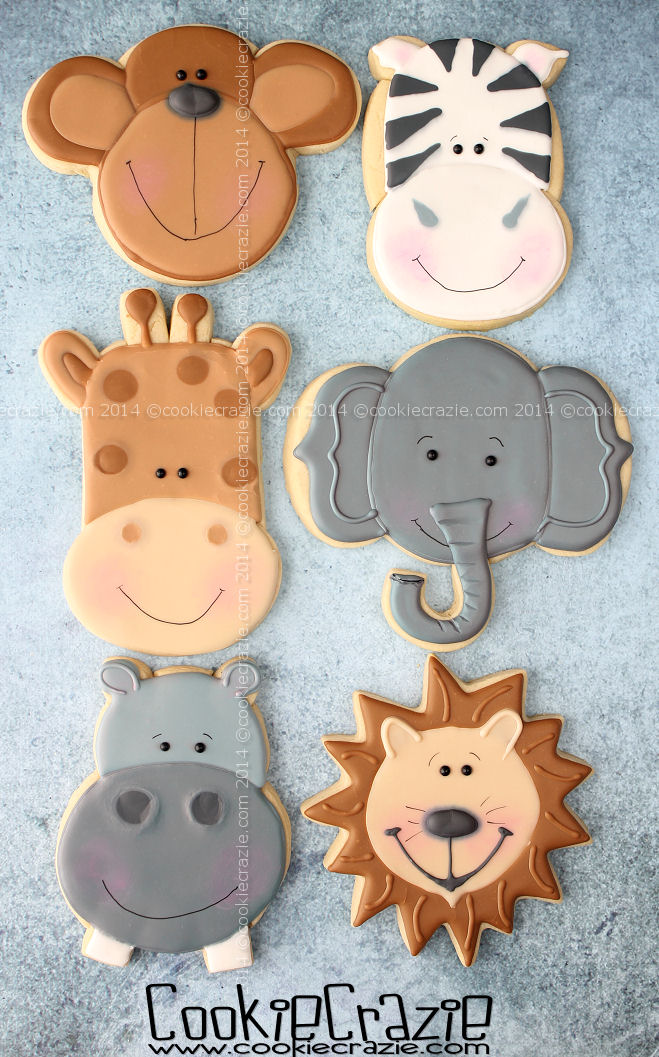
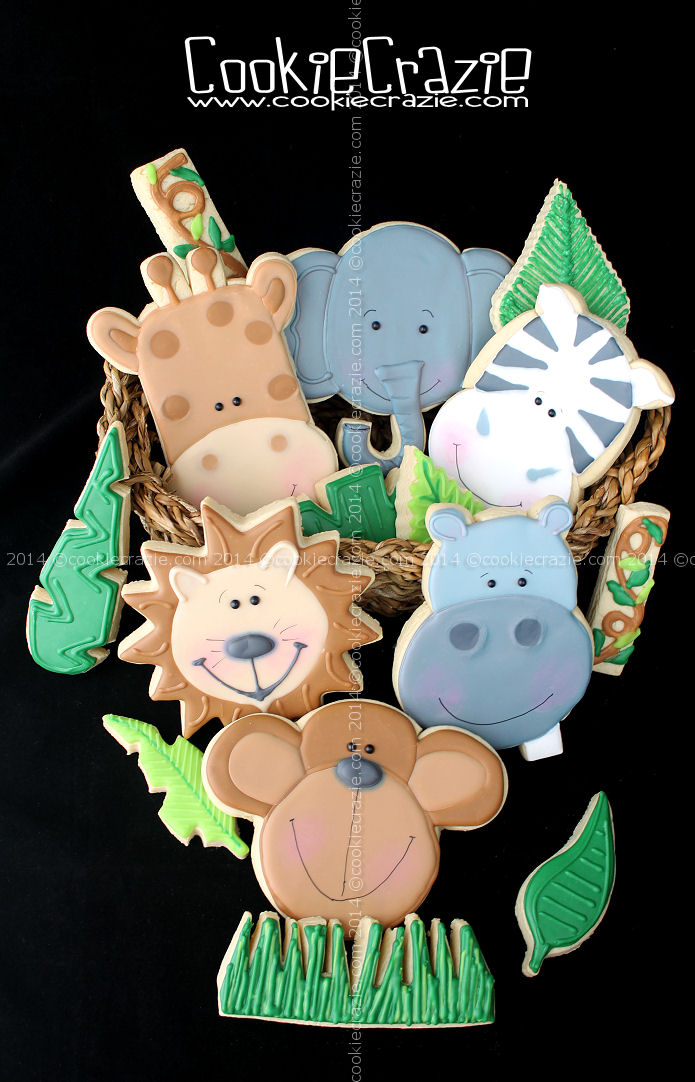
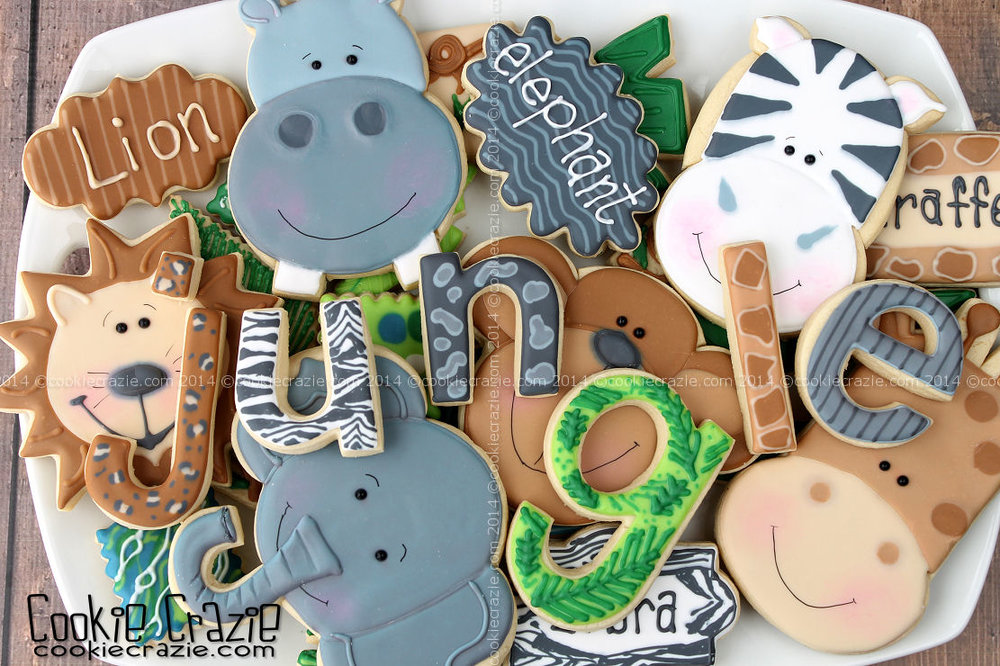
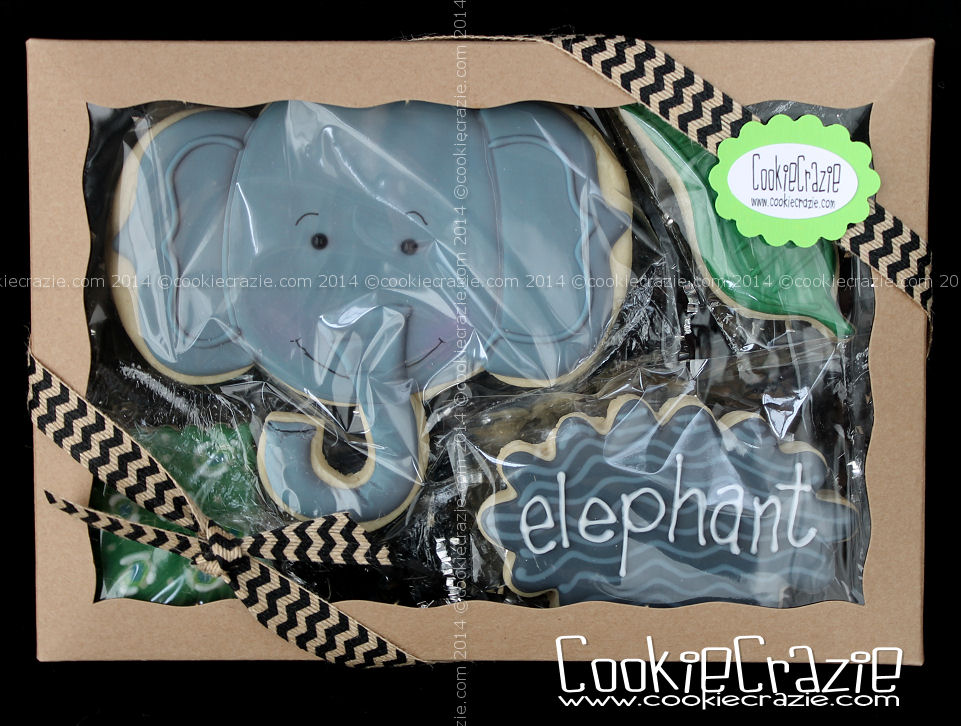
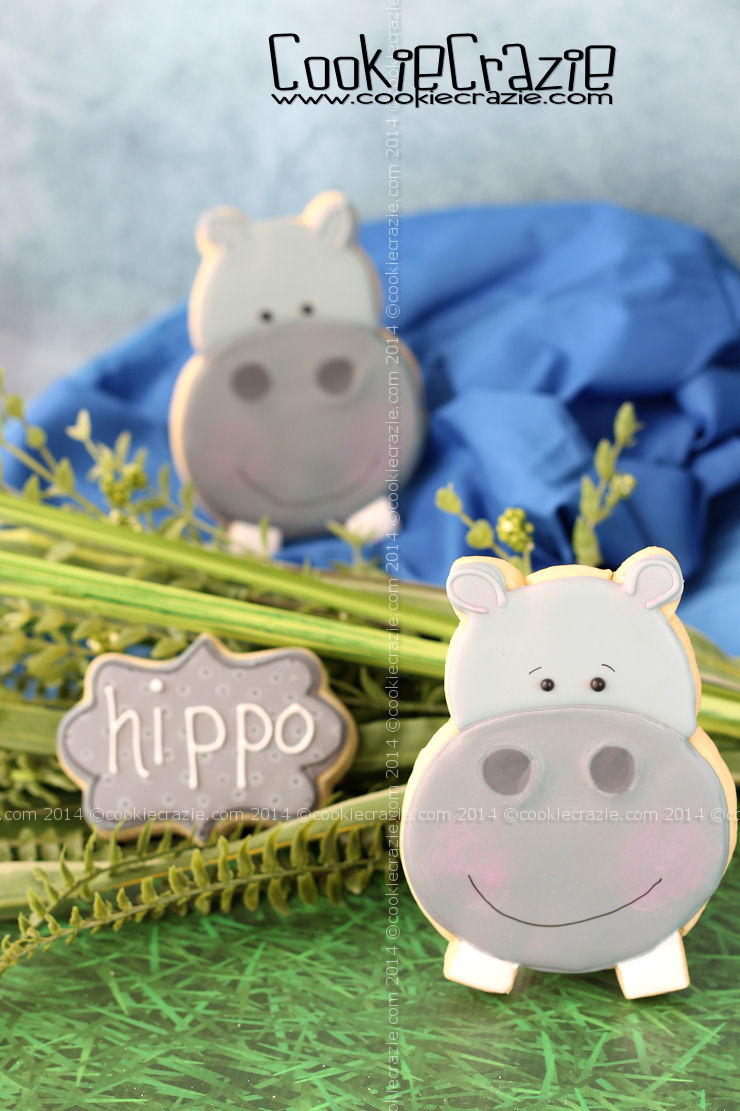
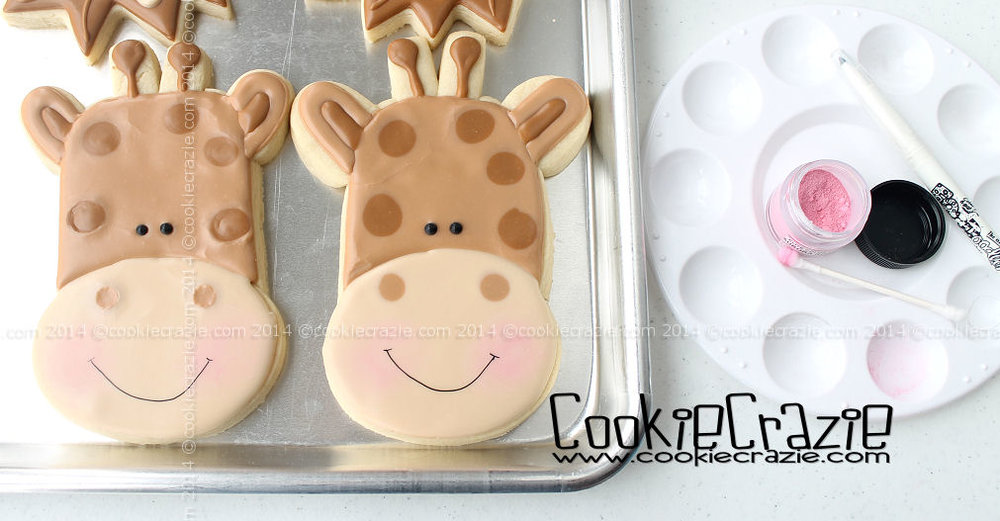
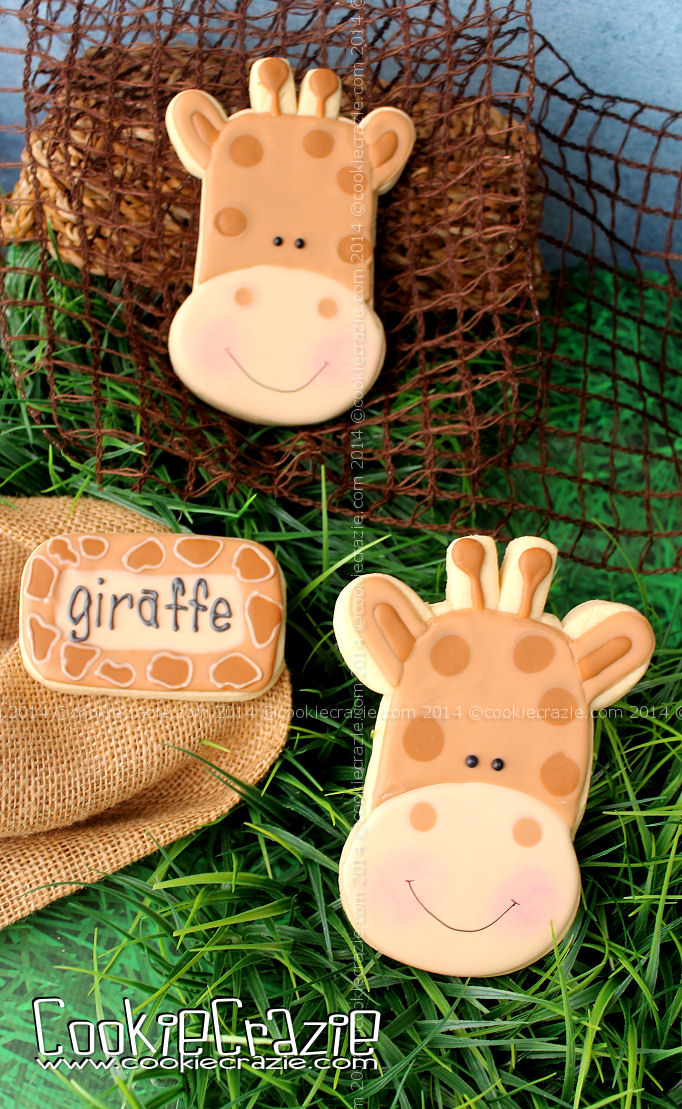
I did a Jungle Buddies cookie series about three years ago. 
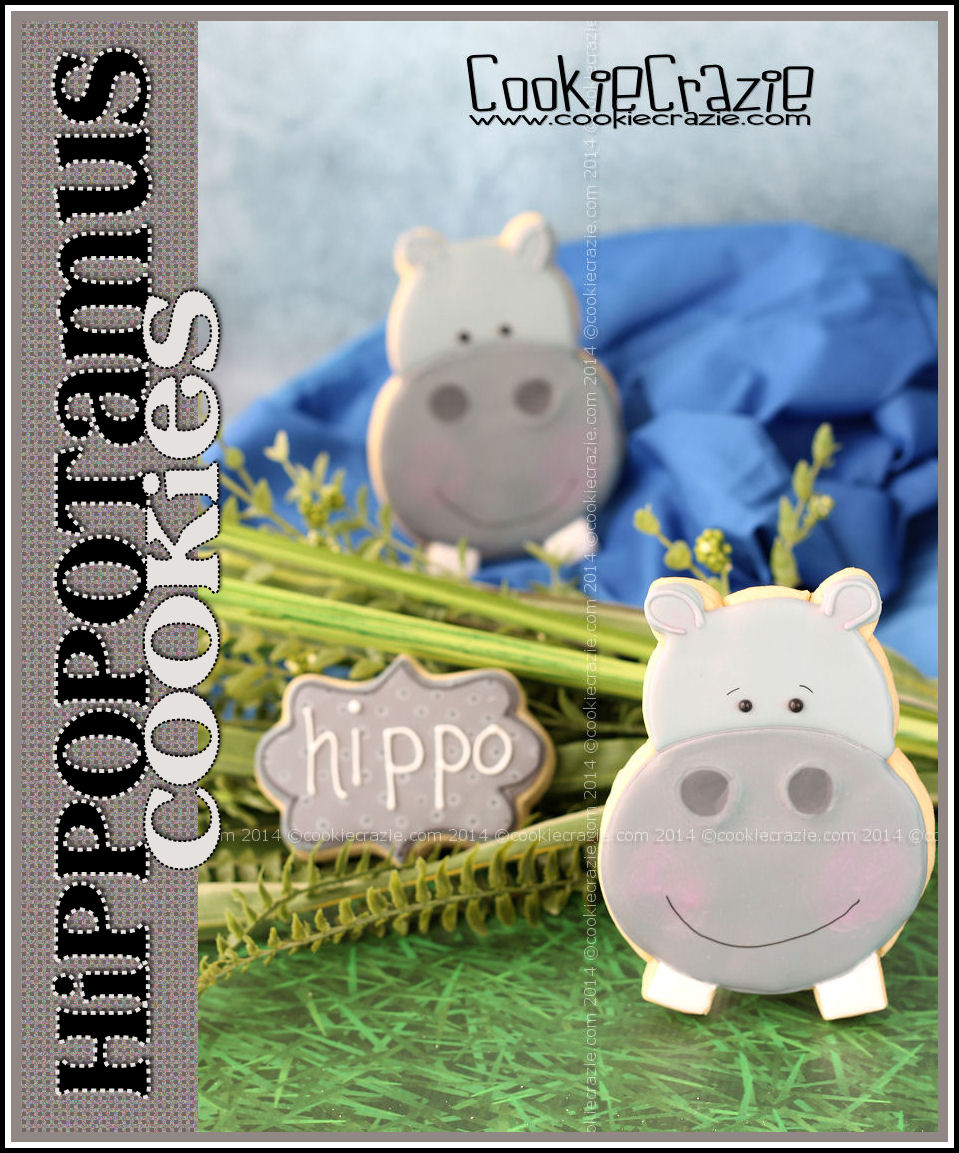
It included a hippo, giraffe, lion, elephant, zebra, and monkey with cookie tutorials for each. 
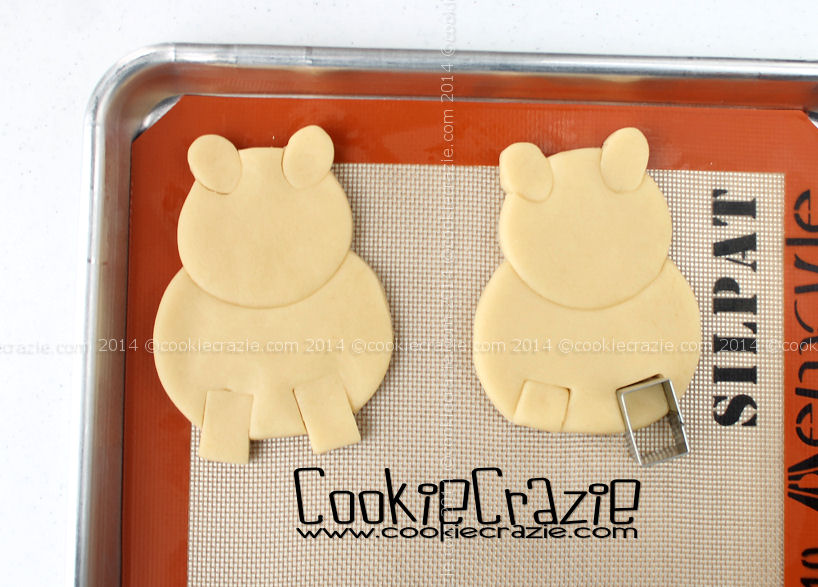
Since that time, Cheap Cookie Cutters has created some of those shapes into cutters.

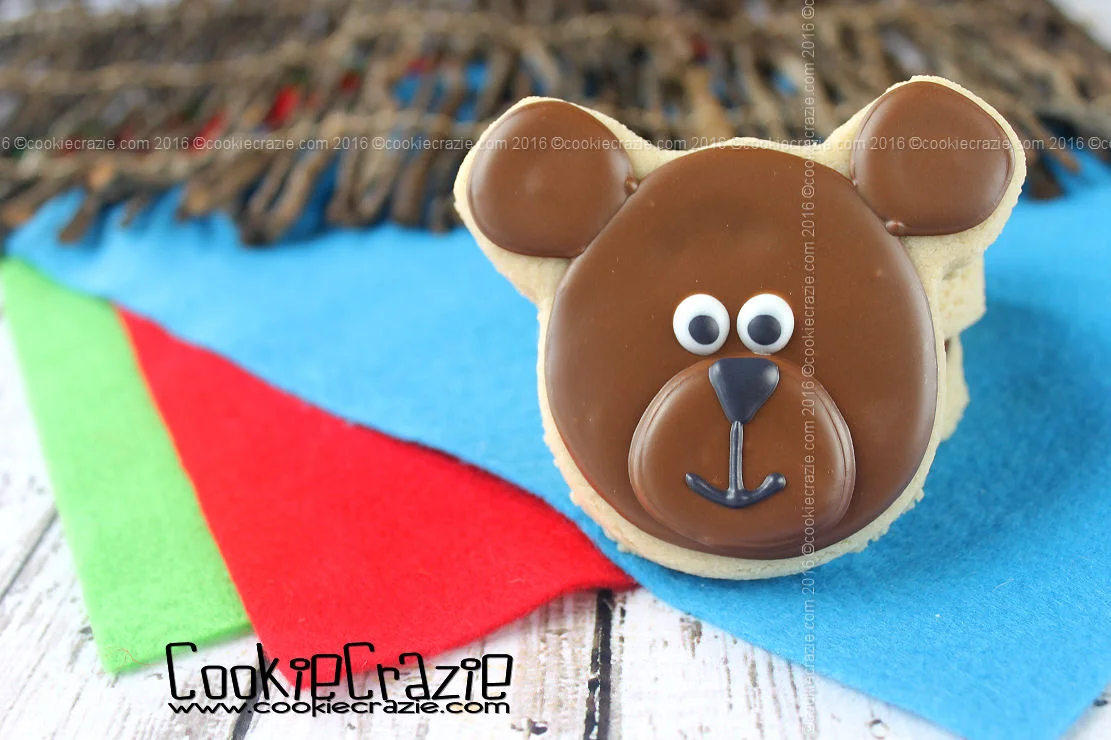
Here's the brown bear cookie tutorial I put together for this series.

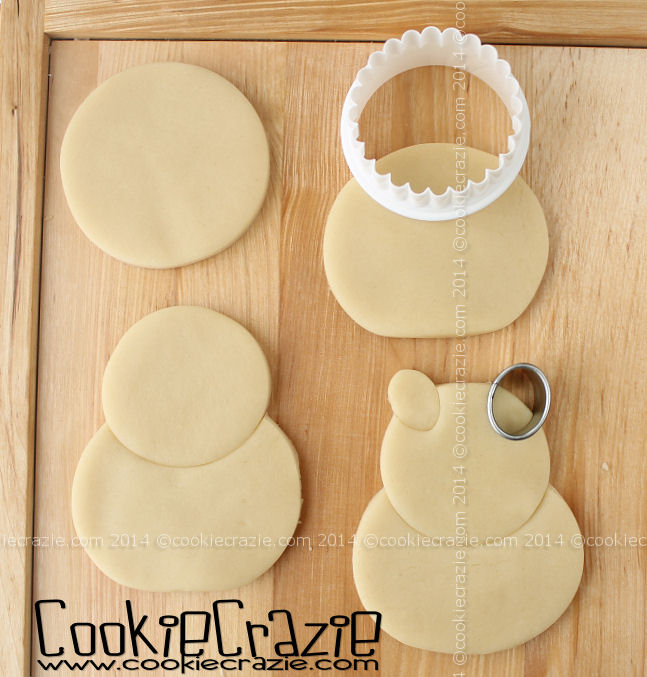
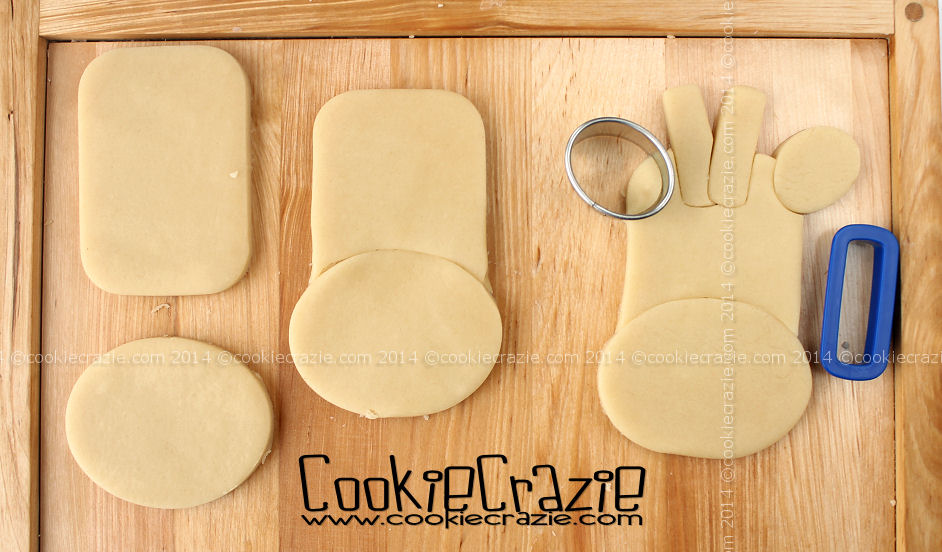
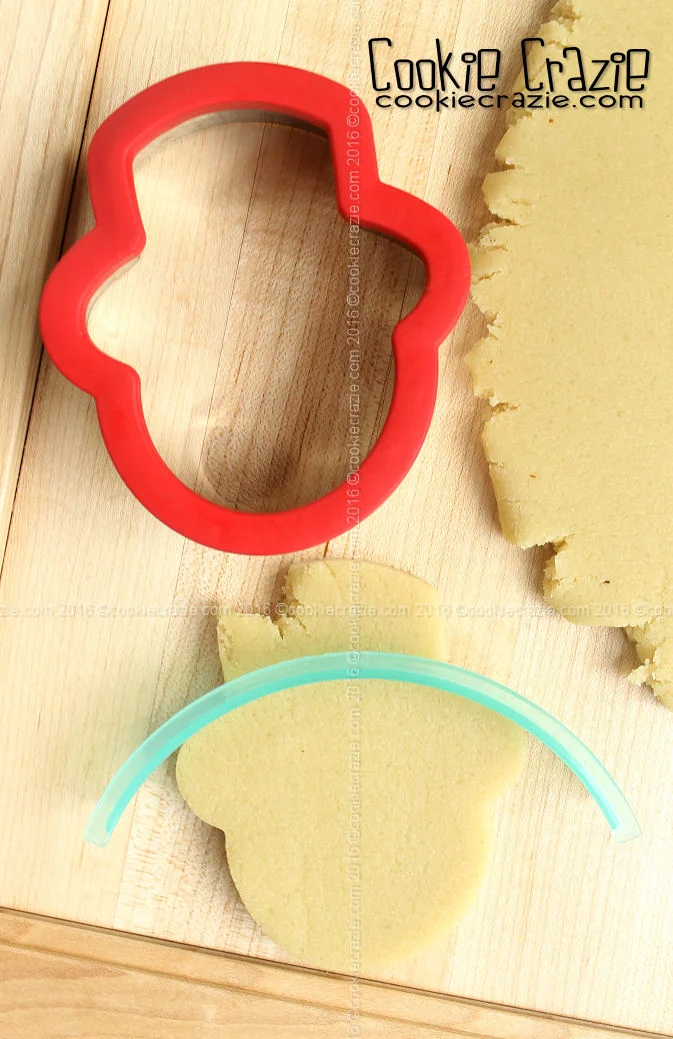
And since the monkey shape was not included with Cheap Cookie Cutters designs, here's how I simplified that shape. Using a snowman head cutter and the curved edge cutter in SugarBelle's Shape Shifters set, cut out the monkey head as shown below.

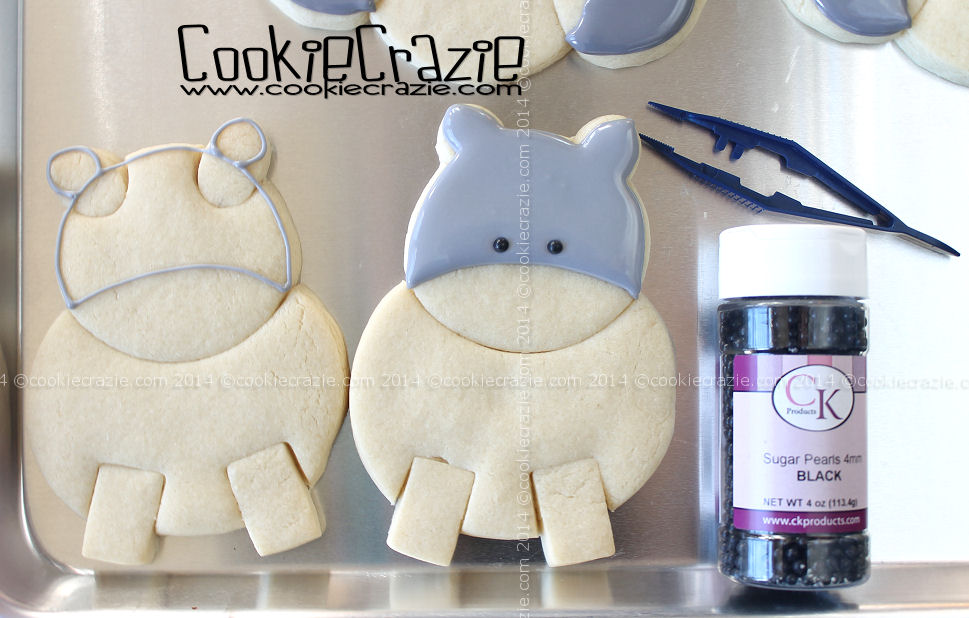
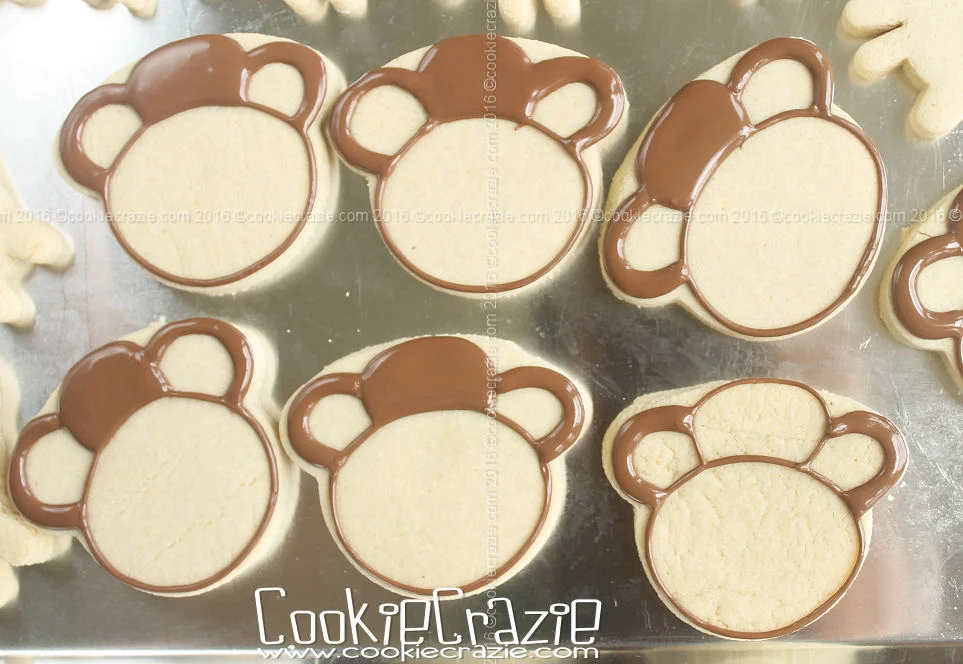
Outline the monkey head filling in a thicker outline of the ears and the entire upper head with dark brown glaze.

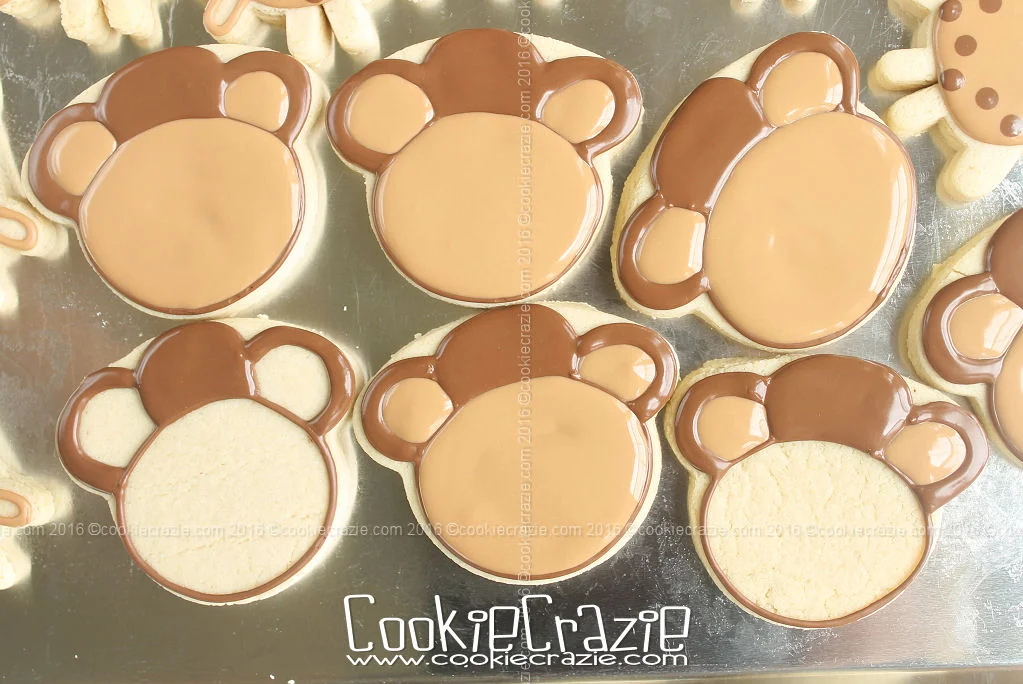
After the glaze has dried for about 30 minutes, fill in the ears and "snout" portion of the monkey with light tan glaze as shown below.

After some dry time, add the eyes, nose, and mouth with white and black glaze. 

Langley loved her animal cookies. Her favorite was the lion........ Rrrrrrr!

CookieCrazie Chatter...... Friday, March 7, 2014


Cookie Con 2014 is happening soon.
I'd LOVE to see you there!


_________________________________________________________


CookieCrazie's Week in Review


/www.cookiecrazie.com//2014/03/giraffe-cookies-tutorial.html


 /www.cookiecrazie.com//2014/03/hippopotamus-cookies-tutorial.html


/www.cookiecrazie.com//2014/03/jungle-buddies-cookie-collection.html


_________________________________________________

Personal Side


Spring & Easter has broken out here....at least in cookies. :)

We had a sleet storm on Sunday.....when I was baking the above cookies. haha
Hopefully that was the last major storm of the winter season.
Don't get me wrong.....I realize that it is only the beginning of March.....
and last year, our biggest storm was at the end of March, 
but I'm just being hopeful that we've had enough winter for the year. :)

Cookie Con is just TWO WEEKS away. 
Wow......it is so exciting to think about how fun last time was.....
and that we will repeat it with double the number of participants. 
Can't wait!
Will I see YOU there?


Instagram photos for this week:


Happy Friday!

Strawberries!


Mmmmm......I'm CRAZIE about blueberries.


 This is happening today.....


Excited about the colors this week!


_________________________________________

Last CookieCrazie Chatter....


Jungle Buddies Cookie Collection

When I started making this set of jungle animals......

I never dreamed it would turn out the way it did.

One thing led to another.......(story of my cookie life!) and suddenly I had

a collection of six different animals with all kinds of plaque and accent cookies.

I've always wanted to do jungle animals......and I finally got my chance.

Faces are NOT my forte.

I tend to minimize the details because as soon as I start adding stuff......

the appearance goes downhill quickly.

So this is why you only see very simple eyes, nose, and mouth.

Simple is good, right?

Now that I own some very cool

Helvetica letter cutters.

......

I use them every chance I get.

How fun to make animal prints on all the letters! :)

Zebras packed up in a

14 x 10 BRP box.....

A smaller elephant set for my daughter's friend.....in a

brown 10 x 7 BRP box

.

And of course......the whole gang packaged in a

14 x 10 BRP box

.

My favorite......

Hippopotamus Cookies (Tutorial)

And last, but certainly not least......Mr Hippo.

I absolutely love his toothy grin. :)

Squish a large

circle

so it is somewhat oval.

Add a medium-sized

circle

over the top of the oval.

Use a small

oval cutter

for ears.

Finally, add

small rectangles

for the teeth. :)

Once baked,

outline and flood

the upper part of the face in gray

10-second glaze

. (shown below)

While the glaze is wet, drop two

black pearls

onto the face for eyes.

After at least 30 minutes dry time, outline & flood the large oval muzzle,

adding large darker gray wet-on-wet circles for nostrils.

Oops.....I didn't photograph this part, but after some dry time, outline/food the teeth in white glaze.

(You can also add some gray accent lines to the ears.....see below.)

Dry overnight.

Add cheek color with a cotton tipped swab and

pink pearl dust

and the eyebrow & mouth lines with a

black food color marker

.

(P.S. If you want to make it more realistic, don't add the mouth line.

I didn't realize by doing so I made the teeth come out of that poor hippo's chin. :()

Giraffe Cookies (Tutorial)

I saved my two favorite jungle buddies for last......

here is Mr Giraffe.

Use a rounded rectangle and an

oval

.......

along with small

ovals

and rectangles for the ears and horns.

(I believe the horn shape was a dash from the

Wilton alphabet and number set

.)

And yes, I did look up giraffes and confirmed that they indeed have horns. :)

Outline and flood

the upper part of the head with tan

10-second glaze

adding large brown polka dots around the perimeter.

 Also, while the glaze is wet, drop two

black pearls

onto the face for eyes.

Make an thick outline around the outer part of the ear with tan glaze (not shown above.....see below).

Dry for about 1 hour.

Flood the inner parts of ears and outline/flood the horns.....both with brown glaze.

Outline and flood the muzzle part of the face with ivory glaze.

Add two large tan dots (wet-on-wet) for nostrils.

Dry overnight.

Add cheek color with a cotton tipped swab and

pink pearl dust

and the mouth line with a

black food color marker

.

Member Login
Welcome, (First Name)!

Forgot? Show
Log In
Enter Member Area
My Profile Not a member? Sign up. Log Out