how-to

Springtime Faces Cookie Collection: Bunnies (Tutorial)

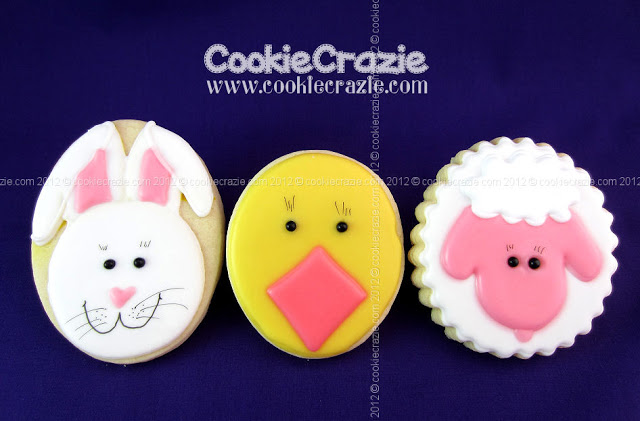
For our final springtime face cookie collection tutorial.....
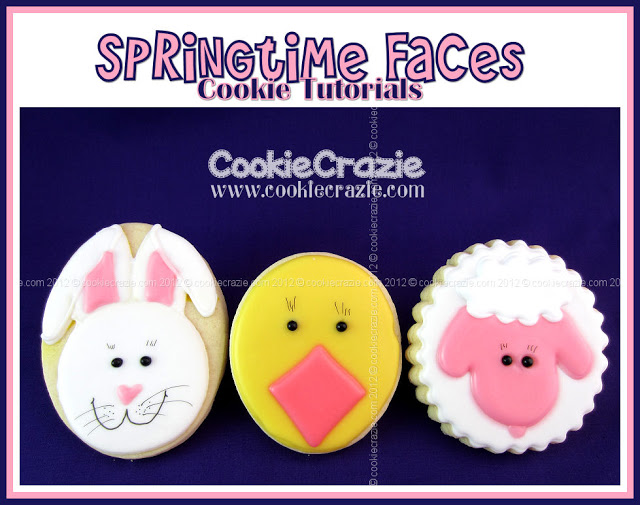

Bunnies!

To make the bunny faces, you will need:


This design is a little trickier than the other two.
You'll need to start by outlining a circle
on the bottom two-thirds of your cookie
using a round cookie cutter
and a light colored food color marker.
I used a yellow one.


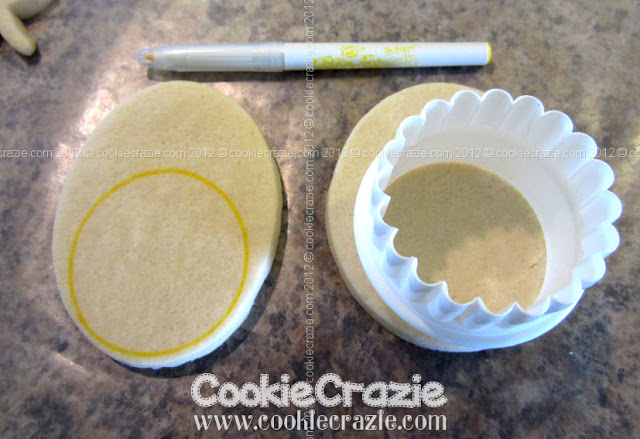
Add your sketch of the floppy ears.

Notice I changed my mine and scribbled
all over my cookie.
That's OK....because you'll cover it up with icing. :)

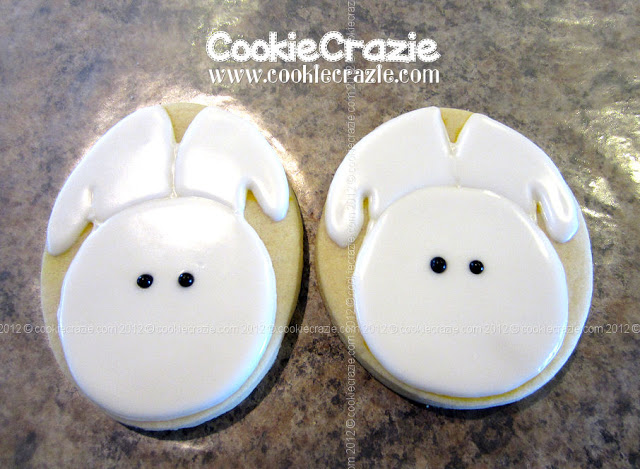
Outline the circle and ears
with white icing and allow
it to dry for 20-30 minutes.

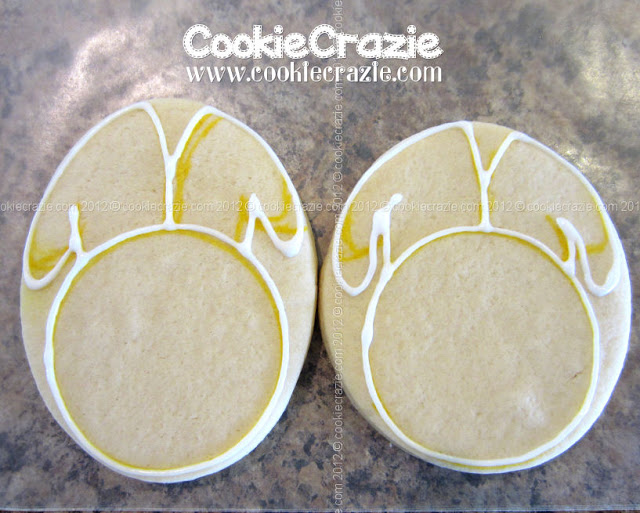
I flooded the ears first and let dry,
because I wanted the face to be puffier
and stand out more.
Who knows if my logic works. haha

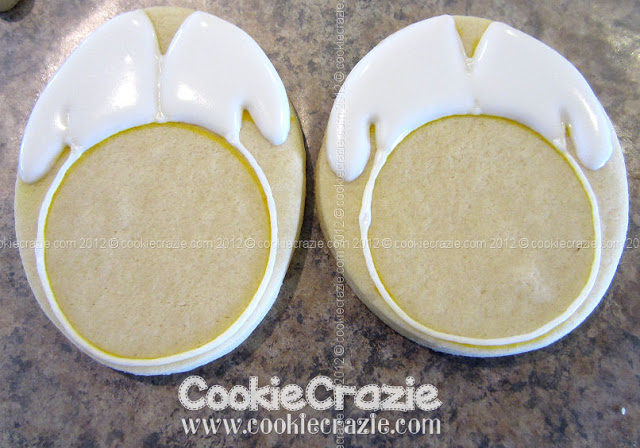
When you flood the face,
be sure to drop the black sugar pearls for eyes right away.

Let it dry for an hour. Then add the pink ear parts and nose.
Later go back and outline the "tops" of the ears
with white so they look folded.

After drying overnight,
use your food color makers to add
some personality. :)


To see the other tutorials in this series:
Springtime Faces: Chick
Springtime Faces: Lambs


To see more bunny cookies I've done in the past.....
Happy Easter
Even More Easter :)

Last year's Spring Faces Tutorials:
Duck Face Tutorial

Oh the new things I have to show you.....
Can't wait!!!!

Summer Is Buzzin' By (Pictorial)

Today is already June 30. Yikes. I wish things could slow down a bit! How can we be nearly half way done with summer. Not fair. lol

Oh well.....life goes on. Make the best of today since it won't last long, right? 

How about a pictorial on making a bee hive with buzzing bees........................

Since my bee hive cutter is huge.....I decided to pare it down a bit, so I cut the bottom level off of it.


Next I wanted to add a shape to the outer side so I could add a buzzing bee, so I used mini club cut out because the top of it reminded me of a bee.


To decorate......I added the black hole at the bottom first.....and then let it dry.
Next I added two of the four hive layers of yellow and let them dry before adding the final two. This helps give it more dimension.


Notice my mistake on the bottom layer. Thankfully it won't show up once I flood that area. :)

Well.....I forgot to keep taking photos of the process. Sometimes I get so involved in it.....that everything else fades away.
In the final bee hives shown below, I didn't outline the whole hive in yellow liked I showed in the previous photos. Instead, I just did my two layers of the hive on their own, and add the second two later. I like how these look much more than the previous ones. 

Make sure your yellow is good and dry before you add the bees.....especially the black head. For the bees, I made the head and let it dry, then I added the yellow body and put the black stripes on it while it was still wet. After it dried for a while, I added the white wings.

And finally, the next day I added the fly lines with a Food Doodler black marker. Love that part! 


Stay cool today on this hot Thursday....

Sunny Glasses (Pictorial)

It's about time I did a pictorial for you.

I wanted to make some sunglasses......but the only cutter I could find for them is really small. SO.....I decided to improvise and make my own.

First I took a rectangle.............and used my mini diamond shape cutter to start carving out the bottom of the sunglasses.


After carving a little from the outside corners, I smoothed out the bottom edges (one of right).

Once baked.....outline your eyeglasses with the color of your choice.

 And fill it in....

Add black to the inside, and white "reflection" lines.

Moving onto the sun cookies......I'll admit that it is very hard for me to make a really nice circle on a cookie. So I used my circle cookie cutters for some help.

Place your circle cutter on top of the cookie.....

And then add some dots of icing on the inside to give you reference marks to make your circle.

 Then connect the dots to make your outline.....

and fill 'er in. :)


And there you have it..........some sunny glasses. ;)

Stay cool!
Member Login
Welcome, (First Name)!

Forgot? Show
Log In
Enter Member Area
My Profile Not a member? Sign up. Log Out