
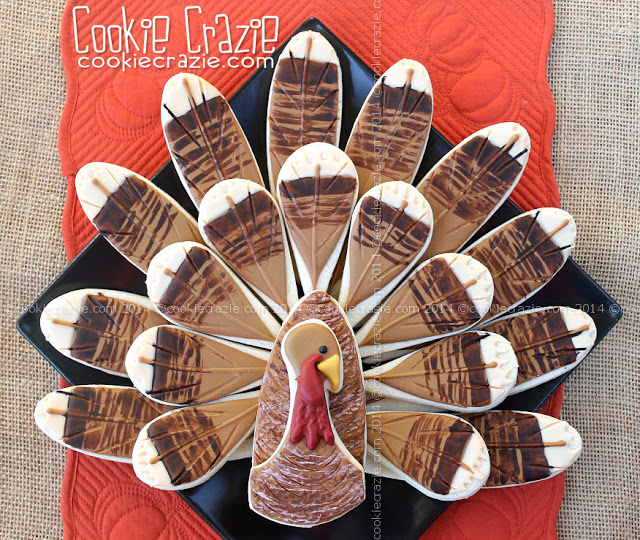
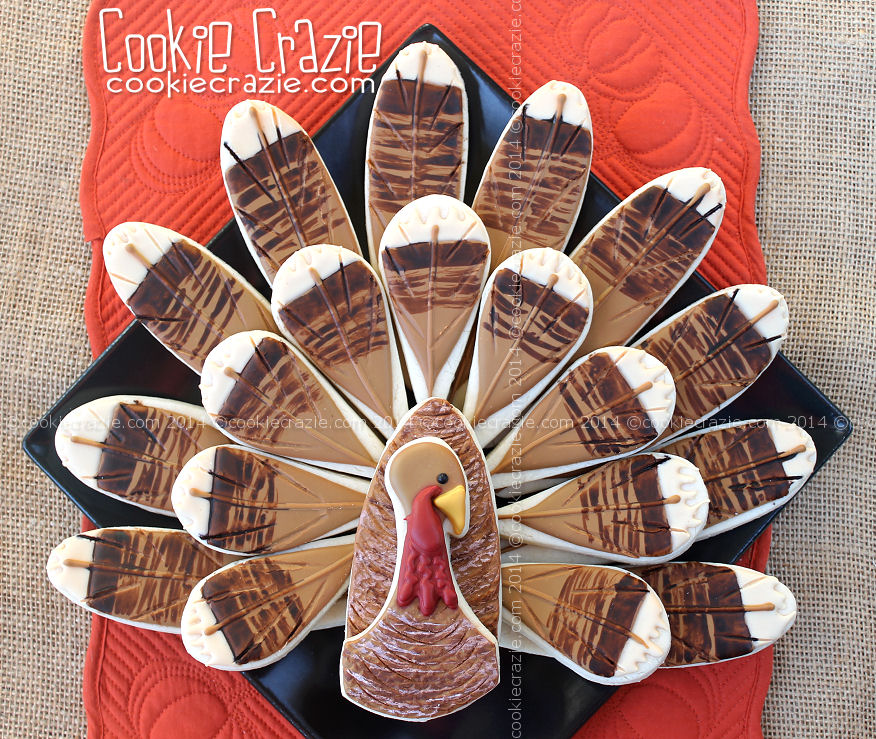
Oh, I know......this turkey platter is nothing original.
But it is fun to change it up and make it different each Thanksgiving.
Last year I went with bright autumn colors for the feathers.
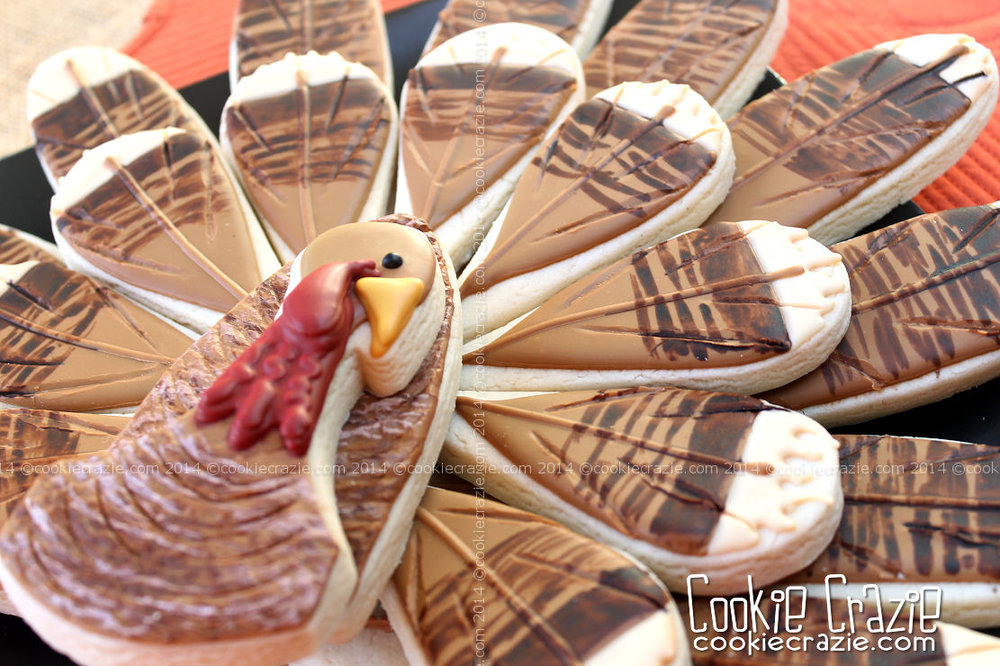
This year, I studied photos of real turkeys and made some more authentic looking feathers.
But it is fun to change it up and make it different each Thanksgiving.
Last year I went with bright autumn colors for the feathers.
This year, I studied photos of real turkeys and made some more authentic looking feathers.
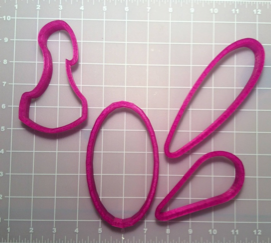
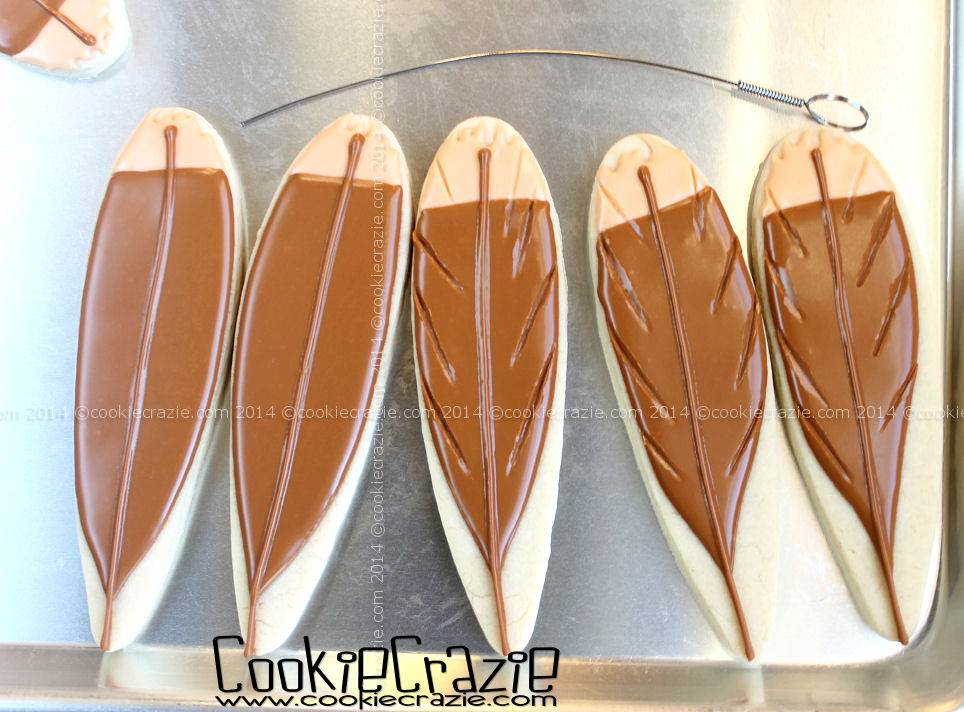
Cut and bake a dozen long feather cookies and a dozen short feather cookies.....
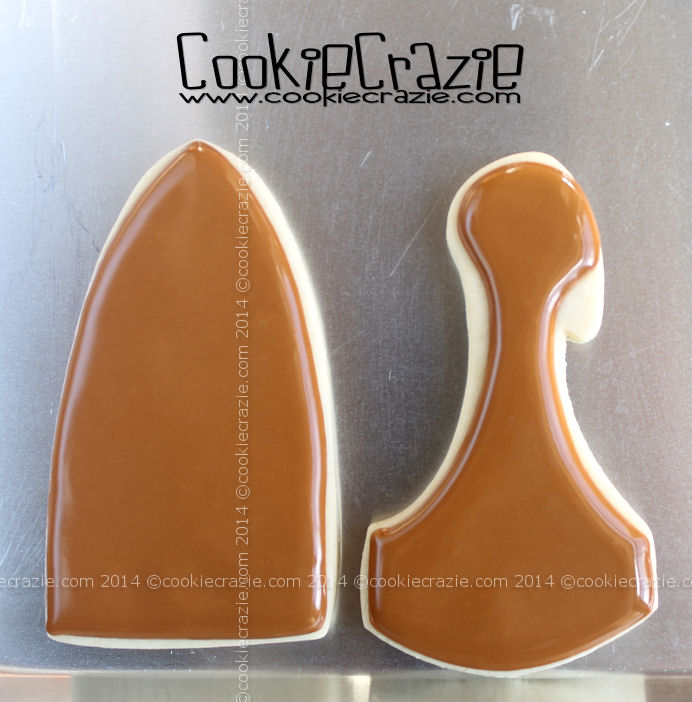
along with a body cookie and a neck/head cookie.
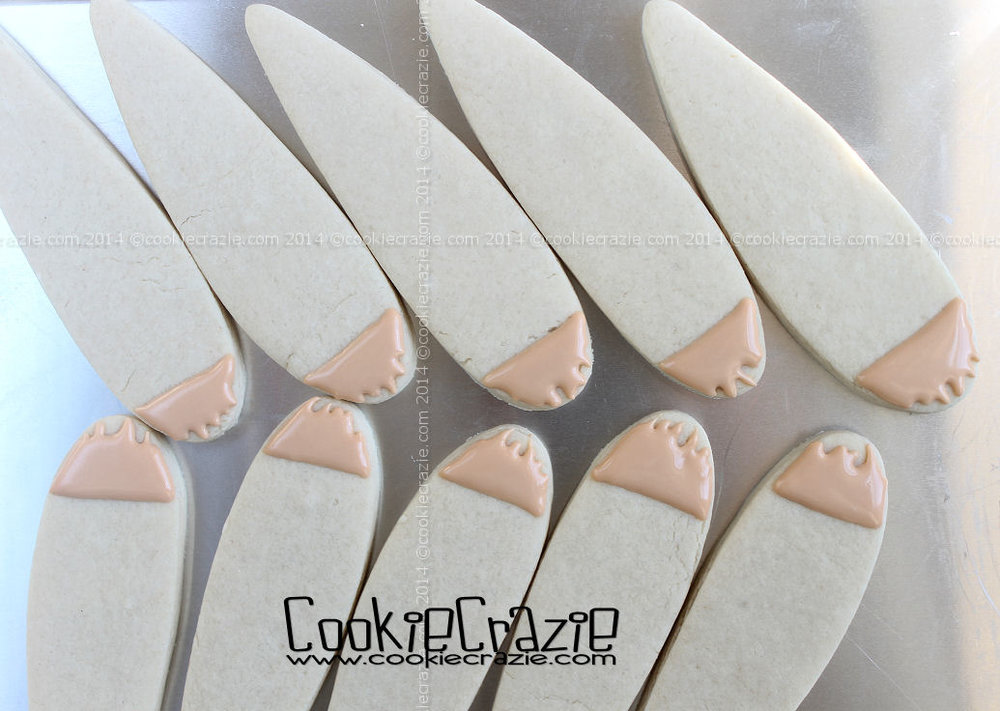
With an ivory 10-second glaze, make a "fringed" top to the feathers.
(see photo below)
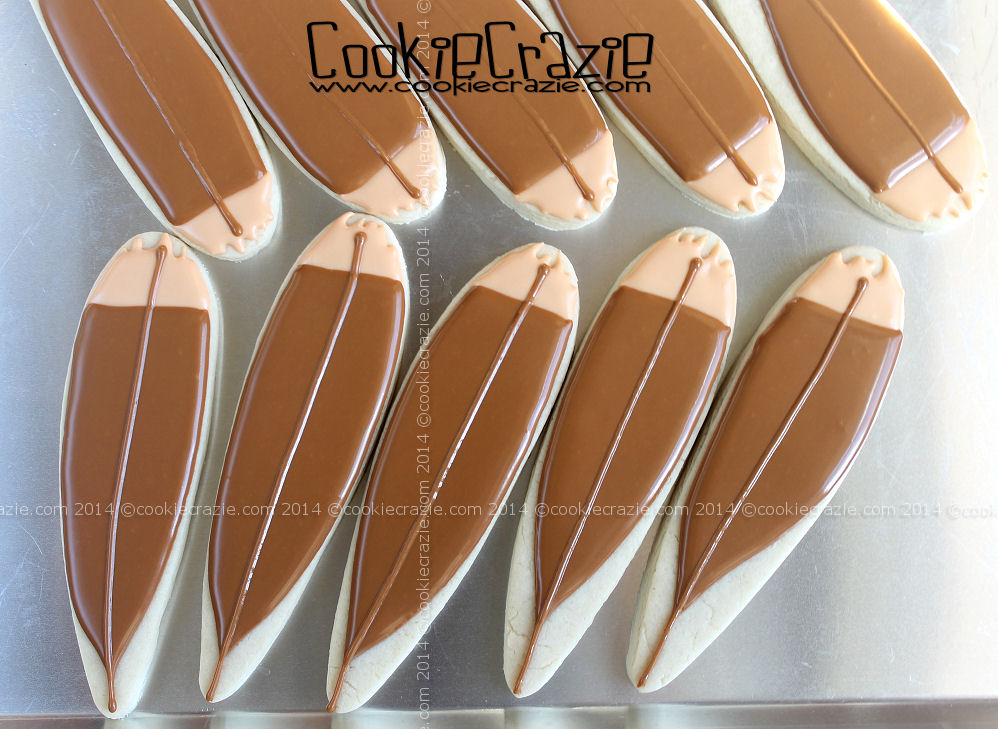
After it dries for about 1 hour, use a brown glaze to outline/flood the remainder of the feather.
Wait about 30 minutes......and then make a straight brown line up the center of the feather.
(photo below shows both steps together)
Outline and flood both the body cookie and the head cookie with brown glaze.
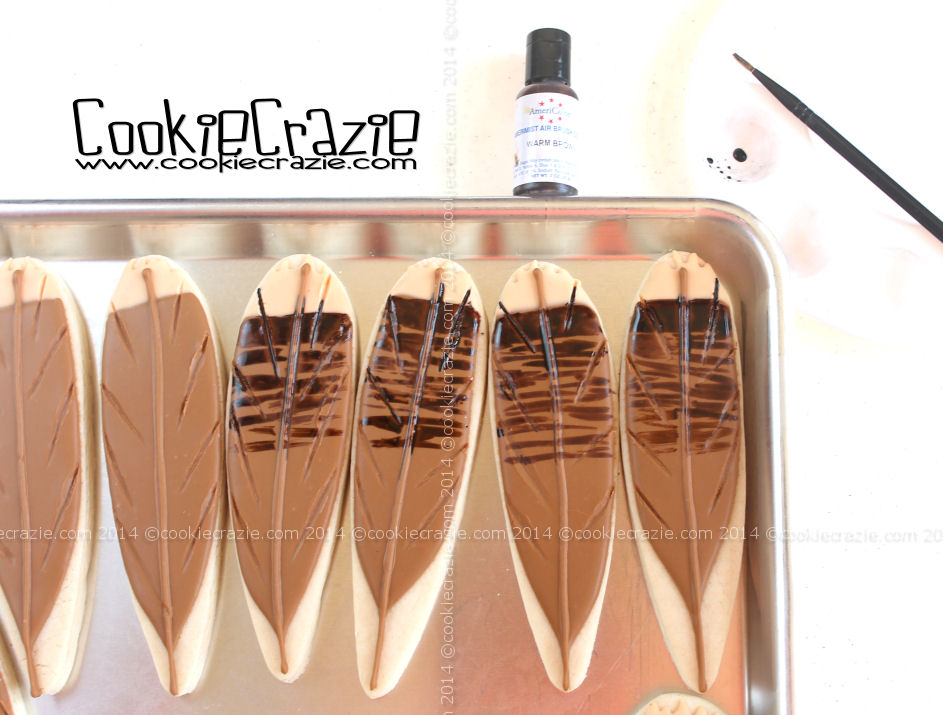
Allow the feather cookies to dry for about 1 hour and
then use a cake tester to add diagonal lines along the edges.
(see photo below)
Once the body and head cookies have dried for at least 3 hours,
use a scale texture mat and a cake tester to give them a 3D "feathered" look.
Also, add a black sugar pearl for the eye.

Dry cookies overnight.
Add a gold beak and a red "gobbler" to the head cookie.

paint horizontal bands/stripes across the top of the feathers.
To assemble the platter, fan out the long feathers around the top half of the plate.
Layer the short feathers over the bottom of the long feathers.
Place the body and then the head cookies at the base of the "turkey".
2014 Thanksgiving Cookie Collection