In keeping with the summer amusement park theme, I just HAD to make a bumper car.
I'd say this is probably one of my favorite rides as I was growing up.
The wait line was always long and the actual time in the cars was always too short. ;)
Great memories.....
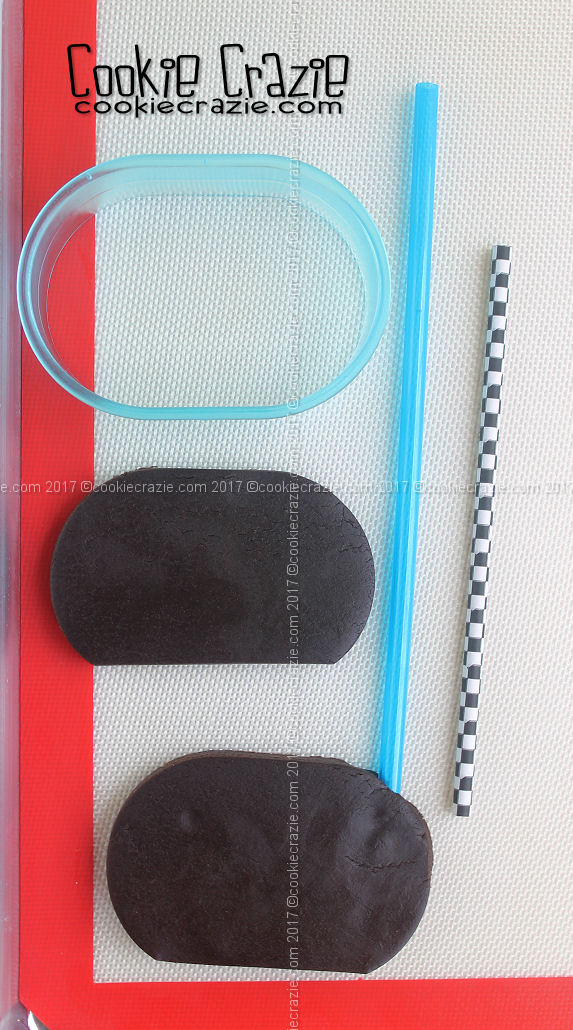
Cut off the bottom 1/5 of a long fat oval cookie to make a nice flat surface for the bottom of the bumper car. I used these oval cutters.
Insert a sturdy straw into the back top of the car to leave a hole that you can later fill with a decorative straw. (see photos below)
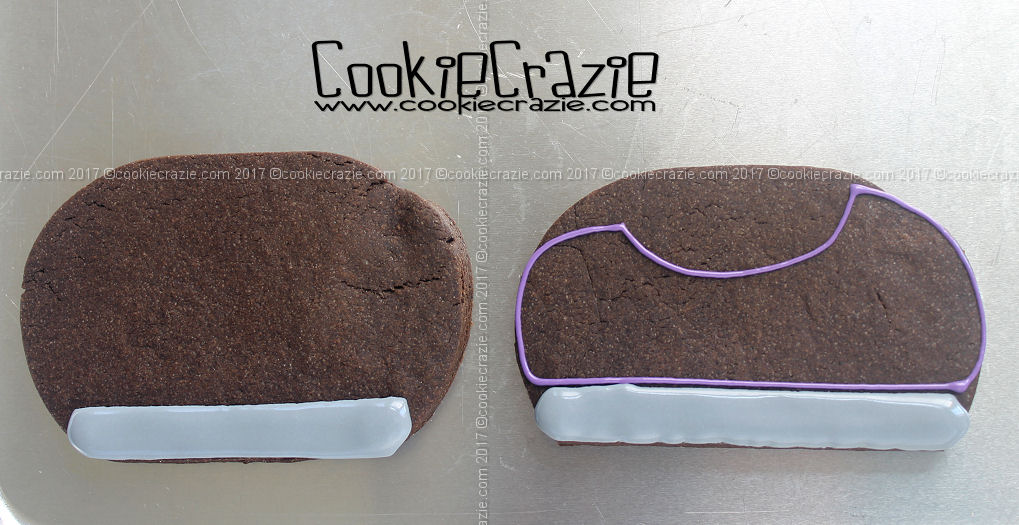
Once the cookie is baked and cooled, outline and flood the bottom "bumper" with grey glaze as shown below. Next outline and flood the actual car in whatever color glaze you'd like.
After the car has dried for approximately 30 minutes, add details like a headlight, steering wheel, and seat back.

Dry overnight.
If desired, make a mixture of silver dust & alcohol (or clear extract, i.e. almond) and paint the grey portions of the car to give a shiny finish. (I'm sorry I forgot to get a photo of this step.)
Poke a decorative straw into the created hole at the back of the car and bend the top of the straw, as seen below.
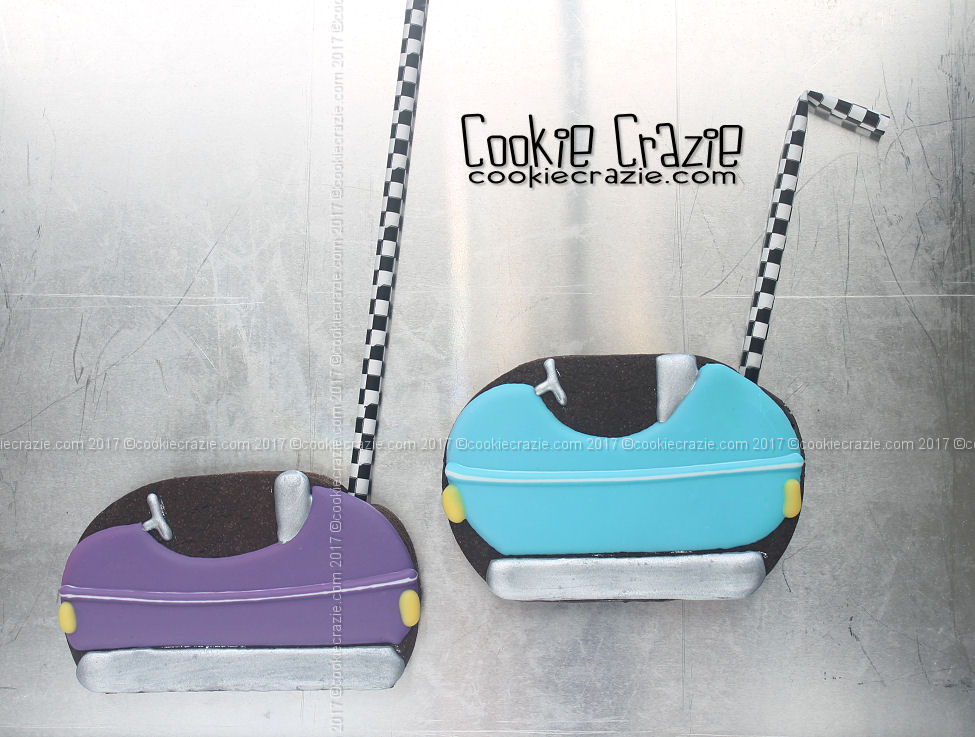
Let the bumpy ride begin!