
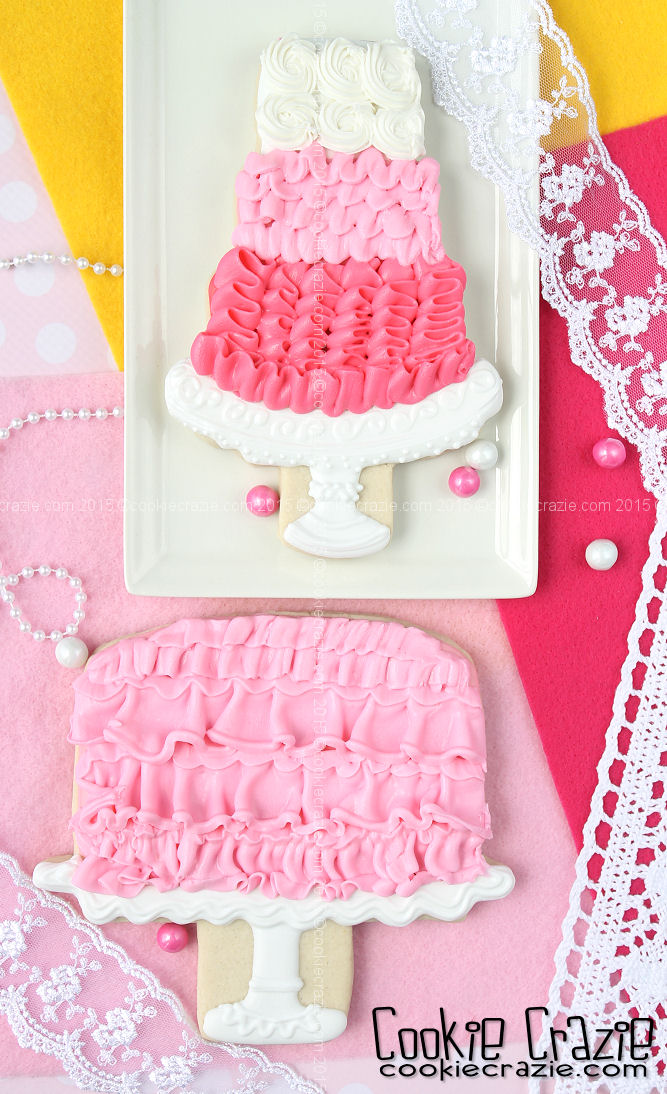
Every time I see a cake decorated with ruffles I want to squeal.
I just love the sweet feminine look that those ruffles add to the cake.
In the past, I would never have been able to make ruffles because glaze icing does not allow it.
But now that I have edible clay, I can add a tiny bit of water to it and then I can pipe with it.
Ruffles......here we come!
Use any cake shaped cutter you'd like.
I wanted large fancier cakes on pedestals, so I hand cut both of these shapes.
Outline and flood the pedestal portion of the cookie in the colors and design desired.
I wanted large fancier cakes on pedestals, so I hand cut both of these shapes.
Outline and flood the pedestal portion of the cookie in the colors and design desired.

The cake part will need a flood coat on the cookie so that
the edible clay ruffles will adhere to the cookie.
You can do them in white, or in the base colors of the cake.
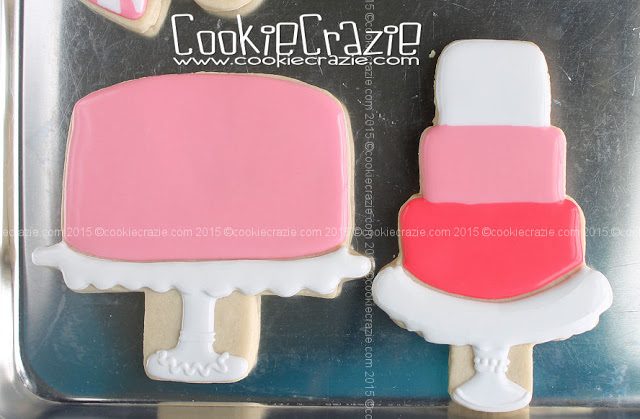
Allow the cookies to dry overnight with just a base coat.
This way, the heavy clay will not sink into the wet glaze.
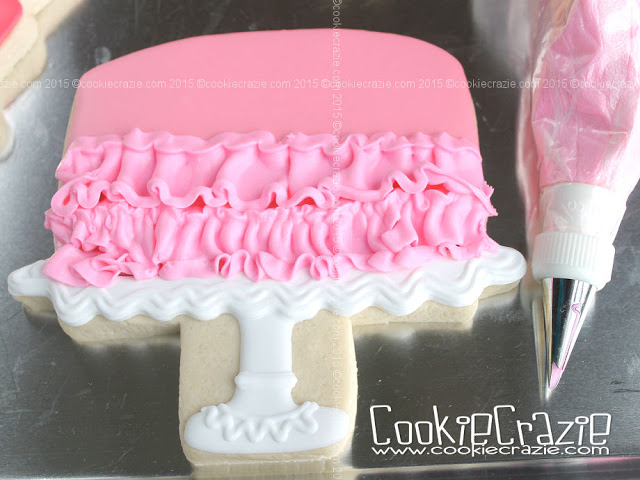
Make some edible clay in the cake icing color of choice.
Add a tiny amount of water to the clay to allow you to pipe ruffles without injuring your hand!
For the wide cake, I used these ruffle tips.
The width of these ruffle is tall, so the cookie will need to be fairly large to use them.
As you push the clay through the tip, you'll need to have an
up and down motion to give it a nice ruffle look.
Repeat this action all the way to the top of the cake as you make horizontal layers of ruffle.
For the tall cake, I tried for an ombre look.
I didn't quite achieve a subtle color change. :(
However, it was fun to change up the ruffles and even do some piped roses on the top of the cake.
Bottom layer ruffles = Wilton #102 tip
Middle layer ruffles = Wilton # 46 tip
Top layer roses = Wilton # 18 tip

Ruffle cakes......I love 'em!

Lemonade 2015 Cookie Collection